One of the most commonly asked questions during a kitchen renovation or cabinet upgrade is: Are kitchen cabinet hinges universal? The short answer is no — not all cabinet hinges are interchangeable. However, understanding why they aren't universal — and which types can be used across different cabinet styles — can help homeowners and professionals make informed decisions when selecting or replacing kitchen cabinet door hinges .
Understanding Kitchen Cabinet Hinge Standards
While some modern hinge designs follow industry standard dimensions (especially European-style frameless hinges), many traditional or proprietary systems do not offer full cross-compatibility. This means that even if two hinges look similar, they may differ in mounting hole spacing, arm length, or adjustment capabilities.
Why Not All Hinges Are Interchangeable:
Mounting patterns vary across brands and styles
Adjustment mechanisms differ between concealed and surface-mounted hinges
Cabinet construction methods influence hinge compatibility (e.g., face-frame vs. frameless)
Material and load-bearing capacities affect performance
Therefore, while certain hinges may appear universal at first glance, careful attention must be paid to size, type, and installation requirements.
Common Types of Kitchen Cabinet Door Hinges
1. Frameless Cabinet Hinges (European Hinges)
Also known as concealed hinges , these are the most standardized style in use today. Designed for modern, flat-panel cabinets with full overlay doors, they typically come with:
Three-axis adjustability (side-to-side, up-and-down, in-and-out)
Standardized mounting hole patterns
Soft-close and self-close variants
Because of their widespread adoption, frameless cabinet hinges are often considered the closest thing to ‘universal’ within the cabinet hardware world.
2. Face Frame Cabinet Hinges
Used primarily in traditional or older kitchens, these hinges attach to the front frame of the cabinet rather than the box itself. They include:
Butterfly hinges
Surface mounted butt hinges
Overlay and inset styles
These types are less likely to be interchangeable due to variations in screw placement, opening angles, and door thickness compatibility.
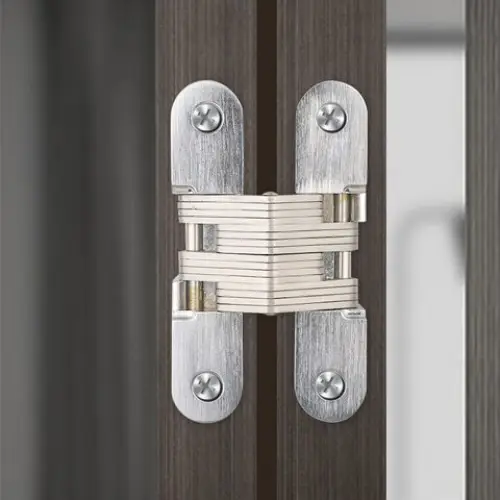
3. Pivot and Continuous Hinges
Some specialty cabinets use continuous hinges (also called piano hinges) or pivot hinges , especially for long or heavy doors. These are rarely universal and usually require exact replacements based on door width and weight.
Are Kitchen Cabinet Hardware Hinges Universal?
Now that we've introduced the main types, let's dive deeper into the question: Are kitchen cabinet hardware hinges universal?
The answer depends on several factors:
1. Hinge Type and Mounting Style
As mentioned earlier, frameless cabinet hinges are the most standardized and widely compatible option. Many manufacturers produce hinges that fit standard 35mm pre-drilled holes found in most modern cabinets.
However, face-frame hinges and other traditional types often have unique mounting configurations that make them incompatible with newer or different cabinet models.
2. Opening Angle Variations
Different hinges allow for different opening angles. For example:
Standard hinges open about 90–110 degrees
180 degree door hinge systems allow full flat opening, ideal for corner cabinets or deep drawers
A 90-degree hinge cannot replace an 180-degree one without affecting functionality and clearance.
What Makes a Hinge Universally Compatible?
Despite the lack of full universality, certain features can increase the likelihood that a hinge will work across multiple cabinet types:
1. Standardized Hole Patterns
Most modern kitchen cabinet hardware hinges follow the 35mm Euro system , which includes:
One hole for the baseplate
Two holes for the adjustable arm
This standardization allows for easier swaps between brands and styles.
2. Adjustable Mounting Plates
Some hinges come with adjustable mounting plates or offset brackets that compensate for minor misalignments in screw positions.
3. Universal Soft-Close Mechanisms
Soft-close technology has become so popular that many manufacturers now offer retrofit versions that can be installed on existing hinges, making them more adaptable.
Exploring 180 Degree Door Hinge Options
For those seeking maximum accessibility and visibility inside cabinets, the 180 degree door hinge is an excellent choice. These hinges allow doors to swing completely flat against the wall or adjacent cabinet.
Where Are 180 Degree Hinges Used?
Corner cabinets : Prevents doors from obstructing nearby surfaces
Deep pantry or utility cabinets : Allows full access to interior shelving
Wall cabinets above appliances : Ensures easy access without hitting countertops
Installation Considerations:
Requires sufficient clearance space
May need reinforced mounting plates
Not suitable for all cabinet depths or weights
If you're considering upgrading to a 180 degree door hinge , ensure your cabinet structure supports the increased range of motion.
How to Identify Your Current Cabinet Hinge Type
Before attempting any kitchen cabinet door hinge replacement , it's crucial to identify what kind of hinge you already have. Here's how to determine your hinge type:
Step 1: Open the Cabinet Door Fully
Observe how the hinge is mounted:
Is it visible when the door is closed? → Likely a surface-mounted hinge
Is it hidden inside the cabinet? → Probably a concealed (frameless) hinge
Step 2: Check for Adjustment Screws
European-style hinges typically feature three adjustment screws:
Side-to-side movement
Vertical alignment
In-and-out depth
Step 3: Measure the Mounting Pattern
Use a ruler to measure the distance between mounting holes. If it matches a 32mm or 35mm pattern, it's likely a universal-style hinge.
Choosing the Right Hinges for Kitchen Cabinet Doors
Selecting the correct kitchen cabinet door hinges types is essential for both function and aesthetics. Here are some common options and their best-use scenarios:
1. Standard Overlay Hinges
Ideal for standard-depth base and wall cabinets, these hinges provide a clean look and smooth operation.
2. Inset Hinges
Designed for cabinets where the door sits flush with the frame, these require precise installation and are less likely to be universal.
3. Full Overlay Hinges
Perfect for hiding gaps between cabinets, these are commonly used in modern kitchens and often follow universal mounting standards.
4. Partial Overlay Hinges
Offering a balance between coverage and visibility, these are versatile but still subject to compatibility concerns.
5. Specialty Hinges
Includes soft-close, self-close, lift-up, and 180 degree door hinge options, each with unique installation requirements.
How to Perform a Successful Kitchen Cabinet Door Hinge Replacement
If you're updating your kitchen or fixing a damaged hinge, knowing how to properly replace your kitchen cabinet door hinge is essential. Here's a step-by-step guide:
Step 1: Remove the Old Hinge
Carefully unscrew the old hinge from both the door and the cabinet. Take note of any wear or damage that might impact the new hinge's performance.
Step 2: Choose the Correct Replacement
Check the size, mounting pattern, and opening angle of the new hinge to ensure compatibility. When in doubt, bring the old hinge to the store for comparison.
Step 3: Install the New Hinge
Align the new hinge with the existing screw holes. If needed, fill old holes with wood filler and drill new ones to accommodate the replacement hinge.
Step 4: Reattach the Door
Hang the door back onto the hinge and test its movement. Make adjustments using the hinge's built-in settings to ensure proper alignment and smooth operation.
Tips for Buying Universal Hinges for Kitchen Cabinet Doors
If you're searching for a truly universal hinge for kitchen cabinet doors , here are some tips to help you find the right match:
1. Look for 35mm Mounting Centers
This is the most widely accepted standard for concealed hinges and offers the highest level of interchangeability.
2. Choose Adjustable Models
Opt for hinges with multi-directional adjustment capabilities to accommodate slight variations in cabinet design.
3. Stick to Reputable Brands
Major hardware brands like Blum, Hettich, and Grass offer high-quality, standardized hinges that are designed for broad compatibility.
4. Consider Retrofitting
If your existing hinges don't match modern standards, consider installing new hinge cups or mounting plates that convert your setup to a universal format.
Troubleshooting Hinge Compatibility Issues
Even with universal-style hinges, compatibility issues can arise. Here are some common problems and how to solve them:
Problem: Door Doesn't Close Flush
Solution : Adjust the side-to-side or in-and-out screws on the hinge. If that doesn't help, check for warping or misalignment in the door itself.
Problem: Limited Opening Angle
Solution : Replace the hinge with a 180 degree door hinge if full access is required. Ensure there's enough clearance behind the door.
Problem: Hinge Squeaks or Stiff Movement
Solution : Lubricate the pivot points with silicone-based spray or graphite powder. Avoid oil-based lubricants, which can attract dust and dirt.
Problem: Mismatched Holes After Replacement
Solution : Use wooden dowels or epoxy putty to fill unwanted holes before drilling new ones in the correct position.
Material and Finish Considerations for Kitchen Cabinet Door Hinges
Beyond mechanical compatibility, the material and finish of your kitchen cabinet door hinges also matter — especially in terms of durability and visual appeal.
Common Materials Used in Cabinet Hinges Include:
Zinc alloy – Durable and corrosion-resistant, ideal for humid environments
Stainless steel – High strength and long-lasting, though more expensive
Brass – Offers a decorative touch but may tarnish over time
Plastic or nylon components – Often used in budget-friendly soft-close hinges
Popular Finish Options:
Matte black
Brushed nickel
Oil-rubbed bronze
Polished chrome
Satin brass
When replacing hinges, try to match the existing finish unless you're doing a complete overhaul of your kitchen cabinet hardware hinges .
So, Are Kitchen Cabinet Hinges Universal?
By understanding the various kitchen cabinet door hinges types , and following best practices for installation and maintenance, you can ensure your kitchen remains both beautiful and functional — regardless of whether the hinges are fully universal or not.
Explore Filta's superior 180 degree door hinge — engineered for modern kitchen cabinet hardware hinges. Experience the effortless function of kitchen cabinet doors hinges and elevate your home. Discover your perfect Filta kitchen hardware today — convenience is just a click away.