The modern recliner is no longer just a comfort chair—it's an engineered system where the
chair recliner mechanism determines performance, ergonomics, and long term reliability. Whether you're sourcing components for furniture manufacturing or evaluating a recliner mechanism for sale, understanding how these systems work is critical to making the right investment.
Chapter 1: What Is a Chair Recliner Mechanism? Structure, Components, and How It Works
At its core, a recliner mechanism is a kinetic system that translates user input (manual or powered) into controlled movement of the backrest and footrest.
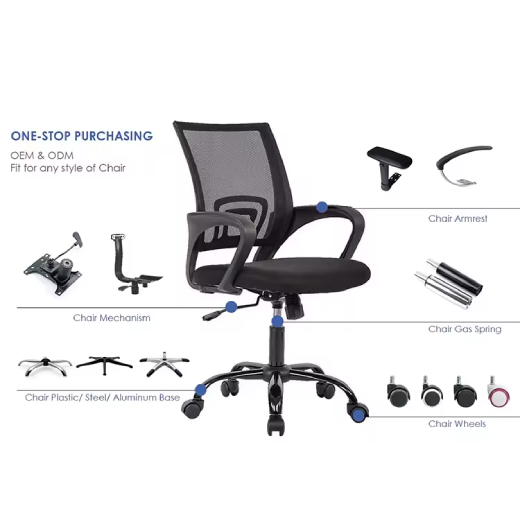
Key Structural Components of a Recliner Mechanism
A standard chair recliner mechanism includes:
Linkage system (levers + gears): Transfers motion from input to reclining action
Actuator or motor (for power recliners): Converts electrical energy into linear movement
Springs and tension bars: Provide resistance and smooth return motion
Locking system: Maintains position stability
Frame interface (mounting brackets): Connects mechanism to chair structure
These mechanical linkages are the “heart” of the recliner, enabling synchronized motion between seat, backrest, and footrest.
Manual vs Power Recliner Mechanism: What Users Actually Search
User intent data shows a consistent comparison between manual vs electric recliner mechanisms:
Manual Recliner Mechanism
Operates via lever or push-back pressure
Lower cost and fewer failure points
Ideal for high volume, cost-sensitive furniture lines
Power Recliner Mechanism
Uses one or multiple motors for precision control
Allows micro-adjustments and added features (massage, memory)
Preferred in premium, elderly-care, and ergonomic markets
From an engineering perspective, power systems introduce higher complexity but significantly improved user experience, especially in controlled motion and load distribution.
Chapter 2: Types of Recliner Mechanisms Explained (Best Recliner Chair Mechanism by Use Case)
Search behavior shows that users rarely look for a “generic best”—they search for best recliner mechanism for specific scenarios. Below is a structured breakdown.
1. Lever and Push-Back Recliner Mechanism (Best Budget Option)
These are the most widely used mechanisms globally.
Characteristics:
Simple mechanical linkage system
Low maintenance and easy repair
Limited reclining positions
Push back models rely entirely on body weight, making them minimalist but less precise.
Best for: entry-level furniture, bulk production, cost efficiency
2. Power Recliner Mechanism (Best for Precision & Comfort)
Power recliners dominate premium markets due to controlled motion and ergonomic adjustability.
Key user search intent:
best power recliner chair mechanism
smooth electric recliner mechanism
Advantages:
Smooth, silent operation with controlled speed curves
Independent adjustment of footrest and backrest
Advanced features (USB ports, memory settings)
High end systems use low-noise actuators (<50 dB) and soft-start control systems to prevent jerky motion.
Best for: home theater seating, elderly users, premium furniture brands
3. Wall Hugger Recliner Mechanism (Best for Small Spaces)
This mechanism addresses one of the most common buyer concerns: space efficiency.
Popular long tail queries:
best recliner mechanism for small rooms
wall hugger recliner mechanism clearance
How it works:
Slides forward while reclining
Requires only 2–6 inches from the wall
Best for: apartments, compact living spaces, commercial seating layouts
4. Lift Recliner Mechanism (Best for Accessibility & Medical Use)
A specialized category driven by aging populations and healthcare demand.
User intent keywords:
lift recliner mechanism for elderly
medical recliner mechanism
Features:
Tilts and lifts user to standing position
Reduces fall risk and improves independence
Best for: rehabilitation centers, senior living, healthcare furniture
5. Swivel, Rocker, and Glider Recliner Mechanisms (Best for Dynamic Use)
These combine reclining with additional motion.
Swivel: 360° rotation
Rocker: curved arc motion
Glider: linear forward-back motion
They enhance usability in social or multi-functional spaces but require more structural stability.
Best for: nurseries, living rooms, interactive environments
Chapter 3: How to Choose the Best Recliner Chair Mechanism (Buyer Decision Framework)
Users searching “best recliner chair mechanism” are typically evaluating four core factors:
1. Durability and Load Capacity (Top Priority)
High performing mechanisms use:
Reinforced steel frames
Corrosion-resistant coatings
50,000+ cycle testing benchmarks
Heavy duty designs can support 450–500 lbs, indicating industrial grade reliability.
Insight: In B2B sourcing, durability outweighs initial price.
2. Motion Smoothness and Noise Control
Modern users expect silent, fluid motion.
Key performance indicators:
Soft-start / soft-stop motion curves
Low decibel actuator systems
Precision gear alignment
Noise reduction below 50 dB is now considered premium standard.
3. Space Efficiency and Integration
Furniture manufacturers increasingly prioritize:
Wall clearance requirements
Frame compatibility (metal vs wood)
Modular installation
Wall-saver mechanisms are a direct response to urban living constraints.
4. Cost vs Lifecycle Value (Not Just Price)
Typical market ranges:
Manual mechanisms: $50–$150
Power mechanisms: $200–$800+
However, long-term value depends on:
Failure rate
Maintenance cost
User satisfaction
Insight: Mid-range mechanisms often deliver the best ROI for commercial furniture production.
Where FSGROWING Fits into the Market
For manufacturers or buyers evaluating a recliner mechanism for sale, suppliers like FSGROWING represent a category of integrated motion control solutions.
Their systems typically focus on:
Swivel + tilt + reclining integration
Durable metal structures for repeated cycles
Compatibility with office and lounge chair designs
Rather than positioning as luxury-only or budget only, this type of mechanism aligns with mid-to-high-end ergonomic seating, especially where versatility and durability are required.
Chapter 4: What Buyers Are Searching Next?
Search trends indicate that users are shifting from “basic functionality” to smart and ergonomic optimization.
1. Smart Recliner Mechanisms
Emerging features include:
App-controlled positioning
Memory presets
Integrated sensors
These systems transform recliners into adaptive seating platforms.
2. Zero Gravity Recliner Mechanisms
Inspired by aerospace ergonomics:
Elevates legs above heart level
Reduces spinal pressure
Improves circulation
Increasingly popular in health conscious and premium markets
3.Multi Motor Systems
Instead of single motor designs:
Dual or triple motors allow independent movement
Greater ergonomic customization
This is becoming a key differentiator in high-end recliner mechanisms.
4. Sustainability and Material Innovation
Manufacturers are adopting:
Lightweight alloys
Recyclable components
Low energy actuators
Driven by both regulation and consumer demand
FAQ: Recliner Mechanism Buyer Questions
What is the best recliner chair mechanism?
The best recliner chair mechanism depends on usage. Power mechanisms offer the best comfort and adjustability, while manual systems are more durable and cost-effective for basic use.
How long does a recliner mechanism last?
A high-quality recliner mechanism typically lasts 7–15 years, depending on usage frequency and build quality. Industrial-grade systems are tested for over 50,000 cycles.
Are power recliner mechanisms reliable?
Yes, modern power recliner mechanisms are reliable when equipped with high quality actuators and control systems. However, they require proper maintenance and stable power supply.
What is the difference between wall hugger and standard recliner mechanisms?
Wall hugger mechanisms move forward when reclining, requiring minimal wall clearance, while standard recliners need significant space behind them.
Where can I find a recliner mechanism for sale?
You can find a recliner mechanism for sale through B2B platforms, furniture hardware suppliers, and specialized manufacturers offering OEM/ODM solutions.