LED drivers are essential components in lighting systems, responsible for regulating the power supplied to LED lights. Ensuring the functionality and performance of LED drivers is crucial for maintaining optimal lighting conditions and prolonging the lifespan of LEDs. Testing LED drivers is a critical step in both manufacturing and maintenance processes, guaranteeing reliability and efficiency. In this guide, we'll explore various methods and techniques for effectively testing LED drivers.
What Is the Purpose of Testing an LED Driver?
The purpose of testing an LED driver is to ensure its functionality, quality, safety, performance, compatibility, reliability, and compliance with regulatory standards. By conducting thorough testing procedures, manufacturers and users can mitigate risks, optimize performance, and ensure the long-term reliability of LED lighting systems. The tool of choice for this purpose? The indispensable multimeter.
Basics of a Multimeter
A multimeter is a versatile electronic device used to measure various electrical quantities such as voltage, current, and resistance.
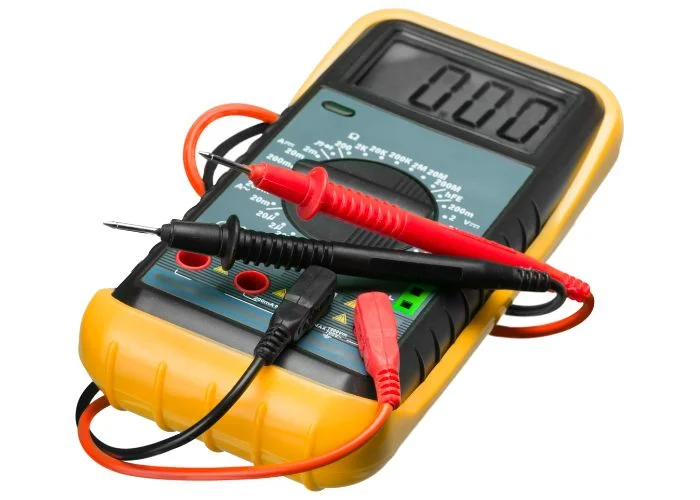
The components of a typical multimeter are as follows:
Rotary Switch: This switch allows the user to select the desired function or measurement mode, such as voltage (AC/DC), current (AC/DC), resistance, continuity, or diode testing. It typically has multiple positions corresponding to different measurement functions and ranges.
Display: The display is where measurement readings are shown. It can be either digital or analog, depending on the type of multimeter. Digital multimeters have an LCD (Liquid Crystal Display) or LED (Light Emitting Diode) display that shows the measured values in digits. Analog multimeters have a scale and a moving pointer to indicate measurements.
Probes: Multimeters come with two probes, usually color-coded—red for positive and black for negative. These probes are used to make contact with the circuit being tested and are connected to the input jacks on the multimeter.
Measurement Functions:
Voltage (Volts): Measures the electrical potential difference between two points in a circuit. Multimeters typically have settings for AC (alternating current) and DC (direct current) voltage.
Current (Amps): Measures the flow of electrical charge in a circuit. Multimeters are usually equipped to measure both AC and DC current. To measure current, the multimeter needs to be inserted in series with the circuit.
Resistance (Ohms): Measures the opposition to the flow of electric current in a circuit. Multimeters can measure resistance up to a certain range.
Continuity: Tests whether a circuit is complete or broken. It typically produces a beep or a visual indication when the circuit is closed (low resistance) and remains silent or displays no continuity when the circuit is open (high resistance).
Diode Testing: Determines whether a diode is functional or faulty.
What Should You Do Before Testing Your LED Driver?
Before you begin testing your LED driver with a multimeter, you need to ensure it's adequately prepared. Make sure the driver is powered down and disconnected from the power source before you begin testing. Lastly, make sure you know all about the driver's inputs and outputs since these will be crucial during testing.
How to Test an LED Driver with a Multimeter?
Testing Continuity in Your LED Driver
There is no doubt that the continuity of any electrical system is essential to the smooth operation of that system, representing the unbroken path that electricity is able to travel. Therefore, to ensure that the continuity in your LED driver is intact, your multimeter becomes a very important tool.
Ensure that the multimeter's settings are set to continuity, which is typically represented by a sound wave or diode symbol. Once this is done, proceed to probe the terminals of the LED driver with the probes of your multimeter until consistent and firm contact is achieved.
As you touch the terminals, pay close attention to the multimeter. It will usually emit a beep if there is continuity, signifying that the circuit is closed. Conversely, if the beep does not appear, it is generally a sign that the LED driver is not working correctly, which could indicate that the driver might need to be examined or fixed more closely.
Measuring Output Voltage from Your LED Driver
No matter the variant of LED driver you possess, whether it's a '12v LED driver' or its '24v LED Driver' counterpart, accurately measuring the output voltage is essential to ensure its operational effectiveness within specified parameters.
To begin this assessment, start by configuring your multimeter. Set it to the DC voltage setting to accurately measure the electrical potential of the driver. Then, with precision, place the probes directly onto the driver's output terminals, ensuring good contact for an accurate reading.
Once you've obtained a measurement, it's crucial to compare it against the expected voltage, such as 12V or 24V, as indicated on the driver's label. Significant discrepancies between these values may indicate underlying issues or inefficiencies, necessitating further examination or corrective actions.
Measuring Output Current from Your LED Driver
Excessive current surges pose a significant threat to the longevity and performance of LEDs. To proactively mitigate any potential damage, the multimeter once again emerges as our invaluable diagnostic tool.
Begin by configuring your multimeter to measure current. Instead of merely probing the LED, establish a connection through the multimeter to allow the flow of power. This enables you to accurately gauge the actual power passing through. If the reading obtained from your 'dimmable LED driver' or '12v dimmable LED driver' deviates from the expected value, it indicates a potential issue. This discrepancy may signal a faulty driver, necessitating closer inspection or even replacement.
Testing Input Voltage for Your LED Driver
When testing the input voltage of your LED driver, particularly crucial models like '24v dimmable LED drivers', precision plays a pivotal role.
Start by preparing your multimeter: if your LED driver operates on AC input, ensure the multimeter is set to measure AC voltage. With this setup complete, it's time to proceed. Utilize the multimeter probes to establish contact with the driver's input terminals, ensuring a secure connection. Upon obtaining a reading, it's vital to compare it against the expected input voltage.
Any deviation between your measured value and the expected input voltage could indicate a potential issue that may impact the driver's overall performance. Addressing this discrepancy promptly can save time and guarantee the smooth operation of your LED setup.
Checking for Short or Open Circuits
Understanding the nuances of short and open circuits is crucial for maintaining the health of your LED driver. A short circuit occurs when electricity finds an unintended shortcut, deviating from the normal path, whereas an open circuit indicates a disruption in the electrical pathway. Both scenarios can significantly impair the efficiency of an LED driver.
In diagnosing these issues, a multimeter proves indispensable. For detecting open circuits, a continuity test serves as the primary method; the absence of the expected beep can indicate a potential break in the circuit. Conversely, short circuits often manifest through indicators such as unusually high currents or abnormally low resistance readings on the multimeter. If any of these irregularities are observed, exercising caution is advisable.
While minor issues may be remedied with careful attention and skill, many circuit-related problems, given their complexity, necessitate professional assistance. In such cases, opting for professional repairs or replacements may prove to be more cost-effective and safer in ensuring the longevity and safety of your LED setup.
Conclusion
In conclusion, testing LED drivers is essential for maintaining optimal lighting conditions and prolonging the lifespan of LEDs. By ensuring functionality, quality, and compliance with standards, manufacturers and users can mitigate risks and optimize performance. The multimeter emerges as a vital tool in this process, offering versatility and accuracy in measuring various electrical quantities. Whether testing for continuity, output voltage, current, input voltage, or detecting short or open circuits, the multimeter provides valuable insights into the health of LED drivers. Promptly addressing any issues identified during testing is crucial for the long-term reliability and safety of LED lighting systems. With thorough testing procedures and attention to detail, users can ensure the efficiency and longevity of their LED setups, ultimately enhancing both functionality and user experience.
Comments