wang meihong's Posts (88)

Sort by

Best Vaccum Reflow Oven KD-V43 for Sale

The vacuum reflow oven is a critical tool in electronics manufacturing, designed to create a controlled environment by removing atmospheric pressure during the soldering process. This precision equipment ensures superior soldering connections by eliminating voids, enhancing electrical conductivity, and preventing oxidation. With a focus on hermetic packaging, the oven safeguards electronic components from environmental factors, promoting durability. Equipped with advanced control systems, these ovens offer precise temperature control and uniform heating, ensuring the integrity of delicate components. Their versatility accommodates diverse applications, and compliance with industry standards ensures the production of high-quality electronic devices with enhanced performance and reliability.
 
Chengliankaida Technology.co.,LTD stands at the forefront of cutting-edge technology with its flagship product, the KD-V43 Vacuum Reflow Oven. Today, we will delve into this product.
 
Vaccum reflow oven KD-V43
 

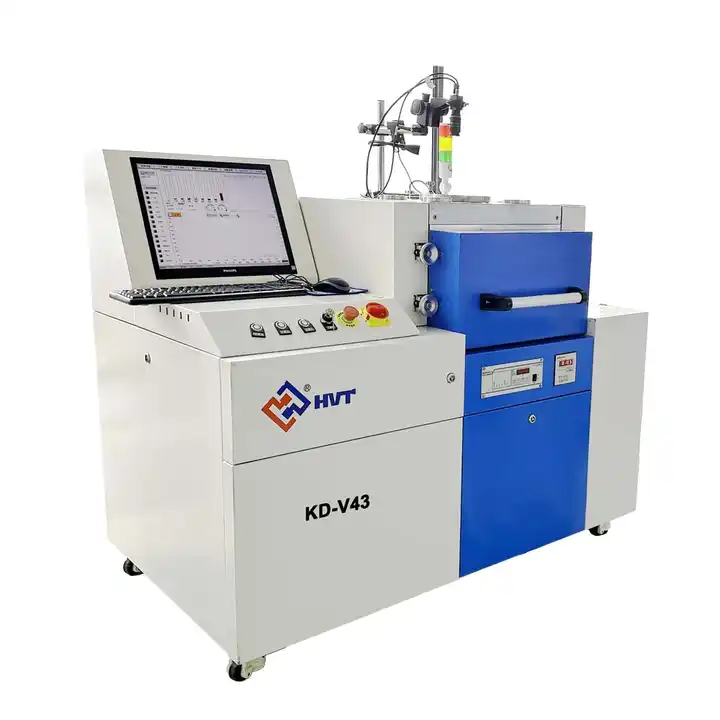
Features of Vaccum Reflow Oven KD-V43

 
The KD-V43 Vacuum Reflow Oven boasts a myriad of features that set it apart as a top-tier choice in the realm of precision soldering. Let's explore the key attributes that define its excellence:
 
1.Welding Size: With a spacious welding size of 400*300mm, the KD-V43 accommodates diverse applications, providing versatility in electronic component assembly.
 
2.Nitrogen System: The inclusion of a nitrogen system ensures a controlled atmosphere for precise soldering, preventing oxidation and enhancing the quality of solder joints.
 
3.Oven Size (LxWxH): The compact design of 1480*990*1300mm maximizes efficiency while offering a reliable and consistent soldering environment.
 
4.Heating and Cooling Speed: The KD-V43 excels in efficiency with a heating speed reaching up to 2°C/S on the red copper heating platform. The cooling speed matches this pace, ensuring optimal operational timelines.
 
5.Lateral Temperature Difference Control: Precision is paramount, and the KD-V43 maintains a lateral temperature difference within ±5℃, ensuring uniform heating throughout the assembly.
 
6.Drawer Loader Weight Capacity: The oven is equipped with a sturdy drawer loader capable of handling up to 20KG, providing convenience in loading and unloading processes.
 
7.Power and Heating Platform: With a maximum power of 21.5KW and a specially treated red copper platform, the KD-V43 ensures efficient heating and consistent performance.
 
8.Control System: The KD-V43 features an advanced control system with Siemens PLC+IPC, offering user-friendly operations and precise control throughout the soldering process.
 

Key Advantages of Hvttec Vacuum Reflow Soldering Oven

 
1.Reduced Void Rates

Employing a vacuum cycle in the reflow process, our vacuum reflow ovens effectively eliminate voids in solder joints and interfaces.

2.Stable Component Placement

The conveyor system's smooth travel ensures components remain stable without any shifting or movement throughout their journey within the oven. Boards experience minimal vibration, even during entry and exit from the vacuum chamber.

3.Optimized Throughput

Our vacuum reflow ovens provide an optional staging conveyor, enabling rapid transfer times within the vacuum chamber for enhanced throughput. Dual rail conveyors are also available, further boosting processing speeds.

4.Minimized Solder and Flux Splatter

Equipped with vacuum pumps featuring closed-loop control, our ovens execute a controlled multi-step pump-down and re-fill process. This proactive approach prevents the occurrence of detrimental solder and flux splatter, a common issue with single-stage, open-loop vacuum systems offered by competitors.

5.Precision Soldering
 
The oven creates a controlled, low-pressure environment, ensuring precise soldering with minimal voids and superior joint quality.

6.Void Reduction
 
By eliminating air pockets during the reflow process, the vacuum environment significantly reduces void formation within solder joints, enhancing overall reliability.

7.Hermetic Sealing
 
The oven facilitates hermetic packaging, protecting electronic components from moisture and contaminants, crucial for devices in demanding environments.

8.Temperature Uniformity
 
Equipped with advanced heating and cooling systems, the oven ensures uniform temperature profiles, preventing thermal stress on delicate components.
 

Applications of Vaccum Reflow Oven KD-V43

 
The Vacuum Reflow Oven KD-V43 from Hvttec finds versatile applications across the electronics manufacturing landscape, contributing to enhanced precision, reliability, and performance. Here are key applications where the KD-V43 excels:

Surface Mount Technology (SMT): The KD-V43 is instrumental in SMT processes, ensuring precise soldering of components onto PCBs. Its vacuum reflow capabilities eliminate voids, enhancing the overall quality of solder joints critical in SMT applications.

Semiconductor Packaging: In semiconductor manufacturing, the KD-V43 plays a pivotal role in packaging processes. The controlled environment and efficient heating platform contribute to achieving hermetic seals, safeguarding delicate semiconductor components.

Aerospace Electronics: The aerospace industry demands high-reliability electronics. The KD-V43's ability to minimize voids, prevent flux splatter, and provide stable processing makes it an ideal choice for soldering electronic components used in aerospace applications.

Medical Device Manufacturing: Precision is paramount in medical device manufacturing. The KD-V43 ensures void-free solder joints, contributing to the integrity and reliability of electronic components in medical devices.

Telecommunications Equipment: For the production of reliable telecommunications equipment, the KD-V43 offers controlled soldering environments, preventing issues like void formation and ensuring consistent and stable soldering results.

Automotive Electronics: In the automotive industry, where electronic components are integral to vehicle functionality, the KD-V43's capabilities contribute to the production of robust and reliable solder joints, meeting the stringent requirements of automotive electronics.

Consumer Electronics: From manufacturing circuit boards for smartphones to other consumer electronic devices, the KD-V43's precision soldering capabilities enhance the overall quality and performance of electronic components.

Industrial Control Systems: The KD-V43 is well-suited for soldering electronic components used in industrial control systems, where reliability and precision are crucial for uninterrupted operations.

Power Electronics: In the production of power electronics, such as inverters and converters, the KD-V43's advanced control systems and efficient heating platform contribute to achieving optimal soldering results.

Research and Development: The KD-V43 is a valuable tool in research and development laboratories, providing a controlled environment for soldering experiments and prototyping electronic components.
 

Why Choose Hvttec 


Global Support Vision

 
Hvttec is committed to providing global support, planning to establish local offices worldwide to offer timely on-site assistance within 24 hours for any operational issues.
 

Customization Options

 
Hvttec understands the unique needs of various industries and offers customization options, ensuring that their vacuum reflow ovens can be tailored to specific applications.
 

Industry Compliance

 
Hvttec's commitment to quality is reflected in its compliance with industry standards, ensuring that its products meet the necessary benchmarks for reliability and performance.
 

Innovative Control Systems

 
Hvttec's ovens are equipped with advanced control systems, providing users with customizable settings for precise control over the soldering process.
 
Read more…

A Comprehensive Guide to IGBT Power Module

IGBT power modules play a crucial role in converting electrical power between different forms, ensuring its convenient and safe utilization in the myriad digital devices that define our modern world.

During the power module conversion process, heat losses may result in significant temperature increases, sometimes reaching up to 5%. In specific applications like electric vehicles, these losses can escalate to 10-15%, affecting the vehicle's range and overall performance.

Continue reading to delve deeper into understanding what an IGBT power module is, its intended purpose, and the mechanics behind its operation.
 

What Is an IGBT Power Module?

 
An IGBT (Insulated Gate Bipolar Transistor) power module is a semiconductor device used in power electronics applications to control and switch electrical power. It combines the features of both the MOSFET (Metal-Oxide-Semiconductor Field-Effect Transistor) and the bipolar transistor, providing high switching speeds and low on-state voltage drops.

Here are the key components and features of an IGBT power module:

1.IGBT Chip: At the heart of the module is the IGBT chip, which is responsible for controlling the flow of electrical current. The IGBT chip combines the high input impedance of a MOSFET with the current-carrying capability of a bipolar transistor.

2.Gate Driver: The gate driver is an essential part of the IGBT power module, responsible for providing the necessary voltage and current to control the IGBT. It ensures precise switching of the IGBT, allowing it to turn on and off rapidly.

3.Anti-Parallel Diode: Many IGBT power modules include an anti-parallel diode across the IGBT chip to allow the current to flow in the reverse direction when the IGBT is turned off. This diode prevents voltage spikes and ensures smooth operation.

4.Heat Sink: IGBT power modules generate heat during operation due to the switching of current. A heat sink is often attached to dissipate this heat and maintain optimal operating temperatures.

5.Isolation: In many applications, IGBT power modules incorporate isolation features to ensure electrical separation between the control circuit and the power circuit. This helps enhance safety and prevent electrical interference.

IGBT power modules are commonly used in various industries and applications, such as:
 
  • Motor Drives: Controlling the speed and torque of electric motors.
  • Power Supplies: Regulating and converting electrical power in power supply units.
  • Renewable Energy: Inverters for solar and wind power systems.
  • Industrial Automation: Controlling power in various industrial processes.
  • Electric Vehicles: Inverters for electric and hybrid vehicles.
 
The advantages of IGBT power modules include high efficiency, fast switching speeds, and the ability to handle high-voltage and high-current applications. They play a crucial role in modern power electronics by providing a reliable and efficient means of controlling electrical power in a wide range of applications.
 

How Does IGBT Power Module Work?

 
An IGBT power module serves as an electronic switch, enabling the transformation of electrical power between direct current (DC) and alternating current (AC) through alternate switching.

The pivotal role of power conversion is evident in ensuring the proper functioning of various applications. For instance, to drive an electric motor effectively, a three-phase AC current is essential. Conversely, electrical energy storage systems, such as batteries, require a direct current (DC) input.
 

What Is the Function of IGBT Power Module?

 
The function of an IGBT (Insulated Gate Bipolar Transistor) power module is to serve as a semiconductor device that controls and switches electrical power in power electronics applications. Its primary functions include:

1.Switching Power On and Off

The IGBT power module acts as an electronic switch, allowing for the controlled switching of electrical power. It can rapidly turn power on and off as needed in a circuit.

2.Power Conversion

By alternately switching between states, the IGBT power module facilitates the conversion of direct current (DC) to alternating current (AC) and vice versa. This is crucial for various applications requiring different types of electrical power.

3.Voltage Regulation

IGBTs are capable of regulating voltage, ensuring that the electrical power in a circuit is maintained at the desired level. This is particularly important in applications where voltage control is critical.

4.Current Control

The IGBT power module enables precise control of electrical current in a circuit. This is essential for applications such as motor drives, where the speed and torque of the motor need to be accurately regulated.

5.Inverter Operation

IGBT power modules are often used in inverters, converting DC power from sources like batteries into AC power, which is required for many electrical devices and machinery.
6.Frequency Control

In AC power systems, the IGBT power module plays a role in controlling the frequency of the alternating current, ensuring compatibility with specific applications and devices.

7.Efficiency Improvement

IGBT power modules contribute to improving the efficiency of power electronic systems. Their ability to switch rapidly and handle high power levels makes them suitable for applications where efficiency is a crucial factor.

8.Motor Drives

In motor drive systems, IGBT power modules control the power supplied to electric motors, regulating their speed and torque according to the requirements of the application.

9.Renewable Energy Conversion

IGBT power modules are widely used in renewable energy systems, such as solar inverters and wind turbine converters, where they facilitate the conversion of variable DC power into usable AC power.
 

Vacuum Reflow Oven for IGBT Module

 
vacuum reflow oven for igbt module
 
Introducing the KD-V400 Vacuum Reflow Oven for IGBT Module – a cutting-edge solution designed to meet the demands of precision soldering and reflow processes. With its advanced features and robust specifications, this reflow oven ensures optimal performance and reliability in the manufacturing of IGBT power modules.
 
Application:IGBT module,MEMS package,High Power component package, Photoelectric component package and vacuum package etc. 
 
Features:
 
1.Watch Window Chamber: The reflow oven is equipped with a chamber featuring a watch window for real-time observation and monitoring.
2.Heating Zones: Featuring two front preheating zones, a central reflow zone, and four rear cooling chambers, each temperature zone operates independently under vacuum conditions. This innovative design enhances the precision and control of the reflow process.
3.Control System: The Siemens PLC1200 control system, coupled with Advantech industrial computer and intuitive software operation, ensures precise and user-friendly control over the reflow process.
4.Vacuum system: Machine configured with high speed direct coupled rotary - vane Vacuum pump to realize 0.1 mbr vacuum condition quickly, Max. Vacuum rate is 0.01 mbar .
5.Cooling System: The bottom-contact cooling system ensures effective heat dissipation during the reflow process.
6.Gas Supply: Nitrogen and formic acid gases are utilized to create the optimal soldering environment.
 
Read more…


In the pursuit of sustainability, businesses are increasingly turning to eco-friendly LED lighting solutions that promise reduced energy consumption and environmental impact. Guangdong Suncom Power, a prominent player in the LED lighting industry, presents a variety of 50W LED power supplyoptions tailored to meet the growing demand for sustainable illumination. With a focus on recyclable materials, waste reduction, and prolonged product lifespan, Guangdong Suncom Power is enabling businesses to adopt environmentally conscious lighting solutions.

Environmentally Friendly LED Power Supply Solutions

Guangdong Suncom Power's 50W LED power supply drivers prioritize environmental sustainability. Through the incorporation of eco-friendly design principles and the use of recyclable materials, they actively minimize the carbon footprint associated with their products. Businesses can confidently rely on Guangdong Suncom Power to deliver LED power supply solutions that align with their commitment to environmental stewardship.

Minimized Waste and Extended Lifespan

Guangdong Suncom Power acknowledges the significance of waste reduction in achieving sustainability objectives. Their 50W LED power supply drivers are meticulously engineered to boast an extended product lifespan, reducing the frequency of replacements and minimizing electronic waste. By choosing Guangdong Suncom Powerr, businesses not only contribute to waste reduction efforts but also benefit from reliable and durable lighting solutions.

Energy Efficiency and Cost-Efficiency

Guangdong Suncom Power's 50W LED power supply drivers prioritize energy efficiency. Through optimized power conversion and minimized energy waste, these drivers play a crucial role in lowering energy consumption and reducing operating costs for businesses. With Guangdong Suncom Power's solutions, organizations can achieve their sustainability goals while enjoying the financial advantages of energy-efficient lighting.

A Trusted Partner with CNAS Accreditation

Guangdong Suncom Power's Verification Center has received the CNAS Laboratory Accreditation, highlighting their commitment to delivering trusted and reliable lighting power supplies. This accreditation underscores Done Power's dedication to upholding the highest standards of quality and ensuring customer satisfaction. With CNAS accreditation, Guangdong Suncom Powerstrengthens its position as a trusted partner for businesses, providing innovative and dependable lighting power solutions.

Conclusion

By opting for Guangdong Suncom Power's 50W LED power supply drivers, businesses can significantly reduce their environmental impact while enjoying long-lasting performance. The emphasis on energy efficiency not only supports sustainability goals but also leads to substantial cost savings over time. As organizations strive to embrace eco-friendly lighting solutions, Guangdong Suncom Power stands ready to empower them with innovative LED power supply drivers that embody sustainability and pave the way for a brighter and greener future.

Read more…

What Is an Endoscope

More than a century ago, the initial endoscope was crafted from a rigid tube. Despite gradual enhancements, its widespread usage remained elusive. A breakthrough came in the 1950s when a pliable, bendable tube replaced the rigid structure, allowing easier maneuvering through the twists and turns of the human body. In 1965, Harold Hopkins introduced a lenticular lens to the endoscope, significantly enhancing the clarity of the field of vision. Contemporary endoscopes typically feature two flexible fiberglass tubes, with one navigating through the body, while the physician observes through the other tube or via a camera. Some advanced endoscopes even incorporate micro-integrated circuit sensors, transmitting observed information back to a computer.
 
what is an endoscope
 

What Is an Endoscope?

 
An endoscope is a medical instrument designed for the visual examination of internal organs and structures within the body. It consists of a long, flexible tube with a light source and a camera at one end. The tube may be rigid or flexible, depending on the type of endoscope and its intended use.

The primary purpose of an endoscope is to allow physicians and healthcare professionals to observe and diagnose conditions inside the body without the need for invasive surgery. The light source illuminates the area of interest, and the camera captures real-time images or videos, which can be viewed on a monitor. In some cases, additional channels in the endoscope may allow for the passage of instruments, such as forceps or scissors, to perform minimally invasive procedures or take tissue samples for biopsy.
 

What Is an Endoscope Used For?

 
Using an endoscope, doctors can examine the inside of a person's body to diagnose diseases in the following areas:
 
  • Esophagus
  • Stomach
  • Colon
  • Ears
  • Nose
  • Throat
  • Heart
  • Urinary tract
  • Joints
  • Abdomen
 

Types of Endoscopy

 
There are various types of endoscopy procedures, each designed to visualize specific areas of the body. The choice of endoscopy type depends on the medical condition and the part of the body that needs examination. Here are some common types of endoscopy:
 
1.Gastrointestinal Endoscopy
 
Upper Gastrointestinal Endoscopy (Gastroscope): Examines the esophagus, stomach, and upper part of the small intestine.
Colonoscopy: Visualizes the large intestine (colon) and rectum.
Enteroscopy: Examines the small intestine.
 
2.Respiratory Endoscopy
 
Bronchoscopy: Allows visualization of the airways and lungs.
Laryngoscopy: Examines the larynx (voice box) and upper part of the airway.
 
3.Urological Endoscopy
 
Cystoscopy: Inspects the urinary bladder and urethra.
Ureteroscopy: Visualizes the ureters, the tubes that carry urine from the kidneys to the bladder.
 
4.Gynecological Endoscopy
 
Hysteroscopy: Examines the uterus, often used for diagnostic and surgical procedures.
Laparoscopy: Allows visualization of the pelvic and abdominal organs for gynecological surgeries.
 
5.Orthopedic Endoscopy
 
Arthroscopy: Visualizes and treats joint conditions, commonly used in orthopedic surgeries.
 
6.Neuroendoscopy
 
Ventriculoscopy: Examines the ventricles of the brain, often used in the diagnosis and treatment of hydrocephalus.
 
7.Ear, Nose, and Throat (ENT) Endoscopy
 
Nasopharyngoscopy: Inspects the nasal passages and pharynx.
Esophagoscopy: Examines the esophagus.
 
8..Capsule Endoscopy
 
Capsule Endoscopy: Involves swallowing a small, pill-sized capsule containing a camera that captures images as it passes through the digestive tract. Useful for imaging the small intestine.
 
9..Endoscopic Retrograde Cholangiopancreatography (ERCP)
 
Combines endoscopy with fluoroscopy to examine and treat issues in the biliary and pancreatic ducts.
 
10.Endobronchial Ultrasound (EBUS)
 
Combines endoscopy with ultrasound to visualize and biopsy structures within the chest, particularly the lungs and surrounding lymph nodes.
 
These are just a few examples, and there are many other specialized types of endoscopy procedures tailored to specific medical needs. The field of endoscopy continues to evolve with technological advancements, providing less invasive options for diagnosis and treatment across various medical specialties.
 

Why You May Need an Endoscopy?

 
Your physician might suggest an endoscopy for various purposes:

1.Screening and Cancer Prevention

To screen for and prevent cancer, such as using a colonoscopy to detect and remove polyps in the colon, which could otherwise progress to colorectal cancer.

2.Diagnostic Purposes

To diagnose a disease or determine the cause of symptoms, with the specific type of endoscopy chosen based on the targeted area of the body.

3.Therapeutic Interventions

For treatment purposes, where endoscopes are employed in various medical interventions.
Some treatments involving endoscopy include:
 
  • Laparoscopic Surgery: Conducted through small incisions in the skin.
  • Laser Therapy: Utilizing a powerful beam of light to eliminate cancer cells.
  • Microwave Ablation: Applying heat to destroy cancerous tissue.
  • Endoscopic Mucosal Resection or Endoscopic Submucosal Dissection: Surgical procedures using an endoscope inserted into the gastrointestinal tract.
  • Photodynamic Therapy: Destroying a tumor with a laser after injecting it with a light-sensitive substance.
  • Medication Delivery (Medication Administration): Administering medication through endoscopic means.
 

How Should I Prepare for an Endoscopy?

 
You will be given detailed instructions by your health care team on how to prepare for your appointment. For example, you may need to follow these steps before your appointment:
 
  • Your doctor will likely instruct you to fast for a specific period before the endoscopy. This often involves refraining from eating or drinking for at least 6 to 12 hours before the procedure. Fasting helps ensure a clear view of the targeted area.
  • If you are on blood thinners or anticoagulants, your doctor may provide specific instructions on whether and when to adjust or stop these medications.
  • It is only necessary to do this for certain types of endoscopies that you take a laxative or use an enema to remove stool from your bowels.
 

Advances in Endoscopy

 
Continual advancements in endoscopy techniques aim to enhance both patient comfort and diagnostic precision for medical professionals.

These innovative endoscopic methods include:
 

Virtual Endoscopy

 
Distinguishing itself from standard endoscopy, virtual endoscopy eliminates the need for the insertion of an endoscope into the body. Instead, this approach relies on computed tomography (CT) scans of fine sections of the body. A computer then integrates these images to generate a comprehensive view.
 
Researchers are actively investigating various forms of virtual endoscopy, such as:
 
  • Virtual Colonoscopy:This procedure examines the interior of the colon. While individuals undergoing this test still adhere to customary bowel-cleansing preparations, a traditional colonoscopy may be required if polyps are detected.
  • Virtual Bronchoscopy:Focused on inspecting the interior of the lungs, this procedure offers a non-invasive alternative.
 

Capsule Endoscopy

 
In this method, a patient swallows a small capsule resembling a vitamin, equipped with a camera. The camera captures images of the esophagus, stomach, and small intestine. A wearable device records these images over approximately 8 hours, which the doctor subsequently reviews.
 
 
Read more…

What Is PTZ Camera:A Complete Guide

What Is PTZ Camera

 
The pan-tilt-zoom camera (PTZ) has mechanical components that enable it to swivel left and right, tilt upward and downward, and zoom in and out. It is typically deployed at guard stations to monitor wide areas that require 180- or 360-degree views, and the camera controller can be used by active personnel. It is also possible to set them to automatically follow motion-triggered activity or to follow a predetermined schedule, depending on the camera or software. Generally speaking, PTZ cameras are used in conjunction with a larger surveillance system, in which the PTZ tracks movement and a fixed camera takes detailed images.
 

Pros and Cons of PTZ Security Cameras

 
Each CCTV camera has pros and cons, and each is suited to performing a specific function when it comes to protecting your premises. Here are the pros and cons of PTZ cameras.
 

Advantages of PTZ Cameras

 
  • Versatility: PTZ cameras provide flexibility in monitoring a wide range of areas. With the ability to pan, tilt, and zoom, a single PTZ camera can cover a large area that might require multiple fixed cameras.
  • Remote Monitoring and Control: PTZ cameras can be remotely controlled, allowing operators to adjust the camera's position, angle, and zoom level from a centralized location. This is especially beneficial for real-time monitoring and responding to events as they unfold.
  • Auto-Tracking: Some PTZ cameras are equipped with auto-tracking capabilities, which enable the camera to automatically follow moving objects or individuals. This feature is valuable in applications where continuous surveillance of a specific target is required.
  • Presets and Patterns: PTZ cameras can be programmed with preset positions and patterns, enabling them to automatically move between different viewpoints. This is useful for covering specific areas at scheduled intervals or responding to predefined scenarios.
 

Disadvantages of PTZ Cameras

 
  • Limited Perspective: The versatility of pan-tilt-zoom cameras introduces a potential drawback. If a PTZ camera isn't focused on a particular area, it may miss events occurring there. Although the PTZ camera can swiftly cover a broad field of view, there are intervals where activities may go unnoticed, emphasizing the need for fixed cameras to address these gaps.
  • Surveillance Blind Spots: When a PTZ camera is set to follow a predetermined route or operate on auto mode, it may continuously pan to the next preset position without regard for ongoing activities in its field of view. While having a manned guard control the camera is an effective solution, it entails additional labor costs. Alternatively, employing analytics on the PTZ camera to track movement, in conjunction with a fixed camera, can provide a comprehensive field of vision and recording as needed.
  • Shorter Equipment Lifespan: The presence of moving parts in PTZ cameras increases the risk of malfunctions compared to fixed solutions. Regular preventative maintenance can help mitigate these issues and extend the camera's operational life.
 

Types of PTZ Cameras

 
PTZ IP Camera:A PTZ IP camera is a surveillance camera that combines the features of a Pan-Tilt-Zoom (PTZ) camera with Internet Protocol (IP) technology. These cameras can be connected to an IP network, allowing for remote monitoring, control, and data transmission over the internet.

Outdoor PTZ Camera:An outdoor PTZ camera is a type of Pan-Tilt-Zoom camera specifically designed for surveillance and monitoring in outdoor environments. These cameras are built to withstand various weather conditions and are often enclosed in durable, weatherproof housings. The outdoor PTZ camera combines the flexibility of pan, tilt, and zoom functionality with the ruggedness required for exposure to the elements.

Wireless PTZ Camera: A Wireless PTZ Camera is a type of surveillance camera that combines the features of a Pan-Tilt-Zoom (PTZ) camera with wireless connectivity. These cameras utilize wireless technology, such as Wi-Fi, to transmit data, enabling more flexible installation options compared to cameras that rely on wired connections.
 

Where PTZ Cameras Are Commonly Used

 
PTZ cameras are used in different locations and in various situations.A few of the most suitable use cases are listed below:
 
  • Supermarkets
  • Airports
  • Large outdoor areas
  • Churches
  • Museums
  • Construction Sites
  • Retail sites
  • Industrial parks
 

What to Consider When Buying a PTZ Camera

 
Although PTZ cameras may be useful for your production needs, you shouldn't rush out and buy them without learning how you can customize them to meet the aforementioned requirements. In order to update your inventory with high-quality and useful equipment, you can check out what to look for when choosing a PTZ camera.
 

Tech Specs

 
It is important to keep in mind the technical specifications when browsing PTZ cameras. PTZ cameras vary in a number of ways, as with any other camera. For instance, there are models that support 4K resolution at 60 frames per second. You can also find PTZ cameras that support 1080p at 60 frames per second, if that is all you need for your production.

Hence, you need to carefully read through PTZ camera listings online; each detail will help you determine how the camera will affect your project. What kind of zoom capabilities would you like from the camera? You can find models with 12x or 20x optical zooms that meet your needs.
 

Mounting Location

 
When choosing a PTZ camera, you need to take into account the location of the set beyond the details above. This is a helpful detail to consider when shopping because equipment requirements vary depending on how you’re going to use the camera.

When shopping, keep your application in mind when choosing the best approach for your PTZ camera arrangement. Additional support systems can be found for ceiling-mounted or wall-mounted PTZ configurations.
 

Optimal Quantity 

 
How many PTZ cameras are required for your production? The compact nature of PTZ cameras makes them well-suited for collaborative use when extensive coverage is necessary.

This allows you to efficiently encompass a broad array of perspectives, leveraging the pan, tilt, and zoom functionalities inherent in these devices. The cameras' manageable size and weight further facilitate a seamless experience when relocating them within the set to discover the optimal angle.

BIT-CCTV offers a comprehensive and diverse range of pan-tilt products and solutions, providing a one-stop professional service. Our product lineup encompasses light, medium, and heavy-duty pan-tilt heads/positioners, network IP PTZ cameras, vehicle-load network IP PTZ cameras, infrared/laser night vision network PTZ cameras, long-range laser network PTZ cameras, infrared thermal imaging PTZ cameras, optical/infrared thermal imaging dual vision PTZ cameras, explosion-proof network IP PTZ cameras, explosion-proof bullet cameras, explosion-proof dome cameras, and various CCTV accessories, including camera housing/enclosurescamera mounting brackets, and power supplies.

In addition to our standard product offerings, as a CCTV surveillance solutions manufacturer, we provide custom design services to meet the diverse demands of our customers. OEM options are also available. For further details about our services, please contact us today to discuss your specific needs
PreviousBack to list Next
You can also visit our United States partner company that can install your security camera system in the Maryland, Virginia, and Washington, DC area at https://www.pentasecuritycameras.com
Read more…

How to Connect a MPPT Solar Charge Controller?

The solar power setup includes a solar cell, a solar charge controller, and a storage battery (pack). If you want the system to produce 220V or 110V AC power, you'll need to add a solar inverter. The solar charge controller manages how the battery charges and discharges. It also regulates the power output from the solar cell and battery to the load, based on the load's power needs. This controller is the key component of the entire photovoltaic power system.

The most common solar charge controllers on the market are PWM (Pulse Width Modulation) and MPPT (Maximum Power Point Tracking) controllers. The PWM controller uses a control method that addresses battery dissatisfaction, achieving a charging efficiency of 75-80%. However, it doesn't fully utilize the solar panel. On the other hand, the MPPT controller is an upgraded version of the PWM controller. It can detect the voltage and current of solar panels in real time, continually tracking the maximum power. This ensures that the system always charges the battery at its maximum power potential. The MPPT tracking efficiency is as high as 99%, leading to an overall power generation efficiency of 97% for the entire PV system.
 

Mppt Solar Charge Controller Connection

 
Here is a basic wiring diagram of the MPPT solar charge controller. After that, we will show you how to connect the controller to a solar panel, battery, and DC load step by step.
 
MPPT solar charge controller connection diagram
 
 
1. Before connection

The first step that you need to do before wiring is to remove the cover and loosen the connection lock. Once that is done, you will be able to see the wiring terminals for the solar panel, battery, load, and temperature sensor along with a Rs-485 port for the computer.
 
 
Before wiring of MPPT charge controller


2. Connect batteries to MPPT charge controller

The connection between the charge controller and the batteries is shown in the wiring diagram below. Ensure that both the positive and negative terminals of the charge controller and the batteries are properly connected. The batteries are connected in series. Please note that when connecting the batteries, the circuit breaker needs to be disconnected.
 
connect batteries to MPPT charge controller


3. Connect DC load to MPPT charge controller

The "DC LOAD" terminal of the MPPT solar charge controller can be connected to a DC load that has the same rated voltage as the batteries. The charge controller will provide the power based on the voltage of the batteries. The wiring diagram of the MPPT solar charge controller and DC load is shown below.
 
connect DC load to MPPT charge controller

4. Connect PV panel module to MPPT charge controller

The MPPT solar charge controllers are suitable for 12V, 24V, 48V off-grid solar panel modules, and also for grid tie modules whose open voltage does not exceed the maximum input voltage specified. It is important to keep in mind that the PV module in the solar system must not be below the system voltage. The connection is shown in the following figure. Please note that the circuit breaker must be disconnected when connecting the PV module.
 
connect PV panel module to MPPT charge controller

5. Temperature sensor, MPPT charge controller and PC connection

You can connect the MPPT solar charge controller to the temperature sensor and PC through the Rs485 communication line. The Rs485 communication line is optional and you can purchase an extra if you wish to do so.
 
temperature sensor MPPT charge controller and PC connection
 

Mppt Solar Charge Controller Installation

 
Installing an MPPT (Maximum Power Point Tracking) solar charge controller is a crucial step in setting up a solar power system. Here's a simple guide to help you with the installation:
 
Materials Needed:
 
  1. MPPT Solar Charge Controller
  2. Screwdriver
  3. Voltage Meter
  4. Wire Strippers
  5. Connectors and Wiring
  6. Solar Panels
  7. Battery Pack
 
Steps:
 
1.Choose a Suitable Location:
 
Select a location for the MPPT solar charge controller that is well-ventilated and protected from extreme temperatures. This will ensure optimal performance and longevity.
 
2.Mount the Controller:
 
Securely mount the MPPT controller on a flat surface using screws. Make sure the controller is easily accessible for monitoring and maintenance.
 
3.Connect the Solar Panels:
 
Connect the solar panels to the input terminals of the MPPT controller. Follow the manufacturer's instructions for proper wiring, typically positive to positive and negative to negative.
 
4.Connect the Battery:
 
Connect the battery pack to the output terminals of the MPPT controller. Again, observe the correct polarity to avoid any damage.
 
5.Connect Load (If Applicable):
 
If you have a load (appliances or devices), connect it to the load terminals of the MPPT controller. This allows the controller to regulate the power distribution.
 
6.Check Voltage Settings:
 
Use a voltage meter to check the voltage settings on the MPPT controller. Ensure that the settings match the specifications of your solar panels and battery.
 
7.Secure and Organize Wiring:
 
Securely fasten all wires to prevent any accidents or damage. Organize the wiring neatly to facilitate future inspections and maintenance.
 
8.Turn On the System:

Once everything is connected and secured, turn on the solar power system. Monitor the MPPT controller to ensure it's functioning correctly and efficiently tracking the maximum power point.
 
9.Monitor and Maintain:
 
Regularly monitor the MPPT controller's display for information on charging status and power output. Perform routine checks to ensure all connections are tight and secure.
 
By following these steps and the manufacturer's guidelines, you can successfully install an MPPT solar charge controller for an efficient and optimized solar power system. If you're unsure about any step, consult the user manual or seek professional assistance.
 
Buy low price yet high efficiency solar charge controller from helios-ne.com, including 10 Amp, 20 Amp,...60 Amp PWM solar charge controllers and 20A30A to 60A MPPT solar charge controllers.

At Helios, our focus is on providing top-notch solar solutions, particularly in the realm of solar DC charge. Our extensive experience and commitment to excellence shine through, especially in the development of PWM (Pulse Width Modulation) and MPPT (Maximum Power Point Tracking) solar charge controllers. These controllers embody our unique concepts, offering reliable performance and efficiency.

Our solar controller products find wide applications in various settings, from solar standalone power systems to solar telecommunication power stations, solar RV power systems, and other power systems that require a solar DC charge source. Beyond solar charge controllers, our company has strong connections with products in other solar DC areas. This includes solar flexible panels/bags assembled with mono cells and Sun Power cells, lithium battery packs integrated with solar charge controllers, and all-in-one solar lights.
 
Read more…

Expanded metal wire mesh is a versatile and innovative material with a wide range of applications across various industries. In this article, we'll delve into the diverse uses of expanded metal wire mesh, exploring its historical development and highlighting its significant roles in construction, agriculture, the industrial sector, and creative decoration.

 What isExpanded Metal Wire Mesh?

Expanded metal wire mesh is a type of metal sheet that has been cut and stretched to create a pattern of openings. This unique design results in a material that is lightweight yet sturdy, making it suitable for a variety of applications. The expansion process imparts strength and rigidity to the mesh, allowing it to withstand heavy loads and provide structural support.

Brief History and Development

The concept of expanded metal dates back to the 19th century when it was developed as a cost-effective alternative to traditional metal sheets. Over the years, advancements in manufacturing techniques have led to the widespread use of expanded metal in diverse industries.

Exploring 4 Diverse Uses of Expanded Metal Wire Mesh

Uses in Construction

Expanded metal wire mesh plays a crucial role in the construction industry. It is commonly used for reinforcing concrete structures, providing strength and stability. Additionally, it finds applications in fencing, walkways, and platforms due to its durability and ability to allow airflow and light.

Uses in Agriculture

In agriculture, expanded metal wire mesh is utilized for various purposes. It serves as fencing to protect crops, acts as a barrier for animal enclosures, and can even be used in poultry houses for ventilation. The durability and versatility of expanded metal make it a reliable choice in agricultural settings.

Uses in the Industrial Sector

Within the industrial sector, expanded metal wire mesh is employed for machine guards, safety barriers, and filtration systems. Its ability to provide security while allowing visibility and airflow makes it invaluable in manufacturing and processing environments.

Uses in Creativity and Decoration

Expanded metal wire mesh is not limited to utilitarian purposes; it has also found its way into the realm of creativity and decoration. Architects and designers use expanded metal for artistic installations, decorative panels, and unique facades. Its flexibility and aesthetic appeal contribute to its growing popularity in creative projects.

Advantages of Expanded Metal Wire Mesh

  • Strength and Durability: Offers robust structural support and withstands heavy loads.
  • Versatility: Adaptable for various applications across different industries.
  • Ventilation and Visibility: Allows airflow and visibility while maintaining security.
  • Cost-Effective: Provides a cost-efficient alternative to traditional metal sheets.

Conclusion

Expanded metal wire mesh has evolved from a practical solution to a dynamic material with diverse applications. Its contributions to construction, agriculture, the industrial sector, and creative endeavors highlight its adaptability and reliability. As technology continues to advance, we can anticipate further innovations and applications for expanded metal wire mesh in the future.

Read more…

How to Choose from Different Types of Cooktops

A kitchen cooktop is a countertop appliance that appeals to many individuals due to its convenience. People often choose to invest in a kitchen stove not only for its practicality but also for its aesthetic appeal, particularly when fitting into spaces like kitchen islands. Various types of cooktops, including electric, gas, induction, and downdraft models, are available. If you haven't considered a cookstove yet, you can explore options that suit your needs. Continue reading to discover how to select the optimal stove for your kitchen.

 Everything you need to know about types of Cooktops for your Kitchen

As time has progressed, significant changes have occurred in the realm of cooktops. The contemporary era has introduced customers to new types that simplify and enhance the cooking experience. If you're curious about the four fundamental types of cooktops, explore below to gain more insights.

Gas Cooktop
Electric Cooktop
Induction Cooktop
Downdraft Cooktop

Purchase different types of stovetops from zsheme.com

Gas Cooktop

Cooking on a gas cooktop involves direct flame, offering instant flame adjustment without the need to wait for a heating element to warm up or cool down. This type provides rapid control over heat settings, and the direct flame can extend to the sides of cookware, which is advantageous for using shaped pans like woks.

Electric Cooktop

Electric cooktops utilize heated alloy windings or elements typically embedded in ceramic or glass surfaces. They are efficient for quickly boiling water as they direct heat from the lower part of the utensil rather than around it. The smooth, flat surface of electric cooktops, often made with a ceramic or glass top, is easy to maintain.

Induction Cooktop

An induction cooktop heats cookware through electromagnetism, turning the cookware into its heat source. While the surrounding elements near the cooktop heat up, the electromagnetic process directs heat straight to the cooking utensil, allowing for rapid temperature adjustments. Induction cooktops are known for fast cooking, especially in pots and pans. It's important to note that these cooktops do not support the use of copper or aluminum cookware.

Downdraft Cooktop

The downdraft cooktop eliminates the need for an overhead vent by integrating the exhaust system with the cooking area. This is an excellent choice for kitchen islands where space may be limited, and there's a preference for an open kitchen design. Keep in mind that you'll require a cabinet with under-counter space to accommodate the internal components necessary for the operation of a downdraft cooktop.

How to Choose the Right Cooktop

Now that you're acquainted with the key features of different cooktop types, consider the following factors to make the right choice for your kitchen:

Space and Kitchen Layout: Evaluate your kitchen space and layout to determine the most fitting cooktop type.

Cooking Preferences: Consider your cooking style and preferences – whether you prefer instant flame control, sleek designs, or advanced technology like induction.

Maintenance and Cleaning: Assess the ease of maintenance and cleaning for each cooktop type to match your lifestyle.

Budgetary Considerations: Determine a budget range and explore options within that range for a practical investment.

Conclusion

Selecting the perfect cooktop involves weighing various factors to align with your cooking habits, kitchen layout, and personal preferences. By understanding the features and considerations associated with gas, electric, induction, and downdraft cooktops, you can confidently embark on the journey of choosing a cooktop that elevates your culinary experience. Happy cooking!

Read more…

Applications of LED Drivers in Street Lighting

The traditional street lighting systems have been replaced with LED technology that offers improved energy efficiency, longer lifespans, and enhanced control options as well. There is no LED street light without an LED driver, the critical component that governs the supply of power and current to the LEDs. This article discusses the essential role LED drivers play in modern street lighting systems and what they are capable of doing.

Functions of LED Drivers

LED drivers play several key functions in ensuring the proper operation and performance of LED lighting systems. Here are the primary functions of LED drivers:

1.Voltage Regulation

LED drivers regulate the voltage supplied to the LED, ensuring that it operates within its optimal voltage range. This function is crucial for preventing damage to the LED and maintaining consistent brightness.

2.Current Regulation:

LED drivers control the current flowing through the LED. Maintaining a stable current is essential for the longevity and performance of LEDs. LED drivers help prevent variations in current that could lead to fluctuations in brightness.

3.Power Factor Correction (PFC)

LED drivers often incorporate power factor correction to improve the overall efficiency of the lighting system. PFC helps align the current and voltage waveforms, reducing energy losses and enhancing power quality.

4.Dimming Control

Many LED drivers support dimming capabilities, allowing users to adjust the brightness of the LED lighting. This function is beneficial for energy conservation, creating ambiance, and adapting to different lighting needs.

5.Temperature Management

LED drivers monitor and manage the temperature of the LED. They may include features such as thermal regulation to prevent overheating, ensuring the LED operates within safe temperature limits.

6.Protection Mechanisms

LED drivers incorporate protection features to safeguard the LEDs from potential issues. This includes overcurrent protection, overvoltage protection, and short-circuit protection, enhancing the reliability and durability of the lighting system.

7.Compatibility with Control Systems

LED drivers are designed to integrate with various control systems, allowing for centralized management and automation. This compatibility facilitates the implementation of smart lighting solutions and energy-saving strategies.

78LED drivers aim to optimize the overall energy efficiency of the lighting system. They achieve this by minimizing energy losses, adapting to load variations, and providing a stable power supply to the LEDs.

9.Noise Reduction

Some LED drivers include features to reduce electromagnetic interference (EMI) and ensure that the lighting system operates quietly without introducing unwanted electrical noise.

10.Start-Up Performance

LED drivers contribute to the smooth start-up of LED lighting systems, preventing issues like flickering or delayed illumination. This is particularly important for applications where instant and reliable lighting is essential.


Types of LED Drivers

LED Drivers can be categorized into two main types based on their output characteristics:

1.Constant Current LED Drivers

  • Description: These drivers provide a consistent current output, making them well-suited for applications with multiple LEDs connected in series.
    Application: Widely utilized in street lighting, constant current LED drivers ensure uniform illumination across the connected LEDs.

2.Constant Voltage LED Drivers

  • Description: Specifically designed for applications where multiple LEDs are arranged in parallel, constant voltage LED drivers maintain a steady voltage output.
    Application: Commonly employed in decorative or accent lighting setups to deliver reliable and constant voltage to parallel-connected LEDs.

Benefits of LED Drivers in Street Lighting


Energy Efficiency: LED drivers excel in optimizing energy efficiency by converting power with minimal losses and enabling precise control over current, leading to decreased energy consumption.

Longevity: Through the meticulous regulation of current and voltage, LED drivers significantly extend the lifespan of LEDs. This not only minimizes maintenance efforts but also reduces replacement costs over time.

Flexibility and Control: Dimmable LED drivers offer municipalities the flexibility to customize lighting levels according to specific requirements. This not only enhances energy savings but also plays a role in minimizing light pollution.

Environmental Impact: LED drivers play a crucial role in promoting sustainable urban development. By curbing energy consumption and reducing carbon emissions, they align with contemporary sustainability goals, contributing to a positive environmental impact.

Considerations for Selection

Voltage and Current Specifications: Verify that the output voltage and current of the chosen LED driver align with the requirements of the LED luminaires.

Dimming Suitability: If dimming functionality is a preference, opt for LED drivers that are compatible with the designated control system.

Environmental Endurance: Choose LED drivers with suitable IP ratings to endure outdoor conditions, ensuring their reliability and longevity.

Efficiency and Power Factor: Prioritize LED drivers with high efficiency and power factor correction to optimize energy savings and adhere to regulatory standards.

Conclusion


Within the ever-evolving landscape of street lighting, LED drivers play a pivotal role as essential components that empower energy-efficient, controllable, and sustainable illumination. Their capacity to oversee current, transform voltage, and facilitate dimming renders them indispensable in contemporary smart city endeavors. Through the meticulous choice and integration of suitable LED drivers, municipalities can not only realize substantial energy conservation but also actively participate in fostering safer, environmentally conscious, and aesthetically pleasing urban spaces.

Purchase Street Lighting LED Drivers from LED Dirver Supplier

View HVC LED driver

View HVE LED driver

View SCP LED driver

View HVS LED driver

View HVG LED driver

View GEP LED driver


Read more…

In the realm of laparoscopic surgery, the choice between the Hasson and Veress techniques holds significant implications for surgical outcomes. Surgeons and medical practitioners face the ongoing challenge of selecting the most suitable approach based on various factors. In this article, we will explore the Hasson and Veress techniques, providing insights to assist medical professionals in making informed decisions, taking into account considerations like safety, complications, and applicability.

1.Understanding the Veris NeedleTechnique

Description: The Veress Needle technique involves blind insufflation of the abdominal cavity before trocar insertion.
Safety Considerations: Discuss the safety profile, highlighting the potential risks associated with blind insertion and the measures to mitigate complications.

Click here to read: A Complete Guide to Veress Needle

2.The Hasson Technique: A Direct Entry Approach:

Description: The Hasson technique employs a direct entry method with open insertion, providing a clear view of trocar placement.
Safety Considerations: Examine the safety advantages of the open approach, focusing on reduced risk of injuries and complications.

3.Comparative Safety Analysis

Safety Factors: Conduct a detailed safety analysis, comparing complications such as vascular injuries, visceral injuries, and overall safety records for both Veress and Hasson techniques.

4.Complications and Risk Mitigation Strategies

Common Complications: Explore common complications associated with each technique, offering insights into proactive measures for risk mitigation and patient safety.

5.Applicability in Different Patient Populations

Considerations for Patient Groups: Discuss the applicability of Hasson and Veress techniques in diverse patient populations, considering factors such as obesity, previous surgeries, and anatomical variations.

6.Factors Influencing Trocar Placement

Trocar Placement Considerations: Delve into the factors that influence trocar placement decisions, examining how surgical goals and patient conditions impact the choice between Hasson and Veress.

7Recent Advancements and Innovations

Innovations in Laparoscopy: Explore any recent advancements or innovations in both techniques, highlighting improvements in safety, precision, and overall efficacy.

8.Training and Skill Development

Skill Requirements: Provide guidance on the training and skill development necessary for surgeons to master each technique, emphasizing the learning curve and proficiency.

9.Patient Outcomes

Comparative Patient Outcomes: Analyze patient outcomes associated with Hasson and Veress techniques, considering factors like recovery time, postoperative pain, and overall satisfaction.

10.Decision-Making Flowchart for Surgeons

Visual Aid: Create a decision-making flowchart or visual aid that guides surgeons through a step-by-step process in choosing between Hasson and Veress techniques based on specific case parameters.

Conclusion

In the dynamic landscape of laparoscopic surgery, choosing between the Hasson and Veress techniques is a critical decision that demands a nuanced understanding of safety considerations, potential complications, and the unique applicability of each approach. By weighing these factors, surgeons and medical practitioners can make informed decisions tailored to individual patient needs, ultimately contributing to improved surgical outcomes and enhanced patient care.

Read more…

The SUNCOM Power Brand of Waterproof LED Drivers

In the pursuit of a well-lit and efficient environment, the choice of lighting system holds paramount importance. In outdoor or moisture-exposed settings like gardens or swimming pools, the silent champions ensuring reliable and enduring illumination are waterproof electronic LED drivers. SUNCOM recognizes the critical role of selecting the perfect waterproof electronic LED driver tailored to your specific lighting needs. This article delves into the essence of these drivers, their pivotal role in lighting systems, key considerations in their selection, and the exceptional benefits offered by SUNCOM's cutting-edge solutions.

Exploring the Essence of Waterproof Electronic LED Drivers

Waterproof electronic LED drivers stand as the backbone of lighting systems in environments susceptible to moisture and water exposure. These vital components supply power and regulate current, ensuring optimal functionality of LED lights. By converting and stabilizing electrical input, waterproof electronic LED drivers shield LEDs from power fluctuations, guaranteeing their longevity and consistent performance. The careful selection of a reliable and high-quality waterproof electronic LED driver is paramount for achieving efficient and enduring lighting solutions.

Key Factors to Consider when Choosing the Ideal Waterproof Electronic LED Driver

The selection of the right waterproof electronic LED driver demands meticulous attention to various factors. Compatibility with your LED lighting system is crucial to seamless integration and dependable operation. SUNCOM's diverse range of drivers offers versatile options compatible with various LED setups, ensuring flexibility and convenience. Additionally, considering the driver’s voltage and current output is essential, aligning them with the requirements of your LEDs. SUNCOM’s waterproof electronic LED drivers provide precise voltage control and constant current, delivering optimal power for your LEDs, ensuring consistent and flicker-free lighting.

The Exceptional Benefits of SUNCOM’s Waterproof Electronic LED Drivers

Opting for SUNCOM’s waterproof electronic LED drivers unlocks a myriad of advantages for your lighting system. Specifically designed to withstand moisture and water exposure, these drivers offer superior waterproof protection. This guarantees the longevity and reliability of your lighting system, even in challenging outdoor or wet environments. Moreover, SUNCOM’s drivers incorporate advanced safety features, including surge protection, overvoltage, overcurrent, and short circuit safeguards, ensuring utmost protection for your LEDs and peace of mind for your business.

Conclusion

Choosing the right waterproof electronic LED driver is pivotal for creating a robust and efficient lighting system, especially in moisture-prone environments. SUNCOM’s range of waterproof electronic LED drivers stands out for exceptional reliability, efficiency, and safety features. Illuminate your space with confidence, knowing that SUNCOM’s waterproof electronic LED drivers will empower your lighting system to thrive in even the most challenging conditions. Experience the excellence of SUNCOM’s solutions and witness the transformative impact on your lighting environment.

Read more…

Top 10 Bag Manufacturers in China

Are you planning to establish your own bag business or wholesale bags? If so, exploring handbag manufacturers in China is your best bet for a successful venture. Compared to other countries, China offers numerous advantages, including competitive pricing, large-scale manufacturing capabilities, a skilled workforce, and efficient transportation networks. To help you make an informed decision, we have carefully evaluated and compiled our top eight guides. These guides offer a quick comparison and in-depth review of each bag manufacturer in China. By reading our comprehensive guide, you can make the smartest business decision and pave the way for a thriving bag enterprise.
 

1. Dongguan Xinhui Accessories Co., Ltd

 
cnxh-bag logo
 
Dongguan Xinhui Accessories Co., Ltd. is a reputable bag manufacturer established in 2006, boasting over 16 years of expertise in the industry. Based in Dongguan City, Guangdong Province, the company enjoys strategic proximity to two international airports and two major shipping ports, facilitating efficient logistics. With a skilled workforce of over 80 professionals, including dedicated design and sales teams, Xinhui excels in producing a wide range of high-quality bags, including fashion handbags, messenger bags, cosmetic bags, travel bags, jewellery bags, cooler bags, mummy bags, shopping bags, purses, and more. The company prides itself on providing customized solutions and has extensive experience in OEM and ODM projects.
 

2. HONEYOUNGBAG

 
honeyoungbag logo
 
Established in 1998, Anhui Honeyoung Enterprise Co., Ltd. is a leading Chinese company specializing in exporting bags, stationery, exercise books, and cultural & educational products. In 2008, the company expanded its operations with the establishment of Anhui Honeyoung Travelling Products Co., Ltd., dedicated to manufacturing backpacks, traveling bags, promotional bags, school bags, rucksacks, and various other types of bags. With over 300 advanced production machines and a team of 300+ professionals, including skilled designers, researchers, and inspectors, the company ensures high-quality products. Their annual gross revenue has reached an impressive 20 million, and they boast various departments such as Design, Marketing, Sales, Finance, Quality Control, and Documentation.
 

3. ORIENTBAG

 
orientbag logo
 
Established in 1983, Orient is a renowned bag manufacturer (OEM) with its roots in China. Founded by Ricky Li, a determined Hong Kong businessman, the company started in Fujian with 50 employees and a small rented space near a local high school. Today, Orient has grown into a multinational manufacturing group with six plants spanning China, Cambodia, and Myanmar. With a dedicated workforce of 1000 employees, the production area now spans an impressive 46,000 square meters. Throughout its journey, Orient has maintained its commitment to producing quality bags at competitive prices, serving clients from small businesses to multinational corporations. Orient is not just a bag manufacturer but also a trustworthy partner and caring employer, upholding values of quality, integrity, and employee well-being.
 

4. ISOCOOLBAG

 
isocoolbag logo
 
Xiamen Goldenway Garments & Bags Co., Ltd. is a leading manufacturer of garments and bags with an impressive experience of over 20 years. With a self-built factory spanning 18,000 square meters and a dedicated workforce of around 100 skilled workers, the company enjoys better control over cost, quality, and delivery time. Situated in the Hai Cang area, the factory benefits from its strategic location, being just 20 minutes from the Subway station and 30 minutes from Xiamen Airport. The company operates four efficient production lines and specializes in outdoor sports bags, laptop bags, school bags, canvas bags, Kraft paper bags, cooler bags, and more. With a monthly capacity of 80,000-150,000 pieces, Xiamen Goldenway's factory has passed rigorous audits like Sedex 4.0 and Disney.
 

5. JDHANDBAGFACTORY

 
jdhandbagfactory logo
 
J.D. Handbag Factory, a branch of J.D. Leather Goods, is a prominent handbag manufacturer in China known for crafting fashionable and superior-quality handbags. With a professional management and development team, the company produces a monthly output of 80,000 units. Committed to providing exceptional customer service, J.D. Handbag Factory offers a wide range of exquisite handbags and tailors solutions to meet individual customer needs. Their dedication to personalization extends to private custom services, enabling each customer to create their unique brand of handbags. With a focus on quality, innovation, and customer satisfaction, J.D. Handbag Factory stands as a leading name in the handbag manufacturing industry.
 

6. BEANBING

 
beanbing logo
 
Established in 2015, Guangzhou Zhongding Bag Company is a reputable manufacturer located in Guangzhou, Guangdong, China. Specializing in women's and men's bags, as well as various leather accessories like small leather goods, leather labels, crossbody bags, gift bags, shopping bags, totes, wallets, clutches, and cosmetic purses. The company offers a diverse range of materials, including vegan leather, genuine leather, nylon, canvas, PVC/TPU, and chrome-tanned leathers. With a focus on high-quality customized bag services, Guangzhou Zhongding has emerged as a leading bag company in China. They serve independent fashion brands, large companies, and e-commerce retailers by managing the entire supply chain process, from design to delivery.
 

7. TKSTARBAG

 
tkstarbag logo
 
Founded in 1995, Quanzhou Twinkling Star Handbag Co., Ltd is situated in Quanzhou, a crucial city on The Belt & Road with excellent infrastructure and convenient transportation links. From its humble beginnings, the company has evolved into a leading bags supplier in China. Twinkling Star's success is fueled by a united team with a common goal – to achieve growth and prosperity for both workers and the enterprise, ensuring a happier life for all employees. With a focus on top-quality bags, the company specializes in R&D, production, and marketing of business and travel bags, fashion and leisure bags, and recycled bags. Adhering to the principle of "Quality First and Customers First," Twinkling Star offers customization options in materials, logos, colors, sizes, and packaging. 
 

8. TOTEBAGFACTORY

 
totebagfactory logo
 
This customer-centric company was founded with the mission of providing convenience to its clients. Catering to companies, small businesses, and hardworking individuals, they offer a wide range of quality items at wholesale prices. Their passion for the business goes beyond routine; they live and breathe their work, dedicated to supplying top-notch products. From Cotton Canvas Tote Bags to Drawstring Bags - Backpacks, Wine Bags, Laundry Bags, and more, this company takes pride in offering diverse options to meet every need. Committed to serving their customers with excellence, they find joy in delivering exceptional service and products, making them a reliable and preferred choice for wholesale purchases.


9. Slbag

slbag logo
 
The company has been in business for more than 16 years and has 20 factories in Guangzhou, producing around 500,000 bags per year. If you are looking for ladies’ leather handbag manufacturers in China, SLBAG can provide you with wholesale leather bags at affordable prices. Besides offering OEM and ODM services, they can also provide you with samples based on your preferences. 

In addition to their customized leather bags, they also offer customized packaging. On their website, you can find information about the various leather bag materials and logo options. SLBAG manufactures both genuine and vegan leather bags. Leather types include vegetable-tanned leather, crocodile leather, and pebbled leather. In addition to embroidery logos, metal logos, embossed logos, and more, SLBAG offers more than 3,500 styles. Customized logos and packaging require a minimum order quantity of 500 pieces.
 

10. Sitoy

sitoy logo
 
Sitoy Group, a famous Chinese bag manufacturer, has been listed on the Main Board of The Stock Exchange of Hong Kong since 2011. They specialize in crafting bags for renowned designer brands like Guess and Prada. Sitoy Group, along with its associated companies, holds a significant position in China's market for branded bridge to luxury items, small leather bags, and travel accessories. Their reputation is built on delivering quality, flexibility, efficiency, and innovation to some of the world's top fashion brands.

The group operates through two primary business segments. The manufacturing segment is responsible for producing handbags and various products for brands owned by other companies. They maintain a strong retail presence, with nearly 100 points of sale across Hong Kong, Macau, and mainland China. Furthermore, they are continually expanding their operations into other cities and exploring e-commerce opportunities. Their online and offline sales points are on the rise. If you're interested in importing fashionable handbags from Sitoy Group in Guangzhou, it's advisable to consider a trusted sourcing agent like MatchSourcing to ensure the products reach you in pristine condition.
 
Click here to read the original article.
Read more…
In industrial and commercial settings, safety is paramount. The choice of flooring or grating plays a crucial role in preventing accidents and ensuring a secure working environment. Perf-O Grip Safety Grating is a trusted solution that excels in offering an optimal balance between slip resistance, durability, and versatile applications. In this guide, we'll delve into the key features and benefits of Perf-O Grip Safety Grating, shedding light on why it's a top choice in various industries.
 

Perf-O Grip Safety Grating

 
The Perf-O Grip grating is a single-piece metal plank that is made of a single sheet that has formed side channels at its edge. A perforated button surface provides a slip-resistant walking surface that is accessible in all directions. There is an open area of approximately 35% which allows fluids, ice, and mud to move freely through the grating. Consequently, the walking surface of Perf-O Grip is flexible and cushioned, which in turn reduces worker fatigue and increases plant productivity.
 

Benefits of Perf-O Grip

 
Perf-O Grip is a specialized safety grating known for its remarkable features and advantages. Its benefits extend to various industries and applications, making it a preferred choice for enhancing workplace safety. 
 
1.Exceptional Slip Resistance:
 
Perf-O Grip is designed to provide unmatched slip resistance. Its pattern of small, round holes and raised perforated buttons creates a textured surface that enhances traction. This quality is particularly valuable in environments where the risk of slips and falls is a concern, especially in wet or oily conditions.
 
2.Durability and Longevity:
 
Perf-O Grip is constructed from durable materials like steel, aluminum, or stainless steel. This robust construction ensures the safety grating can withstand the test of time and resist wear, corrosion, and impact. It's well-suited for both indoor and outdoor applications, including those exposed to harsh weather conditions.
 
3.Versatile Applications:
 
Perf-O Grip's adaptability and versatility make it suitable for a wide range of applications. It can be used in construction sites, transportation hubs, manufacturing facilities, utilities, offshore platforms, and more. Its customization options, including material, size, and finish, allow it to be tailored to specific project requirements.
 
4.Comfort and Safety:
 
In addition to providing slip resistance, Perf-O Grip offers a comfortable and secure walking surface. Its perforations allow for drainage, reducing the risk of standing water, which can lead to slips and falls. This combination of comfort and safety is highly valued in environments with high foot traffic.
 
5.Compliance with Safety Standards:
 
Perf-O Grip is designed to meet safety standards and regulations. This ensures that it complies with industry-specific safety requirements, providing peace of mind to businesses and project managers.
 
6.Easy Installation:
 
Perf-O Grip is relatively easy to install, making it a practical choice for projects with time constraints. Its straightforward installation process saves both time and labor costs.
Reduces Maintenance:
 
Due to its durability and resistance to wear and corrosion, Perf-O Grip requires minimal maintenance. This means lower ongoing costs and fewer disruptions to business operations.
 
7.Proven Track Record:
 
Perf-O Grip has a history of success in various industries and applications. Its proven track record of enhancing safety and performance makes it a reliable choice for businesses and projects.
 
8.Cost-Effective Safety Solution:
 
The long-term durability and reduced maintenance needs of Perf-O Grip contribute to its cost-effectiveness. It's an investment in safety that offers lasting benefits.
 
perf-o grip walkway
 

Applications of Perf-O Grip Safety Grating

 
Here are some common applications of Perf-O Grip Safety Grating:
 
1.Perf-O Grip Walkway: Perf-O Grip is often used as a secure walking surface on elevated walkways, catwalks, and pedestrian bridges. Its slip resistance and drainage capabilities make it ideal for ensuring safe passage in industrial and commercial environments.

2.Perf-O-Grip Stair Treads: Stairs are high-risk areas for slips and falls, but Perf-O Grip Safety Grating provides secure footing on stair treads. It is used in both indoor and outdoor staircases to enhance safety.

3.Platforms and Mezzanines: In manufacturing facilities, warehouses, and industrial settings, platforms and mezzanines are common. Perf-O Grip is used to create durable and slip-resistant platforms, ensuring the safety of workers and visitors.

4.Construction Sites: Construction sites often involve working at elevated heights. Perf-O Grip Safety Grating is employed on scaffolding, access platforms, and temporary walkways to provide a secure footing for construction workers.

5.Transportation: Perf-O Grip is used in transportation hubs, such as airports, train stations, and bus terminals. It provides safe and slip-resistant flooring for passengers as they move through these high-traffic areas.

6.Utilities and Power Plants: In utility facilities and power plants, where heavy machinery and equipment are present, Perf-O Grip Safety Grating offers a durable and reliable safety solution. It can be used on walkways, access platforms, and maintenance areas.

7.Offshore and Marine: On ship decks and offshore platforms, where exposure to saltwater and harsh weather conditions is common, Perf-O Grip's corrosion resistance and durability make it a preferred choice for enhancing safety in marine environments.

8.Oil and Gas Industry: In oil refineries, drilling rigs, and processing plants, Perf-O Grip Safety Grating is used to provide secure walkways and work platforms in areas where hazardous materials are present.

9.Industrial Facilities: Perf-O Grip is suitable for a wide range of industrial applications, including chemical plants, food processing facilities, and manufacturing plants. It enhances worker safety in areas with high foot traffic and potential slip hazards.

10.Water Treatment Plants: In water treatment and wastewater facilities, Perf-O Grip Safety Grating is used on walkways, catwalks, and access points to ensure worker safety in damp and potentially slippery conditions.
 

In Summary

 
Perf-O Grip Safety Grating is a leading choice when it comes to ensuring safety, durability, and versatility in a wide array of applications. With unmatched slip resistance, outstanding durability, and adaptability, it excels in providing a secure environment in industrial, commercial, and outdoor settings. Whether you're looking for a dependable solution for walkways, stair treads, or platforms, Perf-O Grip Safety Grating is a sound investment in safety.

Incorporating Perf-O Grip Safety Grating into your projects means prioritizing safety without compromising on durability or flexibility. Choose a trusted solution that has proven its mettle in various industries and enjoy the peace of mind that comes with a safer workplace.
 
Huijinmaterials has a full portfolio of safety grating solutions to support a wide variety of applications.
 
click hereto read the original article.
Read more…

Radial Capacitor Vs Axial Capacitor

Capacitors, fundamental components in electronic circuits, play a crucial role in energy storage and signal processing. They come in various types and sizes, each designed for specific applications.Axial and radial lead capacitors are two common types of capacitors that differ in their lead orientation. In this article, we will explain the differences between axial and radial lead capacitors, including their construction, applications, advantages, and disadvantages.
 

What Is Axial Lead Capacitor?

 
An axial lead capacitor is a type of capacitor in which the two metallic terminals are aligned along the same axis, usually in a cylindrical or tubular shape. Copper leads protrude from the capacitor body at either end and are usually tinned or silver-plated. Ceramic, polyester, polypropylene, and other materials are commonly used to make capacitor dielectrics, and metal foil or film is used to make electrodes.

Axial lead capacitors are commonly used in electronic circuits for filtering, decoupling, timing, and other purposes. Their size is relatively small, so they are easily mounted on printed circuit boards (PCBs) or soldered to wires or terminals. They have the following advantages:
 
Low inductance: The utilization of an axial lead configuration translates into reduced inductance when compared to various capacitor types, rendering them advantageous for high-frequency applications.

High reliability: Axial lead capacitors are characterized by their sturdy construction, granting them the ability to endure elevated temperatures, shock, and vibration. This robustness makes them well-suited for deployment in challenging and demanding environments.

High capacitance values: Axial lead capacitors are capable of achieving substantial capacitance values, extending to several thousand microfarads. This attribute renders them ideal for applications requiring significant energy storage capabilities.
 
An axial lead capacitor has the following disadvantages:

Restricted voltage rating: Axial lead capacitors are equipped with a limited voltage rating, commonly extending to a few hundred volts. This limitation constrains their application in high-voltage circuits.

Narrow temperature range: Axial lead capacitors come with a confined temperature range, typically up to 125°C. This range might not meet the requirements of certain industrial or automotive applications with more extensive temperature demands.

Polarization: Some axial lead capacitors exhibit polarization, necessitating precise connection of their positive and negative terminals within the circuit. This requirement may entail supplementary circuitry or labeling to prevent incorrect connections.
 

What Is Radial Lead Capacitor ?

 
Typically, radial lead capacitors are shaped as discs or cylindrical tubes with two metallic terminals oriented perpendicular to the capacitor body. A capacitor dielectric and electrodes are similar to those used in axial lead capacitors. The leads are usually tinned or silver-plated copper wire and are located at opposite sides of the capacitor body.

The use of radial lead capacitors in electronic circuits for filtering, decoupling, timing, and other purposes is also common. Radial lead capacitors are slightly larger than axial lead capacitors and are easy to mount on PCBs or solder onto wires or terminals. Some of their advantages include:
 
Elevated voltage rating: Radial lead capacitors are capable of achieving a higher voltage rating than axial lead capacitors, frequently reaching several thousand volts. This elevated rating renders them well-suited for high-voltage circuits.

Extensive temperature range: Radial lead capacitors exhibit the ability to function across a broad temperature spectrum, typically extending up to 150°C or beyond. This adaptability makes them a fitting choice for industrial or automotive applications with diverse temperature requirements.

Non-polarized: The majority of radial lead capacitors are non-polarized, meaning they can be connected to the circuit in any orientation. This simplifies their utilization and reduces the risk of incorrect connections.
 
An radial lead capacitor has the following disadvantages:
 
Bulky Design: Radial lead capacitors tend to have a relatively bulky design, which can pose challenges when space is limited within electronic circuits.

Mounting Limitations: Their design necessitates horizontal PCB mounting, which may not be suitable for all circuit layouts, limiting their flexibility in certain applications.

Lower Voltage Ratings: In comparison to some other capacitor types, radial lead capacitors often have lower voltage ratings, which restricts their use in high-voltage applications.
 

What Is the Difference Between Axial and Radial Lead Capacitors?

 
Axial and radial lead capacitors are two common types of electrolytic capacitors, and they differ primarily in the orientation of their leads (the metal wires extending from the capacitor). Here are the key differences between axial and radial lead capacitors:
 
Axial Lead Capacitors:
 
  1. Lead Orientation: Axial capacitors have two leads emerging from opposite ends of the capacitor body. This orientation allows them to be inserted through holes in a printed circuit board (PCB) in a straight line.
  2. Circuit Mounting: Axial lead capacitors are ideal for through-hole mounting on a PCB. They are inserted into holes on the board and soldered in place.
  3. Compact Design: Axial capacitors typically have a more cylindrical, compact design. This design can be advantageous when space is limited.
  4. Polarized and Non-Polarized: Axial capacitors can be either polarized (with a positive and a negative lead) or non-polarized (with two equivalent leads). Non-polarized axial capacitors can be connected in any orientation, while polarized ones must be connected with the correct polarity.
  5. Applications: They are commonly used in applications where the leads need to pass through the PCB, such as in vintage electronics, audio equipment, and older PCB designs.
 
Radial Lead Capacitors:
 
  1. Lead Orientation: Radial capacitors also have two leads, but both leads emerge from the same end of the capacitor body. The leads are oriented in a radial (side-by-side) fashion.
  2. Circuit Mounting: Radial lead capacitors are typically mounted horizontally on the surface of the PCB. This surface mounting style is different from axial capacitors, which penetrate through the PCB.
  3. Design and Size: Radial capacitors often have a bulkier design, which may not be suitable for applications with limited space on the PCB.
  4. Non-Polarized: Most radial capacitors are non-polarized, meaning they can be connected in any orientation without regard to polarity.
  5. Applications: Radial lead capacitors are commonly used in a wide range of electronic devices, including power supplies, amplifiers, and various electronic equipment.
 
In summary, the primary difference between axial and radial lead capacitors lies in the orientation of their leads and how they are mounted on a circuit board. The choice between the two depends on the specific requirements of your circuit design and available space on the PCB. Additionally, the polarity of the capacitor (polarized or non-polarized) is an important consideration when selecting the appropriate type for your application.

As an electronic components supplier, Joinwinchips provides a wide range of radial leaded capacitors to cater to your specific needs across various applications. We welcome you to get in touch with us to explore our offerings and find the perfect capacitors for your projects.
Read more…

Imagine harnessing the limitless power of the sun to fuel your home, power your appliances, and even contribute excess energy back to the grid. It's a vision shared by many as solar energy continues to gain prominence as a clean, sustainable power source. If you've taken the plunge into the world of solar panels or are considering it, you're already on a path to a greener, more energy-efficient future.

However, as you delve deeper into the realm of solar energy, you'll encounter a critical component that often remains in the shadows – the solar panel charge controller. It's a small, yet mighty device that plays a pivotal role in ensuring your solar panel system operates efficiently and effectively.

In this comprehensive guide, "Solar Panel Charge Controller: Everything You Need to Know," we will shed light on this often-overlooked hero of your solar setup. From understanding the fundamental purpose of a charge controller to demystifying the necessity of one for each solar panel, and from calculating the number of solar panels your charge controller requires to choosing the perfect controller for your system, we've got you covered.

So, whether you're a solar enthusiast eager to optimize your existing setup or a beginner looking to take the first step toward a greener tomorrow, let's embark on a journey to unravel the mysteries and intricacies of solar panel controllers. By the end of this article, you'll be armed with the knowledge needed to make informed decisions about your solar energy system and unleash its full potential.

Let's begin by demystifying the role of the solar panel charge controller and why it's a crucial component of your solar power system.

What Is Solar Panel Charge Controller?


A solar panel charge controller, often simply referred to as a charge controller, is a critical component of a solar power system. Its primary function is to regulate and manage the power flow between the solar panels, the battery or batteries, and the electrical loads in a solar energy system. This essential device ensures the efficient and safe operation of the entire system.


What Does a Charge Controller Do for a Solar Panel?


Here's what a charge controller does for a solar panel system:


  • Overcharge Protection: One of the primary functions of a charge controller is to protect the batteries in the solar panel system from overcharging. When the batteries are fully charged, the charge controller reduces or disconnects the flow of electricity from the solar panels to prevent the batteries from being overcharged. Overcharging can damage the batteries and reduce their lifespan.
  • Deep Discharge Protection: Charge controllers also prevent deep discharging of batteries. They monitor the battery voltage and disconnect the load when the battery voltage drops to a certain predefined level. Deep discharging can harm batteries, so the charge controller ensures that the batteries remain at a safe voltage level.
  • Battery Maintenance: Charge controllers help maintain the overall health of the batteries by ensuring they are charged properly. This extends the lifespan of the batteries, reducing the need for frequent replacements.
  • Optimizing Power Output: Charge controllers optimize the power output from the solar panels by regulating the voltage and current supplied to the batteries. They ensure that the solar panels operate at their maximum power point, which results in efficient energy conversion.
  • Load Control: Some charge controllers have the capability to control and manage the electrical loads in the system. This can be useful for turning on or off specific appliances or loads based on the battery's state of charge.
  • Temperature Compensation: In certain environments, temperature can affect the performance of the solar panels and batteries. Advanced charge controllers may incorporate temperature sensors to adjust the charging parameters based on the prevailing temperature conditions.

Does Each Solar Panel Need a Charge Controller?


Charge controllers may not be a requisite component for every solar panel system. However, they become indispensable when dealing with off-grid solar-plus-storage setups. Their primary role is to ensure that batteries do not suffer from overcharging or deep discharging, especially during periods of solar panel inactivity. If your solar system is grid-tied, the need for a charge controller diminishes since surplus power is automatically channeled away from your battery system and back into the grid.


How to Choose the Best Solar Charge Controller for Your System?


Choosing the right solar panel charge controller for your system is essential to ensure efficient and safe operation. Here's a step-by-step guide on how to make the best choice:

1.Identify Your System Type:

Determine whether your solar panel system is grid-tied or off-grid. Grid-tied systems typically don't require a charge controller because excess power is sent back to the grid. Off-grid systems with battery storage are the primary candidates for charge controllers.


2.Determine Battery Voltage:

Find out the voltage of your battery bank. Charge controllers are available in various voltage ratings, so it's crucial to select one that matches your battery voltage. Common battery voltages include 12V, 24V, and 48V.
 
3.Check Solar Panel Voltage:

Examine the voltage of your solar panels. Charge controllers must be compatible with the voltage produced by your solar panels. If you have multiple panels connected in series, the voltage may be higher.
 
4.Consider Battery Type:

Know the type of batteries you're using, such as lead-acid, lithium-ion, or another type. Some charge controllers are specifically designed to work with certain battery chemistries, so ensure compatibility.
 
5.Select Charge Controller Type:

Choose between two main types of charge controllers: Pulse Width Modulation (PWM) and Maximum Power Point Tracking (MPPT). MPPT controllers are more efficient and suitable for systems with higher voltage panels, while PWM controllers are cost-effective for smaller setups.
 
6.Assess System Size and Load:

Consider the overall size of your solar panel system and the electrical loads it will support. This information helps you determine the current capacity (in amps) your charge controller should handle. Make sure the controller's current rating matches or exceeds your system's requirements.
 
7.Environmental Considerations:

Evaluate the environmental conditions of your installation site, especially if it experiences extreme temperatures or weather conditions. Some charge controllers are designed to operate in harsh environments and can withstand temperature variations.
 
8.Budget Constraints:

Keep your budget in mind. MPPT controllers are generally more expensive than PWM controllers, so choose one that aligns with your financial constraints.
 
9.Consider Future Expansion:

If you plan to expand your solar panel system in the future, ensure the charge controller can accommodate the increased capacity. Select a controller with room for growth.
 
10.Seek Professional Advice:

If you're uncertain about your choice, consult with a solar energy professional or contact the charge controller manufacturer for expert guidance.
 
Helios-ne PWM solar charge controllers are available in a variety of models, each of which is associated with a specific charge rating and other characteristics. Click on any of the products to learn more about their charges and ratings, battery support, meter display, and load/lighting control functions.
 
View Our Full List of Charge Controller Models
Read more…
In electronics assembly, reflow soldering involves applying solder paste to contact pads on printed circuit boards (PCBs). As the solder paste undergoes heating in order to establish electrical connections, it serves as the medium for attaching electrical components to the board. During the process of reflowing, the solder paste is heated in order to establish electrical connections.
 
The main difference between reflow soldering and traditional soldering is the absence of a soldering iron. Instead, heated air is used to liquefy the solder and facilitate component integration.

All components of the assembly are conveyed through a reflow oven equipped with an infrared lamp, which provides the heat needed to melt solder and bond electrical elements.

Moreover, the infrared lamp's temperature can be precisely controlled. By gradually increasing the temperature, a sudden rise in temperature can compromise solder joints and make them vulnerable to thermal shock. Thermal shock-related issues can be avoided through the implementation of reflow soldering.

In electronics assembly, reflow soldering involves applying solder paste to contact pads on printed circuit boards (PCBs). As the solder paste undergoes heating in order to establish electrical connections, it serves as the medium for attaching electrical components to the board. During the process of reflowing, the solder paste is heated in order to establish electrical connections.
 
The main difference between reflow soldering and traditional soldering is the absence of a soldering iron. Instead, heated air is used to liquefy the solder and facilitate component integration.

All components of the assembly are conveyed through a reflow oven equipped with an infrared lamp, which provides the heat needed to melt solder and bond electrical elements.

Moreover, the infrared lamp's temperature can be precisely controlled. By gradually increasing the temperature, a sudden rise in temperature can compromise solder joints and make them vulnerable to thermal shock. Thermal shock-related issues can be avoided through the implementation of reflow soldering.
 
In this comprehensive guide, we'll unravel the mysteries surrounding reflow soldering, exploring its inner workings, temperature requirements, and the tools that make it all possible. Join us as we delve into the pros of reflow soldering, and discover the essential tips for a flawless soldering process.
 

What Is Reflow Soldering?

 
Reflow soldering stands as the prevailing soldering technology within the microelectronics industry, primarily for the assembly of Surface Mounted Devices (SMDs). This process plays a pivotal role in the large-scale production of Surface Mount Devices, serving to establish their electrical and mechanical connections to Printed Wiring Boards (PWBs).

Preceding the actual reflow soldering procedure, a series of essential steps are executed. These include the application of solder paste onto the designated contact surfaces or pads of the PWB and the precise placement of components onto the deposited solder paste. Subsequently, the reflow process is initiated, subjecting the entire assembly to elevated temperatures surpassing the melting point of the solder alloy. As the temperature gradually decreases, the solder alloy solidifies, engendering the formation of robust and dependable solder joints.
 

Pros of Reflow Soldering

 
  • It is preferable for SMT assembly
  • It induces minimal thermal shock.
  • It is one of the most reliable soldering technique
  • It has options for limited soldering
  • It requires only a minimum level of monitoring
  • It results in reduced material wastage.
  • Specific PCB areas can be soldered using this technique.
 

Reflow Soldering Process and Tips

 
Reflow soldering stands as the foremost and extensively employed technique for connecting surface mount technology (SMT) components to a printed circuit board (PCB). This procedure centers on establishing satisfactory solder connections through the utilization of preheated components, affording the opportunity to melt the solder without incurring damage from excessive heat.

In order to craft an appropriate reflow profile, thermocouples are affixed to a basic assembly, often utilizing high-temperature solder, positioned at various locations to gauge the temperature variations across the PCB.

Please take note of the following recommendation: It is advisable to place a thermocouple on the pad located at the front edge of the printed board and another thermocouple towards the board's center. This method of assessing temperature differentials across the board through thermocouples is commonly referred to as "DeltaT."

The reflow profile encompasses four key phases of the process that require your vigilant consideration:
 
  • Proheat- As part of this process, the printed circuit board, components, and solder are heated to a specific dwell temperature or soak temperature, and the main aspect is not to heat the components or solder too rapidly (usually no more than +2 degrees per second). As a result of fast heating, component defects may occur, such as slattering or cracking of solder paste.
  • Soak- During this part of the process, the components are allowed to reach the required temperature before going on to the next reflow stage. The soaks usually last between 60 and 120 seconds.
  • Reflow-To form a liquid solder paste in the oven, the temperature is raised above its melting point. To ensure that "wetting" occurs between the printed board and the components, the solder must be held above the melting point temperature for a period of time (time above liquidus). To prevent brittle solder joints, the time should not exceed 30 to 60 seconds. It is also important to know that the peak temperature has to be strictly controlled as many of the components can fail if exposed to excessive heat. If the reflow profile does not provide sufficient heat, it will result in bad solder joints, which is one of the most common defects.
  • Cooling- It is not healthy to heat the assembly rapidly, so make sure to never cool it down too rapidly, because it could cause malfunctions. The recommendation is to keep cooling above 3 degrees a second.
 

Reflow Soldering Temperature Requirements

 
The printed circuit board (PCB) industry encompasses a diverse array of components that necessitate specific reflow temperatures.

In the case of Sn/Pb solders, the melting point temperature generally reaches its zenith between 215°C to 245°C, with a duration of approximately 20-60 seconds above 183 degrees.

For lead-free soldering, the reflow temperature should attain 260°C.

Reflow soldering ovens commonly feature distinct temperature zones, with periodic adjustments in temperature following a predetermined curve. These adjustments are made in accordance with the assembly's particulars and temperature prerequisites.

Hvttec has a reflow soldering oven with 8 temperature zones which can be used for reflow soldering.

Suitable Machines and Equipment

 
The preferred method for reflow soldering involves employing an industrial convection oven to attach surface mount technology (SMT) components onto a printed circuit board (PCB).

A wide array of reflow soldering machines exists, each specializing in distinct designs, processing speeds, materials, and PCB specifications. It is crucial for the oven to be of an appropriate size to seamlessly accommodate the production pace of the pick-and-place equipment.

Here's a method for calculating the production line speed:
 
reflow soldering line speed
 
Once you have determined the line speed, it becomes straightforward to identify the appropriate chamber and heated length necessary to meet your workflow demands. If you encounter any issues, you can seek assistance from Hvttec.
 

Best Reflow Soldering Machine Manufactuer--Hvttec

 
Hvttec is the leading manufacturer of reflow soldering machines. The company's reflow soldering ovens meet all customer requirements. With them, you can receive assemblies that exceed your expectations.

Here are some reasons why to choose Hvttec:
 
  • They utilize nitrogen reflow soldering to efficiently avert oxidation.
  • They possess the capability to reflow solder a wide range of printed circuit boards, including those that are lead-free.
  • They employ cutting-edge machinery and technology, including 30 Panasonic and Yamaha SMT lines, German ERSA selective wave soldering, solder paste inspection using 3DSPI, AOI (Automated Optical Inspection), X-ray, and more.
  • Prior to assembly, they conduct a meticulous and complimentary review of your bill of materials.
  • They perform functional testing of the PCBA (Printed Circuit Board Assembly) before delivering it to you.
  • They offer comprehensive component sourcing services, ensuring all the necessary components in your bill of materials are readily available for assembly.
 

Conclusion

 
Reflow soldering demands the utmost precision and meticulous attention. If you've gone through the entire article, you should now have a comprehensive understanding of nearly every facet of reflow soldering.

Hvttec offers top-notch PCB assembly services characterized by precise component placement and flawless soldering. Whether your order is small or substantial, Hvttec is equipped to handle your assembly requirements. If you have any reservations, don't hesitate to click and request a free online quote.
Read more…
Plank grating is a versatile and essential element in various industrial and architectural settings. Its durability, safety features, and adaptability make it a preferred choice for many applications. In this comprehensive guide, we will delve into the world of plank grating, exploring its various types, diverse applications across different industries, and providing step-by-step instructions on how to install it effectively.
 

What Is Plank Grating?

 
Plank grating, also known as safety grating or safety plank, is a grid-like structure consisting of metal planks with punched holes or raised perforations. These perforations provide enhanced traction, making it an ideal solution for areas where slip and fall accidents can be a concern.
 

A Comprehensive Guide to Plank Grating: Types, Uses, and Installation

2023-11-07
Plank grating is a versatile and essential element in various industrial and architectural settings. Its durability, safety features, and adaptability make it a preferred choice for many applications. In this comprehensive guide, we will delve into the world of plank grating, exploring its various types, diverse applications across different industries, and providing step-by-step instructions on how to install it effectively.
 

What Is Plank Grating?

 
Plank grating, also known as safety grating or safety plank, is a grid-like structure consisting of metal planks with punched holes or raised perforations. These perforations provide enhanced traction, making it an ideal solution for areas where slip and fall accidents can be a concern.
 
walkway-plank- grating
 

Types of Plank Grating

 
Plank grating comes in various types, each designed to meet specific needs and conditions. Here are some common types of plank grating:
 
  1. Diamond-Strut GratingThis type of plank grating features diamond-shaped openings in its surface. These diamond-shaped openings provide excellent slip resistance, making it a preferred choice for areas where slip and fall accidents can be a concern. Diamond-strut grating is often used in outdoor environments, industrial settings, and other places where safety is a top priority.
  2. Perf-O Grip GratingPerf-O Grip grating is characterized by round perforations in its surface. This type of plank grating is suitable for applications that require drainage and ventilation. It is commonly used in environments where moisture and airflow are important considerations, such as wastewater treatment plants and marine settings.
  3. Traction Tread Grating: Traction Tread grating is known for its serrated surface, which provides maximum slip resistance. It is an excellent choice for applications that require secure footing, such as walkways, stair treads, and platforms. This type of plank grating is often used in industrial and commercial settings.
  4. Heavy-Duty Plank Grating: As the name suggests, heavy-duty plank grating is designed to withstand high levels of foot traffic and heavy loads. It is commonly used in industrial settings, on factory floors, and in areas where durability and load-bearing capacity are critical. This type of plank grating is engineered to provide long-lasting performance in demanding environments.
 

Materials of Plank Grating

 
Plank grating can be made from various materials, and the choice of material often depends on the specific requirements of the application, including factors like load-bearing capacity, corrosion resistance, and cost. Here are some common materials used to manufacture plank grating:
 
  1. Steel: Steel plank grating is one of the most common materials used. It offers exceptional strength and durability, making it suitable for heavy-duty applications. Steel plank grating can be further categorized into carbon steel and stainless steel. Carbon steel is strong and cost-effective, while stainless steel provides added corrosion resistance, making it ideal for environments where exposure to moisture and corrosive substances is a concern.
  2. Aluminum: Aluminum plank grating is lightweight, corrosion-resistant, and often chosen for applications where weight reduction is a priority. It is commonly used in environments where moisture is present, such as in wastewater treatment plants or marine settings. Aluminum plank grating is also favored for architectural applications due to its aesthetic appeal and versatility.
  3. Fiberglass: Fiberglass-reinforced plastic (FRP) plank grating is known for its corrosion resistance, making it suitable for applications where exposure to chemicals, moisture, and corrosive elements is a concern. FRP plank grating is lightweight, making it easy to handle and install. It is often used in chemical processing facilities, water treatment plants, and areas with aggressive chemical exposure.
  4. Galvanized Steel: Galvanized steel plank grating is created by coating carbon steel with a layer of zinc to provide corrosion resistance. It is commonly used in outdoor settings, as the zinc coating protects the steel from rust and corrosion. Galvanized steel plank grating is cost-effective and offers robust performance in various applications.
  5. Plastic: Plastic plank grating is lightweight and resistant to corrosion, making it an excellent choice for environments where moisture and chemical exposure are concerns. It is often used in settings like food processing plants, pool areas, and other places where hygiene and slip resistance are important.
  6. Other Materials: Depending on specific requirements, plank grating can be manufactured from other materials like copper, brass, or special alloys. These materials may be chosen for their unique properties and applications, but they are less common compared to the materials listed above.
 

Applications Across Industries

 
Plank grating finds its applications in various industries, owing to its durability and safety features. Here are some of the key sectors where plank grating plays a vital role:
 
1. Industrial Facilities

Plank grating is extensively used in industrial facilities for catwalks, platforms, and mezzanines. Its slip-resistant surface ensures the safety of workers even in challenging conditions.
 
2. Commercial Buildings

In commercial buildings, plank grating is employed for stair treads, flooring in areas prone to moisture, and walkways. Its aesthetic appeal and durability make it a versatile choice.
 
3. Transportation

In the transportation sector, plank grating is used for bridge decks, pedestrian walkways, and railway platforms. Its ability to withstand heavy loads and harsh weather conditions makes it a top choice.
 
4. Oil and Gas

The oil and gas industry relies on plank grating for its offshore platforms and drilling rigs. Its corrosion resistance and durability are crucial in these environments.
 

How to Install Grip Strut Safety Grating?

 
There are three methods for installing Grip Strut Safety Grating, including welding installation, Diamond Washer installation, and Anchor Clamp Assembly installation. You can choose the installation method that best suits your specific application.
 

Welding Installation

 
Welding is a commonly used method for securely fastening safety grating. It is particularly suitable for long-term fixation applications where disassembly is not required, such as for mechanical pedal or stair step installations. This method is characterized by its simplicity, structural solidity, and cost-effectiveness.
 
Installation Process:
 
  • Before welding, ensure that surfaces of the supporting steels and steel gratings are free from paint, rust, oil, water, or any other contaminants.
  • During welding and installation, it is essential to weld all four corners of the safety grating, with a minimum weld length of at least 20mm. For larger surface areas, adjust the weld length as needed.
  • Upon completion, apply anti-rust paint to the welded joints manually to protect the surface of the steel grating from corrosion.
 

Diamond Washer Installation

 
Diamond Washer installation is typically used in situations where frequent removal is required, such as for manhole covers and scaffolding. When installing screws, it is crucial to secure each corner of the grip strut grating to effectively prevent product damage.
 
Installation Process:
 
  • Begin by placing the diamond washer on the upper surface of the steel grating.
  • Install bolts and nuts. Ensure that the diamond washer is correctly positioned, and insert the bolts through the designated bolt holes. Tighten the nuts from the bottom to the top.
 

Anchor Clamp Assembly Installation

 
This installation method is designed to enhance load-bearing capacities by securely fastening multiple planks together to create an integral section.
 
Installation Process:
 
  • Position two planks side by side.
  • Place J-Bolts in the corresponding openings on each plank.
  • Slide the anchor plate up along the J-Bolts until it fits snugly.
  • Secure the planks by tightening the nuts, ensuring they are firmly in place.
 
These three installation methods offer flexibility to accommodate various application needs, whether you require a permanent, removable, or load-enhancing solution for your Grip Strut Safety Grating. Choose the method that aligns with your specific project requirements.
 

Conclusion

 
Plank grating is a versatile and indispensable component in various industries. By understanding the different types of plank grating, its wide-ranging applications, and the proper installation process, you can make informed decisions and ensure the safety and durability of your structures. Whether you're in need of a robust industrial solution or an aesthetic architectural element, plank grating offers a reliable and adaptable choice.
Read more…
The functional differences between a microcontroller and a microprocessor are important for embedded systems engineers and product developers in the electronics industry. While both types of components are essential for designing and building various kinds of electronic devices, their definitions alone can make it difficult to distinguish between them.

Microcontrollers can be categorized as small computers or "supercomputers" that are made from a single integrated circuit chip that contains one or more cores of computing power, along with other peripherals (memory, serial interfaces, timers, programmable I/O peripherals, etc.).

A microprocessor refers to a computer processor that incorporates the functions of a central processing unit (CPU) onto just a few (and often only one) integrated circuits, which are used to carry out the operation of that computer.

There are many similarities between microcontrollers and microprocessors on the surface. They are both examples of single-chip processors which have increased reliability and reduced the cost of processing power, thereby accelerating the proliferation of computing technology. Each of these processors executes computing logic on a single chip, and they are found in millions of electronic devices worldwide.

Here's a blog post that compares microcontrollers and microprocessors to help clarify the differences between them. You will gain a clear understanding of which of these components should power your next computer engineering project as we examine every difference between a microcontroller and a microprocessor, from architecture to applications.
 

What's the Difference Between a Microcontroller and Microprocessor?

 
Choosing the right computer processor for your project matters a lot. It affects how you design and what results you get. So, knowing the main options and their unique features is essential. Let's look at how a microcontroller and microprocessor differ.
 

Microcontroller vs. Microprocessor Architecture

 
While both do similar tasks, their architectures are quite different. A microcontroller has everything it needs for computing on a single chip. That means the CPU, memory, controls for interruptions, timers, serial ports, and more are all on that one chip. No external circuits are needed.

On the other hand, a microprocessor includes a CPU and some extra chips that supply memory, interfaces, inputs, timers, and other parts. People sometimes use "microprocessor" and "CPU" interchangeably, but a microprocessor is like a single chip that has a CPU. This chip can connect to external stuff like a control bus or data bus for inputs and outputs.

So, microcontrollers are self-contained, while microprocessors deal with external things. These differences have their own pros and cons.
 

Microcontroller vs. Microprocessor Applications

 
Microcontrollers and microprocessors both use CPUs in computing. They have somewhat separate applications, though.

Microprocessors need extra chips to make a microcomputer system. They are great for personal computers where you need powerful processors for different jobs. You can easily upgrade parts like RAM in microprocessors.

Microcontrollers are all-in-one chips that use low power and do a single job. They're mostly used in embedded systems where things have to run on their own for a long time.
 

Three Key Differences: Cost, Speed, and Power

 
Cost

In general, microcontrollers tend to be less expensive than microprocessors, as microprocessors tend to be manufactured with more expensive devices that will use external peripherals to boost performance. They are also significantly more complex, as they are intended to perform a variety of computational tasks, while microcontrollers usually perform a particular function. In order to support more complex computational tasks, microprocessors require a robust external memory source.

Code for specific applications is written and compiled by engineers and uploaded to a microcontroller, which contains all of the computing features and components needed to execute the code internally. Since microcontrollers have narrow individual applications, they often require less memory, computing power, and complexity than microprocessors, which is why they are more affordable.

Speed

A high-quality microcontroller differs significantly from industry-leading microprocessor chips when it comes to overall clock speed. As a result, microcontrollers are designed to handle specific tasks or applications, while microprocessors are designed to handle more complex, robust, and unpredictable computing tasks. 

Using just the right amount of speed and power to accomplish a given task is one of the key design advantages associated with microcontrollers. That means using just the right amount of power and speed to accomplish the task. Therefore, many microprocessors are clocked at speeds of up to 4 GHz, while microcontrollers operate at 200 MHz or less.

While on-chip components help microcontrollers perform functions quickly, microprocessors sometimes operate more slowly as a result of their dependence on external peripherals.

Power Consumption

There are several benefits associated with microcontrollers, including their low power consumption. Microcontrollers can perform a variety of tasks at relatively low speed, which means that they use less power than processors with robust computational capabilities. An implementation's power consumption is an important factor: a processor that consumes a lot of power may require an external power supply, whereas a processor that consumes a small amount of power could be powered for a long time by just a small battery. 

A microcontroller can be much more cost effective than a microprocessor for tasks that require little computational power.
 

Microcontrollers for Embedded Systems

 
Microcontrollers work well for embedded systems:
 
  • They have everything on one chip.
  • They're made for one job.
  • They can be optimized.
  • They use low power.
  • They're cost-effective.
 

Summary

 
In the end, microcontrollers and microprocessors are different ways of organizing and optimizing a computing system based on a processor. A microprocessor houses a more powerful CPU on a single chip that connects to external peripherals, as opposed than a microcontroller which houses the CPU and all peripherals on the same chip. In general, microprocessors are more useful for applications requiring more complicated and versatile computing operations than microcontrollers, which are optimized for a low-power, dedicated applications - ideal for embedded systems.

We have the tools you need to work with programmable microcontrollers, whether you're an embedded systems engineer or developer. With our host of adapters and protocol analyzers, you can speed up the process of debugging your product and reduce its time to market.

Feel free to contact us at kevin@joinwinchips.info if you have any questions.
Read more…

What Is the Best Size for a Tote Bag

What is a Tote Bag?

 
The tote bag is a must-have accessory for any fashionista, whether they are students, office workers, or moms. The tote bag is the perfect organizer for all your daily essentials, from books to keys to your lunchbox. Whether they are small or large, totes are easy to carry and stylish but very functional.
 
A tote bag comes in a wide variety of shapes and sizes. Before you buy one, it's important to know the size and capacity of the bag so you can be sure you're getting one that is right for you.
 

What Is the Best Size for a Tote Bag

2023-11-20

What is a Tote Bag?

 
The tote bag is a must-have accessory for any fashionista, whether they are students, office workers, or moms. The tote bag is the perfect organizer for all your daily essentials, from books to keys to your lunchbox. Whether they are small or large, totes are easy to carry and stylish but very functional.
 
A tote bag comes in a wide variety of shapes and sizes. Before you buy one, it's important to know the size and capacity of the bag so you can be sure you're getting one that is right for you.


What Is a Standard Tote Bag Size?


There are a variety of tote bag sizes, ranging from small to large, depending on the brand, design, and intended use. Here are some general categories of tote bag sizes:
 
1.Small Tote Bag: Typically measuring between 10 to 12 inches (25 to 30 cm) in height and width, with a depth ranging from 2 to 4 inches (5 to 10 cm), small tote bags serve as convenient everyday carriers. They are ideal for holding essentials such as a wallet, phone, keys, and a few personal items.
 
2.Medium Tote Bag: Falling within the dimensions of 12 to 16 inches (30 to 40 cm) in height and width, and a depth of 4 to 6 inches (10 to 15 cm), medium-sized tote bags offer a bit more room than their smaller counterparts. Suited for various occasions, they can accommodate items like a tablet, a book, a water bottle, and additional personal belongings.
 
3.Large Tote Bag: With dimensions ranging from 16 to 20 inches (40 to 50 cm) in height and width, and a depth of 6 to 8 inches (15 to 20 cm) or more, large tote bags provide ample space for a variety of items. They are suitable for carrying essentials such as a laptop, documents, gym clothes, and larger personal belongings.
 
4.Oversized Tote Bag: Exceeding the dimensions of large totes, oversized tote bags are particularly spacious. These bags, designed for purposes like travel, beach trips, or carrying bulkier items, offer generous height, width, and depth to meet diverse needs.
 
If you're looking for a tote bag for a specific use, such as shopping, carrying books, or as a promotional item, you may find variations in sizes based on the bag's design and intended function. It's always a good idea to check the product description or specifications when purchasing a tote bag to ensure it meets your size requirements.
 

What Are the Dimensions of a Tote Bag?


It can be difficult to decide what size is best for your needs, especially with so many options available on the market. Understanding Tote bag dimensions will help you select the right size.
 
Typically, tote bag dimensions are measured by recording their height, width, and depth. The measurements are usually expressed in inches or centimeters. In order to ensure your items will fit comfortably inside a tote bag, it's important to measure them before buying one.
 
Here are some simple steps to help you measure a tote bag:
 
  1. Measure the height of the bag from the base to the top edge.
  2. Measure the width of the bag from one side to the other side at the widest part.
  3. Measure the depth of the bag from front to back, excluding any pockets or compartments.
 
It is easier to compare sizes when tote bag manufacturers provide a size chart that details the dimensions of their bags.
 
You need to keep in mind that tote bags can vary in shape and design, which can influence how much they can hold. It is important to consider this when choosing a tote bag size that fits your lifestyle and usage, as some bags have wider bases and can carry more items, while others have narrower straps and are better suited to lighter loads.
 

How to Choose the Right Tote Bag Size?


Choosing the right tote bag size can be difficult with so many options available on the market. Here are some helpful tips: 
 
1.Determine the Purpose:
 
Consider the intended use of the tote bag. Whether it's for work, travel, shopping, or everyday activities, the purpose will be a guiding factor in choosing the appropriate size.
 
2.Take Inventory:
 
Evaluate the items you plan to carry in the tote bag. Whether it's a laptop, gym clothes, or groceries, taking inventory of your belongings is crucial to selecting a size that accommodates everything comfortably.
 
3.Consider Functionality:
 
Ponder on how you prefer to carry the tote bag—by hand or on your shoulder. Opt for a size that not only fits your items but is also easy and comfortable to carry based on your preferred style.
 
4.Check Dimensions:
 
Look for tote bags with size charts or specified dimensions. Pay attention to the length, width, and depth of the bag to ensure it aligns with your practical needs and preferences.
 
5.Choose the Right Style:
 
Tote bags come in various styles and shapes, including square, rectangle, or bucket designs. Consider the style that best suits your needs, complements your lifestyle, and aligns with your personal preferences.
 
6.Personalize:
 
Finally, make the selection a reflection of your personal style and taste. Consider aspects such as color, material, and overall design to ensure the tote bag not only serves its practical purpose but also resonates with your individuality.

Custom Tote Bag Size Options


While standard tote bag sizes are readily available in the market, custom tote bag size options from Dongguan Xinhui Accessories Co., Ltd. offer a more tailored solution to meet individual needs. Our custom service can bring your creative ideas to life, including designs, sizes, colors, materials, logos, labels, packaging, etc. Whether you require a smaller or larger tote bag or need a specific size to accommodate certain items, our custom tote bag service allows you to select the size that suits your needs best.
 
Additionally, our custom tote bags offer more flexibility in terms of branding and personalization. Businesses can customize the size of their bags to fit their unique requirements while maintaining consistency with their brand image. With low minimum order quantity customization and fast service, personalized tote bags with custom dimensions from Dongguan Xinhui Accessories Co., Ltd. make for an excellent promotional item or a gift that shows you put thought into the recipient’s preferences. We have professional designers and teams to design your own brand products and help you throughout the entire process from procurement to finished products.
Read more…
Solar power systems offer an eco-friendly and cost-effective way to harness the energy of the sun and convert it into usable electricity. Whether you're considering solar panels for your home or a remote off-grid installation, solar charge controllers play a vital role in ensuring the efficiency and longevity of your system. In this article, we'll explore how solar charge controllers work and the various types available to help you make informed decisions for your solar project.
 

How Does a Solar Charge Controller Work?

 
The first solar charge controller schematic, depicted in Figure 1, illustrates the connection of a solar charge controller to power a direct current (DC) load. The second schematic, shown in Figure 2, pertains to an alternating current (AC) load.
 
Figure 1: Off-grid Diagram with DC Load
 
off-grid-diagram-with-dc-load
 
When installing a solar charge controller, it is advisable to follow a specific order for connecting and disconnecting:
 
  1. Connect the battery to the controller first.
  2. Connect the PV array to the controller.
  3. Connect the electrical load to the controller.
 
When disconnecting, you should reverse this order. The battery supplies power to the controller, so always ensure that the solar panels and loads are disconnected before connecting or disconnecting the battery from the controller. To enhance safety and simplify installation and breakdown, it's recommended to have disconnect switches in the connections between the battery, load, PV array, and the controller.
 
In the wire diagram schematic with a DC load, sunlight reaches the solar modules, which convert solar energy into DC electrical power. This power is then delivered to a charge controller. The charge controller regulates the amperage and voltage supplied to the loads, and any excess power is directed to the battery system to maintain the state of charge without overcharging. During the evening when there is no sunlight, battery power is used to operate the load.
 
You may notice that the battery is grounded at the negative battery terminal. This is because all our PWM and MPPT controllers share a common negative ground. Therefore, it is possible to establish a common negative ground for the entire system, including the solar array, controller, battery, and load. This configuration complies with NEC code requirements for grounding. For controllers that lack an equipment ground terminal lug, you can directly connect an equipment ground to the controller enclosure for any metal parts.
 
Figure 2: Off-grid Diagram with AC Load
 
off-grid-diagram-with-ac-load
 
The next diagram, as seen in Figure 2, illustrates the components and connections required to power an AC load. This schematic with an AC load closely resembles the previous DC load example. However, in this scenario, an inverter has been added to the system. The inverter's role is to convert DC power from the battery into AC power, which can be utilized to operate AC loads, such as the TV shown in the schematic.
 
It's important to note that the inverter is connected and powered directly from the battery, not from the controller's load terminals, as in the DC load example. This arrangement is necessary because inverters can produce a high energy surge during startup, and this surge may exceed the rated capacity of the charge controller. Batteries, on the other hand, can meet the high-energy surge requirement.
 

Charge Controller Types:PWM Vs MPPT

 
It can be seen from the chart below that PWM controllers operate at battery voltage and are smaller, while MPPT controllers operate at maximum power voltage using newer technology. As a result, the array voltage gets increasingly higher than the battery voltage in colder conditions, maximizing the amount of power being produced. Moreover, MPPT controllers can operate at higher voltages and lower array currents, which can result in fewer strings in parallel and smaller wire sizes.
 
A PWM controller can only be used with arrays matched to the battery voltage, so what modules can be used are limited. Many 60 cell modules have a maximum power voltage (Vmp) equal to about 30V, making them suitable for MPPT controllers, but not PWM controllers.
 
In short, what's better, PWM or MPPT? All things being equal, MPPT is the newer technology that harvests a greater amount of energy. Despite MPPT's advantages, it is not always a smart choice to choose a PWM controller, especially for smaller systems or in warm climates where MPPT boosts are less noticeable.
 
 
PWM vs. MPPT Solar Charge Controller Comparison
 
PWM ControllersMPPT Controllers
Array voltage is “pulled down” to battery voltage    Convert excess input voltage into amperage
Generally operate below Vmp    Operate at Vmp
Suitable for small module configurationsSuitable for large module configurations that have a lower cost per watt
Often chosen for very hot climates which will not yield as much MPPT boost    Provide more boost than PWM, especially during cold days and/or when the battery voltage is low


PWM Charging


Conventional solar regulators featuring PWM (Pulse Width Modulation) charging function by creating a direct connection from the solar array to the battery bank. During the bulk charging phase, when there is an uninterrupted connection from the array to the battery bank, the array's output voltage aligns with the battery voltage. The battery voltage undergoes slight adjustments based on the array's current supply and the battery's size and characteristics.

MPPT Charging


Morningstar MPPT controllers incorporate TrakStar technology, which is engineered to swiftly and precisely determine the Vmp (maximum power voltage) of the solar array. TrakStar MPPT controllers employ a technique where they 'sweep' the solar input to identify the voltage at which the array produces the maximum power. The controller captures power from the array at this Vmp voltage and converts it to the battery voltage, simultaneously boosting the charging current.  

Why Choose PWM Over MPPT

 
The comparison between PWM and MPPT may raise questions about why one would opt for a PWM controller over an MPPT controller. Several factors may reduce or negate the advantages provided by MPPT controllers. Considerations should include the cost, as MPPT controllers generally come at a higher price point than their PWM counterparts. When deciding on a controller, it's essential to assess the additional cost of MPPT in relation to the following factors:

Low Power Applications: Low power, specifically low current charging applications, might achieve similar or even superior energy harvest with a PWM controller. PWM controllers maintain relatively consistent harvesting efficiency regardless of the system's size. In contrast, MPPT regulators may exhibit reduced harvesting efficiency when used in low- power applications. It's crucial to review efficiency curves available in Morningstar MPPT controller manuals when making a regulator selection.

Climate Considerations: The most significant benefit of an MPPT regulator is often observed in colder climates where Vmp (voltage at maximum power) is higher. Conversely, in hotter climates, Vmp decreases, reducing MPPT harvest compared to PWM. High average ambient temperatures at the installation site may render the advantages of MPPT less economical.

Full Battery Conditions: Systems in which the solar array's power output significantly exceeds the power draw of the system's loads may result in the batteries remaining at full or near-full charge most of the time. In such cases, the increased harvesting capability of an MPPT regulator may be unnecessary, especially if autonomy is not a critical factor.
 

Why Choose MPPT Over PWM

 
Opting for MPPT controllers offers several advantages:

Increased Energy Harvest: MPPT controllers operate at array voltages above battery voltage, enhancing the energy harvest from solar arrays by 5 to 30% compared to PWM controllers, depending on climate conditions. The array's voltage and amperage are continually adjusted throughout the day to maximize power output.

Less Module Restrictions: MPPT controllers, operating arrays at voltages higher than battery voltage, can be used with a broader range of solar modules and array configurations. They can also support systems with smaller wire sizes.

Support for Oversized Arrays: Unlike PWM controllers, MPPT controllers can accommodate oversized arrays that might otherwise surpass the maximum power limits of the charge controller. The controller manages this by limiting the array's current intake during periods of high solar energy supply, usually in the middle of the day. While excess energy from the array is regulated during this time, oversized arrays can deliver more power during the early and late parts of the day, compared to smaller non-oversized arrays.
Read more…