wang meihong's Posts (88)

Sort by

What Muscles Do Overhead Press Work?


If you're new to strength training, you might often see photos of lifters performing an overhead press. This classic exercise is more than just a shoulder workout—it's a powerhouse move that engages multiple muscle groups. Whether you're aiming to tone your deltoids, enhance your triceps, or strengthen your upper chest, the overhead press is a versatile addition to your fitness routine. In this blog, we'll explore the key muscles worked by the overhead press and how this fundamental exercise can help you achieve your strength training goals.


What is the Overhead Press?


The overhead press, also known as the shoulder press, is a fundamental strength training exercise where you lift a barbell or dumbbells from shoulder height to above your head. This movement targets the shoulders, triceps, and upper chest, making it an excellent choice for building upper body strength and muscle mass.


Muscles Worked by the Overhead Press


  • Deltoids: Primarily works the shoulder muscles, including all three heads of the deltoids.
  • Triceps: Engages the back of the upper arms to assist in extending the elbows.
  • Upper Chest: Involves the upper portion of the pectoral muscles.
  • Trapezius: Helps stabilize the shoulder blades.
  • Core Muscles: Supports the torso and maintains balance.


How to Perform an Overhead Press?


  1. Set Up: Stand with your feet shoulder-width apart. Grip the barbell or dumbbells with your hands slightly wider than shoulder-width, elbows bent, and weights at shoulder height.
  2. Brace Your Core: Tighten your core muscles to stabilize your torso and maintain balance throughout the movement.
  3. Press Up: Push the weights upward in a straight line until your arms are fully extended overhead. Keep your elbows slightly in front of your wrists and avoid arching your back.
  4. Lower the Weights: Slowly lower the weights back to shoulder height, controlling the descent to engage the muscles throughout the movement.
  5. Repeat: Perform the desired number of repetitions while maintaining proper form.


Differences Between Standing and Seated Overhead Press


Aspect Standing Overhead Press Seated Overhead Press


  • Stability & Core: Requires more core activation and stability. Reduces core engagement; focuses more on the shoulders and triceps.
  • Range of Motion: Greater range of motion; allows slight back lean. Slightly reduced range of motion; limits back lean.
  • Back Involvement: Engages lower back for balance and stability. Minimizes lower back involvement.
  • Weight & Load: Typically allows for lifting heavier weights. Often involves lighter weights for isolation.


Benefits of the Overhead Press


It's hard to overlook the advantages of having stronger shoulders, a more developed upper back, and a stable core—benefits that come from incorporating the overhead press into your routine. By enhancing these areas, you'll not only boost your performance in various exercises but also address one of your body’s weak points, making you more resilient and less prone to injury.

But the benefits of the overhead press extend well beyond the gym. Even if you're not an athlete who frequently performs overhead movements, strengthening your shoulders can greatly improve your functional strength. From lifting heavy items onto high shelves to managing tasks that require overhead reach, like fixing a light fixture or carrying objects, having a robust pressing power makes daily activities easier and more efficient.


Common Mistakes to Avoid


  1. Lifting Weights That Are Too Heavy: Only lift weights that you can handle without compromising form. Using weights that are too heavy can lead to poor technique and increase the risk of injury.
  2. Your Stance is Off: Make sure your feet are at least hip-width apart to maintain stability. A solid stance helps anchor your body and prevents imbalance that could lead to injury.
  3. Incorrect Arm and Shoulder Form: Keep your elbows slightly forward and ensure your wrists are aligned with your triceps. This prevents shoulder strain and maintains proper form.
  4. Pressing Path Issues: Lift the barbell in a straight line. Avoid pressing too far forward or backward to maintain balance and target the right muscles.
  5. Misaligned Neck and Back: Keep your lower back neutral and avoid excessive arching. Ensure your neck is aligned with your spine for proper form.


Safety Tips for the Overhead Press


  1. Don’t keep your feet too close together. Ensure they are at least shoulder-width apart for better balance and stability.
  2. Start with a thorough warm-up to prepare your shoulders and upper body, reducing the risk of injury.
  3. Maintain a neutral spine and engage your core. Avoid excessive arching of your back to prevent strain.
  4. Choose a weight that allows you to maintain good form throughout the set. Avoid lifting too heavy to prevent poor technique and injury.
  5. When lifting heavy, use a spotter or safety bars for assistance in case you lose control of the weight.
  6. Perform the lift with smooth, controlled movements. Avoid jerking or using momentum, which can strain your shoulders and back.
  7. Ensure the barbell and weights are securely fastened and that the equipment is in good condition before starting.
  8. Stop if you experience sharp or persistent pain. Adjust your form or reduce the weight as needed to prevent injury.


Conclusion


The overhead press is more than just a shoulder-blasting exercise—it's a total game-changer for building upper body strength and functional fitness. By hitting your deltoids, triceps, upper chest, and core, this powerhouse move not only sculpts your physique but also enhances your daily life. Whether you're aiming to lift heavier weights, tackle more demanding tasks around the house, or just impress your friends with your strength gains, the overhead press has got you covered.

Remember, though, form is everything. Keep those feet shoulder-width apart, avoid lifting weights that make you grimace, and always listen to your body. With a bit of practice and proper technique, you'll be pressing like a pro and feeling the benefits both in and out of the gym. So, get ready to flex those shoulders and conquer your fitness goals—one press at a time!


Click here to read the original article. What Muscles Do Overhead Press Work?


Read more…

The Pros and Cons of Using a Smith Machine

ck, is a staple in many fitness facilities and is commonly used for exercises like squats, bench presses, and shoulder presses.

But what exactly is a Smith machine, and is it worth incorporating into your workout routine? In this article, we'll explore the pros and cons of using a Smith machine, offering insights to help you determine if it's the right fit for your fitness goals.

What is a Smith Machine?


A Smith machine is a weightlifting apparatus that consists of a barbell fixed to a vertical track, allowing for vertical movement while restricting horizontal movement. This design means the barbell can only move up and down in a straight line, providing a controlled and stable lifting environment.

The History of the Smith Machine

The Smith machine was invented in the 1950s by Jack LaLanne, a pioneering American fitness icon and media personality. LaLanne envisioned a safer alternative to traditional barbell exercises, leading to the creation of the Smith machine. It was later popularized by Rudy Smith, an executive at the Tanny's Gym chain, which led to the machine being named after him.

Since its inception, the Smith machine has undergone various modifications, with different manufacturers introducing their own versions. Among the most notable variants is the 3D Smith Machine, also known as the Jones Machine, which allows horizontal movement in addition to the standard vertical path. However, this variant has garnered mixed reviews, and many fitness enthusiasts, myself included, prefer the traditional Smith machine for its simplicity and stability.

The Pros of Using a Smith Machine

1. Increased Safety

One of the primary advantages of using a Smith machine is the enhanced safety it offers. The fixed barbell and vertical track significantly reduce the risk of injury by keeping the barbell securely in place, preventing it from slipping or falling. Additionally, the machine often features safety stops that allow you to lock the barbell at various heights, providing extra security during your lifts. This makes the Smith machine particularly useful for individuals who train alone or those who are new to weightlifting.

2. Versatility

While the Smith machine is often associated with basic barbell exercises like squats and bench presses, it can be used for a wide range of other movements. For instance, it’s excellent for exercises such as the Standing Military Press, Smith Hack Squat, Smith Barbell Lunge, and Standing Calf Raise. The Smith machine's versatility extends to its incorporation into modern multi-gyms, making it a valuable tool for full-body workouts. Its ability to target various muscle groups in a controlled environment makes it a popular choice for both beginners and experienced lifters.

3. Controlled Movement

The fixed barbell on the Smith machine ensures a consistent, linear path of movement, which can be beneficial for specific exercises. This controlled movement helps maintain proper form and reduces the likelihood of injury caused by poor technique. For those recovering from injury or looking to isolate specific muscle groups, the Smith machine offers a reliable option. However, it's important to note that this controlled movement can also be a limitation, as we'll explore in the cons section.

The Cons of Using a Smith Machine

1. Limited Range of Motion

One of the most common criticisms of the Smith machine is its restricted range of motion. The barbell's fixed path may not align with your body's natural movement patterns, potentially leading to discomfort or strain over time. This limitation can also decrease the activation of stabilizing muscles, which are crucial for overall functional strength. As a result, relying solely on the Smith machine could hinder the development of these muscles, leading to imbalances in your training.

2. Lack of Stabilization

Building on the previous point, the Smith machine's design eliminates the need for stabilizing muscles to engage during lifts. While this can be advantageous for focusing on specific muscle groups, it may result in weaker stabilizers over time. Functional strength relies on the body's ability to stabilize itself during dynamic movements, and the Smith machine does not effectively promote this aspect of training. To counteract this, it's essential to incorporate free weights and other equipment that challenge your stabilizing muscles.

3. Potential for Overuse Injuries

Due to the Smith machine's fixed movement pattern, there's a risk of developing overuse injuries if the machine is used excessively without variation. Performing the same exercises repeatedly in a limited range of motion can place undue stress on joints and ligaments. To mitigate this risk, it's important to rotate exercises and incorporate a variety of training modalities into your routine.

How to Incorporate a Smith Machine into Your Workout Routine

If you've decided to include the Smith machine in your workouts, here are some tips to ensure you use it effectively:

1. Start with Light Weights

Given the Smith machine's restrictive movement and stabilization, it's wise to begin with lighter weights. Focus on mastering proper form and technique before gradually increasing the load. This approach will help you avoid injury and build a solid foundation.

2. Mix it Up

Don't limit yourself to traditional barbell exercises on the Smith machine. Experiment with different movements and ask a trainer for recommendations. Incorporating a variety of exercises will keep your workouts engaging and help you target different muscle groups.

3. Use it as a Supplement

While the Smith machine can be a valuable addition to your training regimen, it shouldn't be the sole focus. Balance your workouts by incorporating free weights, bodyweight exercises, machines, and cables to ensure comprehensive muscle development and functional strength.

Conclusion

The Smith machine can be a beneficial tool in your workout arsenal, offering increased safety and versatility for a range of exercises. However, it's important to be aware of its limitations, particularly the restricted range of motion and reduced stabilization. By using the Smith machine as a supplement to a well-rounded workout routine, you can reap its benefits while maintaining overall functional strength.

If you're considering adding a Smith machine to your home gym, be sure to research different models and choose a reputable brand. With the right approach, the Smith machine can play a valuable role in helping you achieve your fitness goals.


Read more…
The Air Separation Unit (ASU) remains indispensable across various industries due to the increasing demand for industrial gases. It offers a reliable and efficient method to produce gases at precise purity levels. The air separation process is notably cost-effective, delivering high-purity gases in large quantities, which leads to economies of scale and reduced production costs per unit over time.

But what exactly is an ASU, how does it operate, and what are its primary applications? Here’s a comprehensive guide to the ASU, drawing from our expertise in cryogenic engineering and the design and manufacturing of these systems.
 
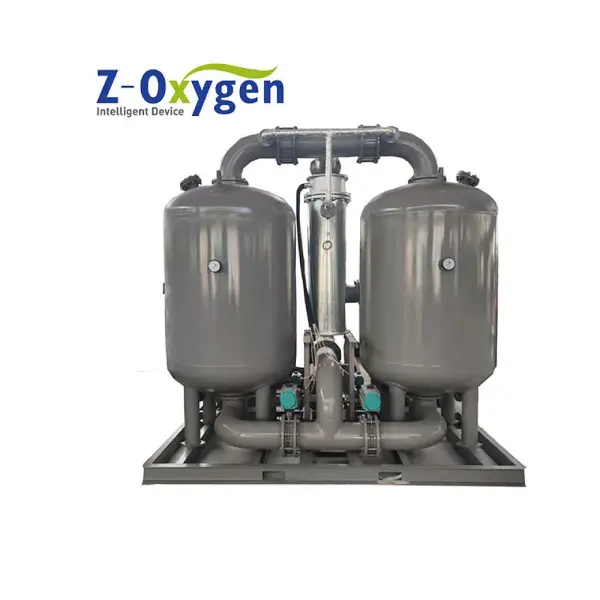
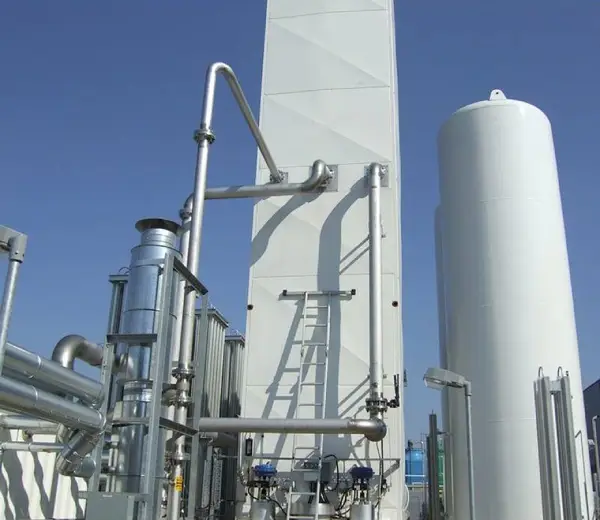
air separation unit for oxygen
 

What Is an Air Separation Unit?

 
An Air Separation Unit (ASU) is an industrial facility designed for the separation of atmospheric air into its primary components, including nitrogen, oxygen, and in some cases, argon and other rare gases. These units typically consist of components such as air compressors, an air purification system, heat exchangers, cryogenic cooling systems, and distillation columns, among others.
 

How Does an Air Separation Unit Work?

 
Fractional distillation stands as the primary method employed by Air Separation Units (ASUs) for various separation processes.
 
The ASU operates on the fundamental principle of separating air through liquefaction and distillation processes. Here's a simplified overview of how an ASU typically functions:
  1. Compression: Atmospheric air enters the ASU and passes through compressors to increase its pressure. This step prepares the air for efficient cooling and separation processes, typically achieving pressures ranging from 5 to 10 bar gauge.
  2. Purification: The compressed air undergoes purification to remove impurities such as moisture, carbon dioxide, and trace contaminants. This purification step ensures high-purity gases and prevents issues like equipment freezing or blockages in cryogenic equipment.
  3. Cooling: The purified and compressed air is cooled to cryogenic temperatures using heat exchangers and refrigeration cycles. This cooling process liquefies the air, leveraging the differing boiling points of its components.
  4. Separation: The cooled, liquefied air enters a distillation column or series of columns where it is separated into its primary components based on their varying boiling points:
    • Nitrogen, with a boiling point of -196°C (-321°F), separates from oxygen, which boils at -183°C (-297°F).
    • If argon is being separated, it has an even lower boiling point of -186°C (-303°F).As the air rises through the column, each component evaporates at its specific boiling point. Oxygen-rich vapor ascends to the top of the column, while nitrogen-rich liquid accumulates at the bottom. Argon, if present, is typically extracted at an intermediate point within the column.
  5. Collection, Storage, and Delivery: The separated gases are collected and stored in pressurized or cryogenic storage tanks. From there, the gases are distributed to various industries and applications according to their specific purity requirements.
Throughout these operations, the ASU ensures efficient operation through tight integration of heat exchangers and distillation columns, optimizing the separation process.
 

Applications of an ASU

 
The applications of an Air Separation Unit (ASU) span across various industries and are crucial for meeting the demand for industrial gases. Here's an overview of the key applications:
 
  1. Steel Industry: ASUs are extensively used in the steel industry to provide oxygen for the basic oxygen steelmaking process. Oxygen-enriched air improves combustion efficiency and reduces emissions in steel production.
  2. Chemical Industry: ASUs supply nitrogen, oxygen, and other industrial gases used in chemical manufacturing processes. Nitrogen is often employed for blanketing and inerting applications to prevent oxidation and ensure product quality.
  3. Medical and Healthcare: Oxygen produced by ASUs is critical for medical applications, including respiratory therapy, medical gases for hospitals, and oxygen therapy for patients.
  4. Food and Beverage: Nitrogen and carbon dioxide produced by ASUs are utilized in food packaging to extend shelf life, prevent spoilage, and maintain product freshness. They are also used in beverage carbonation processes.
  5. Electronics and Semiconductor Manufacturing: Ultra-high purity nitrogen and oxygen are essential in semiconductor fabrication to create clean environments and prevent contamination during manufacturing processes.
  6. Oil and Gas Industry: ASUs provide nitrogen for various applications in the oil and gas sector, including blanketing storage tanks to prevent explosions and purging pipelines.
  7. Environmental Applications: ASUs supply gases for environmental protection applications such as wastewater treatment, landfill gas management, and emission control technologies.
  8. Aerospace and Aviation: ASUs supply high-purity gases for aviation applications, including aircraft fuel tank inerting to reduce the risk of explosions and fire hazards.
  9. Glass Manufacturing: ASUs supply oxygen for combustion processes in glass manufacturing, which improves energy efficiency and reduces emissions.
  10. Metal Processing: ASUs provide gases for metal cutting, welding, and heat treatment processes in metal fabrication and automotive industries.
 

Z-Oxygen Intelligent Device, Experts in ASU Projects

 
With our deep expertise in cryogenic engineering, Z-Oxygen stands out as a premier supplier of cutting-edge air separation plants. Our strength lies in our ability to tailor solutions to the specific needs of each project, taking into account its entire lifecycle, potentials, and constraints.

Through the integration of advanced technologies and comprehensive engineering services, we have successfully designed, manufactured, and implemented a series of ASU projects that meet rigorous industry standards.

Our involvement spans from material procurement to equipment assembly, electrical and piping installations, and crucial processes like factory acceptance testing (FAT) for containerized ASU components. Our strength lies in meticulous planning, detailed drawings, precise calculations, and 3D modeling, enabling us to deliver customized, end-to-end solutions.

Furthermore, our production facility boasts a vast area of 14,000 square meters, equipped to handle large-scale manufacturing requirements.

Z-Oxygen is dedicated to meeting diverse air separation needs, particularly for oxygen and nitrogen. Our product portfolio covers a wide spectrum of the air separation industry, including large-scale cryogenic air separation systems, pressure swing adsorption (PSA) oxygen/nitrogen generators, and low-temperature storage tank systems. We also specialize in advanced production lines for intelligent control valves.

With extensive experience in international projects, we have successfully executed air separation solutions across various industries worldwide. Examples include cryogenic air separation plants in Russia, liquid oxygen storage tanks and gas stations in Turkey, PSA nitrogen generators in Thailand, oil-free compressors in South Africa, and containerized oxygen generators in Chile.
Read more…
Industrial oxygen generators are crucial for various applications, including medical facilities, steel manufacturing, wastewater treatment, and more. Choosing the right manufacturer ensures reliability, efficiency, and optimal performance. Here are the top 5 industrial oxygen generator manufacturers known for their quality products and innovative solutions.
 
vpsa oxygen generator
 

What Is an Oxygen Generator?

 
Oxygen generators separate oxygen from compressed air, allowing the gas to be directly fed into industrial processes or stored in pressure tanks. These generators are vital across a wide range of industrial applications, from gold mining to aquaculture.

Normal ambient air consists of approximately 78% nitrogen, 21% oxygen, and trace amounts of other gases like argon and CO2. Oxygen generators work by removing the nitrogen and trace gases to produce concentrated oxygen.

The size of oxygen generators varies significantly, from small units no larger than a soda can to large industrial models that can occupy an entire room. Despite the size differences, their core function remains the same: to provide a reliable supply of concentrated oxygen gas.

Businesses requiring bulk oxygen typically start by purchasing tanks of the gas from suppliers who use industrial oxygen generators to fill them. However, for companies with large and ongoing needs for pure oxygen, investing in their own oxygen generator can be more cost-effective. Although the initial cost of the equipment is substantial, the cost per cubic foot of generated oxygen is about 1/3 to 1/2 of the cost of purchasing bulk oxygen. Over time, this significant saving means that the oxygen generator can effectively pay for itself.
 

List of 5 Industrial Oxygen Generator Manufacturers


1.Hangzhou Z-Oxygen Intelligent Device Co.,Ltd

 
Hangzhou Z-Oxygen Intelligent Device Co., Ltd, located by the Fuchun River in Hangzhou, is renowned as a professional manufacturer in the air separation industry. Z-Oxygen is dedicated to delivering optimal solutions for customers with diverse air-related needs, particularly focusing on oxygen and nitrogen.

Z-Oxygen’s product portfolio encompasses the entire air separation industry, including large-scale cryogenic air separation systems, pressure swing adsorption (PSA) oxygen/nitrogen generators, and low-temperature storage tanks. Additionally, they have advanced production lines for intelligent control valves.

The company boasts extensive experience in overseas projects, providing various air separation solutions across multiple industries. Notable projects include a cryogenic air separation plant in Russia, liquid oxygen storage tanks and a gas station in Turkey, a PSA nitrogen generator in Thailand, an oil-free compressor in South Africa, and a container oxygen generator in Chile.

Z-Oxygen offers comprehensive solutions for oxygen, nitrogen, liquid oxygen, liquid nitrogen, and other air separation components such as compressed air purification systems and compressed air filters. They are committed to meeting your needs with professionalism and expertise.
 

2.Atlas Copco USA 

 
Atlas Copco USA is a leading figure in the compressed air technology and service industry. This leadership is showcased in their extensive range of compressed air products and comprehensive service plans. Atlas Copco offers a wide array of products, from oil-free and oil-injected compressors to high-quality air products, supported by a nationwide parts and service network, underscoring their commitment to reliability and excellence in all air-related solutions.

While Atlas Copco is most renowned for its air compressor products, the company’s offerings extend far beyond compressors. Their diverse product and service portfolio includes:
 
  • Nitrogen and Oxygen Generators
  • Industrial and Aeration Blower Technologies
  • Industrial Cooling Equipment
  • Quality Air Solutions (including Dryers, Air Receivers, Aftercoolers, and Filters)
  • Comprehensive Service and Parts Support
 
Atlas Copco takes its role as a reliable provider of air solutions very seriously, ensuring top-notch quality and service across all their products and services.
 

3.Jiangsu Minnuo Group Co., Ltd.

 
Jiangsu Minnuo Group Co., Ltd. has been a pioneering force in gas production solutions since 1985. Renowned for creating cost-effective nitrogen and oxygen solutions for medical and industrial applications, the company leverages advanced technologies like PSA (Pressure Swing Adsorption), VPSA (Vacuum Pressure Swing Adsorption), and air separation to meet diverse gas needs globally.

Jiangsu Minnuo Group caters to a wide range of customers, from small producers to government healthcare providers, offering best-in-class gas production solutions worldwide. The company's flexible and personalized care, which includes installation and remote intelligent operation of machines, is highly appreciated by its customers.

Specializing in the manufacturing of oxygen and nitrogen generators, Jiangsu Minnuo Group delivers reliable gas equipment with high purification levels (99.5% for oxygen and 99.999% for nitrogen). These generators are designed for versatile applications in the medical, agricultural, and industrial sectors, ensuring low operating costs and consistent gas purity and flow rates.

Additionally, the company excels in producing cryogenic air separation plants, which are essential for various industries such as metallurgy, petroleum, chemical, coal, and energy. These plants not only support medical applications but also facilitate the preparation and production of essential gases like hydrogen, helium, and other industrial gases necessary for agricultural and industrial processes.
 

4.Xuzhou Huayan Gas Equipment Co., Ltd

 
Xuzhou Huayan Gas Equipment Co., Ltd. is a premier provider of gas compressors, headquartered in Xuzhou City, Jiangsu Province, China. Spanning an area of 91,260㎡, the company has been producing gas compressors since 1965, accumulating extensive design and manufacturing experience over the decades.

The company boasts comprehensive production and processing capabilities, including professional forging, casting, heat treatment, welding, machining, assembly testing, and other essential processes. Equipped with complete technical testing equipment and methodologies, Xuzhou Huayan can design, manufacture, and install products tailored to customer specifications.

Xuzhou Huayan Gas Equipment Co., Ltd. has established a strong global presence, exporting its products to numerous countries such as Indonesia, Egypt, Vietnam, South Korea, Thailand, Finland, Australia, the Czech Republic, Ukraine, and Russia. The company is committed to providing complete, one-stop solutions for customers worldwide, ensuring quality and reliability in every product.
 

5.Jiangsu Minnuo Group Co.,Ltd

 
Established in 2012, Jiangsu Minnuo Group Co., Ltd. is a premier manufacturer specializing in a wide range of industrial gas equipment and related products. The company is based in a 26,000 square meter facility and operates five production lines with nearly 400 dedicated staff members.

Jiangsu Minnuo Group specializes in the manufacturing of:
 
  • PSA Oxygen Generators
  • Screw Air Compressors
  • Piston Air Compressors
  • Portable Air Compressors
  • Freeze Dryers
  • Air Tanks
  • Oxygen Cylinders
  • Nitrogen Cylinders
  • Carbon Dioxide Cylinders
  • Argon Cylinders
  • LPG Gas Cylinders
  • Natural Gas Cylinders
  • Various Industrial Cylinders
  • Castings and Related Accessories
 
The company boasts an impressive annual production capacity of 2,000,000 pieces, generating approximately 200 million yuan in annual sales. Jiangsu Minnuo Group adheres to strict production standards, complying with CE, ISO 9809-1, ISO 9809-3, ISO 4706, DOT, and TPED requirements. All products are certified, ensuring the highest levels of quality and safety. The company has also secured numerous patents, highlighting its commitment to innovation.
Read more…

Guide to Selective Soldering Techniques

Selective soldering is a specialized technique crucial in modern electronics manufacturing. This guide explores the process characteristics, techniques, advantages, and considerations for choosing selective soldering over conventional methods. Whether you're navigating through complex PCB layouts or seeking precise solder joint control, understanding selective soldering empowers manufacturers to optimize quality and efficiency in assembly processes.
 

What Is Selective Soldering?

 
Selective soldering is a specialized soldering process used in electronics manufacturing to precisely solder specific areas of a printed circuit board (PCB) where traditional wave soldering or reflow soldering techniques may not be suitable or efficient.
 
In selective soldering, solder is applied only to selected areas of the PCB where components need to be soldered. This is achieved using a robotic system or a soldering nozzle that accurately delivers solder to the desired locations. The rest of the PCB, including components already soldered through other methods, is protected from the soldering process.
 
Selective soldering is particularly useful in several scenarios:
 
  1. Complex PCBs: PCBs with a mix of through-hole and surface-mount components can benefit from selective soldering to precisely solder through-hole components after surface-mount components have been soldered using reflow soldering.
  2. Heat-sensitive Components: Components that are sensitive to heat or cannot withstand the high temperatures of reflow soldering can be selectively soldered at lower temperatures, minimizing the risk of damage.
  3. Mixed Technology Boards: Boards that include both standard components and components requiring special soldering techniques (like odd-shaped components or components with non-standard thermal profiles) can be effectively soldered using selective soldering.
  4. Repair and Rework: Selective soldering is also used for repair and rework operations where specific areas of a PCB need soldering without affecting nearby components that are already in place.
 
Selective soldering machines are equipped with precise controls to manage solder flow, temperature, and soldering duration. This ensures reliable solder joints while minimizing the risk of solder bridges or excess solder. Overall, selective soldering enhances manufacturing flexibility and quality in electronics assembly processes.
 

Process Characteristics of Selective Soldering

 
Selective soldering is a soldering process that differs from wave soldering in several key aspects. Unlike wave soldering, where the entire lower portion of the PCB is immersed in liquid solder, selective soldering targets specific areas or components sequentially.

In selective soldering, individual components are soldered by passing them over a localized solder wave, which is applied precisely where needed. This method contrasts with wave soldering, which applies solder to all joints simultaneously using a full wave.

One significant difference is the use of flux. In selective soldering, flux is applied only to the specific area or components requiring soldering before the solder wave passes over them. This localized application minimizes flux usage compared to wave soldering, where the entire PCB must be coated with flux.

Selective soldering is particularly advantageous for soldering components that cannot withstand the high temperatures of wave soldering or require precise control over solder placement. It allows for efficient soldering of through-hole components and selective areas of a PCB without heating the entire board, thereby reducing thermal stress and potential damage to sensitive components.

Overall, selective soldering is commonly used for applications where precise soldering of individual components or specific areas on a PCB is required, offering flexibility and control in electronics manufacturing processes.
 

Selective Soldering Process

 
Selective soldering involves four main processes that are crucial to its operation:
 
  1. Flux Coating Process: This initial step involves applying flux to the specific areas of the PCB where soldering will occur. Flux helps clean and prepare the surfaces for soldering by removing oxidation and promoting solder flow.
  2. Preheating Process: Before soldering, the PCB and components undergo a preheating phase. This helps to gradually raise the temperature of the board and components to ensure uniform heating and prevent thermal shock during soldering.
  3. Drag Soldering: In this technique, a soldering tool with a specially designed tip is used to drag molten solder across the leads or joints of the components. This ensures precise and controlled application of solder to achieve reliable electrical connections.
  4. Dip Soldering: This process involves briefly dipping the components or PCB into a localized solder wave. It is used for soldering through-hole components or specific areas of the PCB that require soldering. The solder wave selectively solders the exposed metal areas while avoiding contact with non-soldered areas.
 
Each of these processes plays a vital role in the selective soldering method, ensuring efficient and reliable solder joints with precise control over solder application.
 
1.Flux Coating Process
 
Flux coating is the critical first step in selective soldering, crucial for enhancing soldering efficiency and preventing oxidation and bridging on the PCB. Typically, a robotic system handles this task by guiding the PCB through a flux nozzle, where the flux is sprayed onto the areas designated for soldering. Various types of flux sprays are available, including single-nozzle, micro-hole, simultaneous multi-point, and pattern spray.
 
Among these, micro-hole spray is favored for its precision and ability to prevent contamination outside the solder joint during the microwave peak welding after the reflow process.
 
2.Preheating Process
 
In selective soldering, preheating serves to activate the flux and ensure proper viscosity of the solder before it reaches the solder wave. It's not primarily to reduce thermal stress on the PCB but to prepare it for effective soldering. The temperature settings for preheating depend on factors like PCB thickness, device package size, and the type of flux used.
 
Preheating can be configured in different ways; some prefer applying flux after preheating, while others find no necessity to alter the sequence.
 
3.Drag Soldering
 
Drag soldering utilizes small single-nozzle waves to reach confined areas on the PCB. This method ensures better heat transfer compared to dip soldering due to the movement of both the board and solder. It effectively removes oxide layers, reducing the risk of solder bridges and enhancing the reliability of solder joints.
 
However, drag soldering is limited by lead lengths and can result in extended cycle times compared to other methods. Despite these limitations, it offers unique advantages in heat distribution and thermal transfer characteristics on different board types.
 
4.Dip Soldering
 
Dip soldering involves submerging the PCB onto a custom nozzle plate that solders multiple joints simultaneously. While it requires different tooling plates for various PCB types, dip soldering offers robust capabilities and minimal cycle times when used appropriately. It differs significantly from drag soldering in its approach and effectiveness in soldering multiple connections at once.
 

Advantages and Disadvantages of Selective Soldering

 
Advantages
 
  • Selective soldering offers operators flexibility in adjusting soldering variables, enabling efficient production of high-quality solder joints in less time and with controlled heat.
  • Operators can precisely control the amount and temperature of solder used in the process.
  • They have the freedom to program the movement of the solder nozzle, ensuring adequate time to fill through-holes with solder effectively.
  • Solder joints produced through selective soldering are highly reliable and consistent.
  • Operators can program the exact locations where molten solder is applied, enhancing precision without the need for manual dexterity.
  • Selective soldering eliminates the need for manual hand-soldering of through-holes, streamlining the process and reducing labor requirements.
  • It eliminates the need for expensive aperture wave solder pallets traditionally used in wave soldering.
  • Operators can customize soldering to accommodate various board configurations and component parameters, optimizing production costs.
  • Selective soldering is particularly effective for specialized through-hole technology (THT) applications.
  • It minimizes the application of excess heat and eliminates the need for adhesives for surface-mounted devices (SMDs).
 
Disadvantages
 
  • The setup process for selective soldering is intricate and requires specialized knowledge and skill.
  • Selective soldering typically takes longer than selective wave soldering due to its precise nature.
  • Excessive heat exposure during selective soldering can lead to thermal issues affecting the PCB, solder joints, and components.
  • Selective soldering may require post-assembly cleaning to remove flux residues.
  • It is less suitable for high-volume mass production due to its slower processing speed compared to other methods like wave soldering.
 

When to Choose Selective Welding?

 
There are specific situations where hand-soldering is impractical and wave soldering isn't feasible for various reasons. In these cases, selective soldering becomes the necessary solution. Here are several scenarios where selective soldering is chosen:
 
  1. Tall Components: When tall components are used, wave soldering cannot effectively reach the board surface, leaving these components unsoldered. Selective soldering addresses this issue by precisely soldering these tall components.
  2. Thick Boards or Heavy Copper Layers: Boards with significant thickness or thick copper layers, especially for ground and power planes, pose challenges for hand soldering. A single soldering iron may not adequately heat through-holes to achieve satisfactory solder joints, despite the board's thermal conductivity.
  3. Close Proximity of Through-Hole and SMT Components: Boards where through-hole components are closely positioned alongside surface-mount components do not allow for the placement of a protective fixture needed for effective wave soldering. Selective soldering is effective here due to its targeted application.
  4. Large Connectors with Many Pins: Soldering large connectors with numerous pins using a single soldering iron is extremely difficult. Selective soldering is preferred due to the dense concentration of through-hole pins.
  5. Programming Flexibility: Selective soldering allows operators to program and manage soldering configurations for every pin, providing precise control. It can use a wider nozzle to solder multiple rows of connector pins in a single operation.
  6. Consistency: Unlike hand soldering, which can vary depending on the operator's skill, selective soldering ensures consistent results every time. It offers precision and repeatability, making it ideal when uniformity is crucial.

Click here to read the original article.

Read more…

Introduction to Surface Mount Reflow Ovens

In the realm of electronics manufacturing, precision and efficiency are paramount. Surface mount reflow ovens play a crucial role in this process, ensuring reliable soldering of surface mount components onto printed circuit boards (PCBs). This comprehensive guide dives into what surface mount reflow ovens are, their essential components, and their integral function in modern electronics assembly.
 

What are Surface Mount Reflow Ovens?

 
Surface mount reflow ovens are specialized machines designed to solder electronic components onto PCBs using a controlled heating and cooling process. Unlike traditional through-hole soldering methods, which involve inserting component leads through holes in the PCB and soldering them on the opposite side, surface mount technology (SMT) mounts components directly onto the PCB surface.
 
Components of Surface Mount Reflow Ovens
 
  1. Conveyor System: A conveyor belt or chain transports PCBs through the reflow oven at a controlled speed, ensuring consistent heating and cooling profiles.
  2. Heating Zones: Reflow ovens typically have multiple heating zones, each with its own set of heating elements and temperature sensors. These zones gradually increase the temperature of the PCB assembly to activate the solder paste and bond components.
  3. Cooling Zones: Following the heating process, cooling zones rapidly reduce the temperature of the PCB assembly to solidify the solder joints and prevent component damage.
  4. Control System: Advanced reflow ovens feature precise control systems that monitor and adjust temperature profiles, conveyor speed, and other parameters to achieve optimal soldering results.
 

What Is the Reflow Process of Surface-Mount?

 
The reflow process of surface-mount technology (SMT) is a critical step in electronics manufacturing, where components are soldered onto printed circuit boards (PCBs) using a controlled heating and cooling process. Here's a detailed explanation of the reflow process:
 
  1. Application of Solder Paste: Before components are placed on the PCB, solder paste—a mixture of tiny solder particles and flux—is applied to the pads where components will be mounted. This paste serves as the adhesive that holds the components in place during soldering.
  2. Component Placement: Automated pick-and-place machines or manual laborers place surface-mount components onto the solder paste deposits on the PCB. The components are positioned precisely according to the PCB design layout.
  3. Preheating: The PCB assembly enters the reflow oven, starting with a preheating stage. During preheating, the temperature gradually rises to around 150-200°C (302-392°F). This preheating stage removes any moisture from the PCB and components and prepares them for soldering without causing thermal shock.
  4. Ramp-Up: After preheating, the PCB moves into the ramp-up phase where the temperature is increased more rapidly. This phase typically reaches peak temperatures between 220-250°C (428-482°F) depending on the solder alloy used. The ramp-up rate is controlled to avoid thermal stress on the components.
  5. Reflow: Once the PCB reaches the peak temperature, the solder paste undergoes a phase change from solid to liquid, known as reflow. The flux in the solder paste activates, removing any oxides on the metal surfaces and facilitating the formation of reliable solder joints between the component leads and the PCB pads.
  6. Cooling: After reflow, the PCB assembly enters the cooling phase. Cooling is critical to solidify the solder joints and prevent them from forming brittle structures. Cooling rates are carefully controlled to minimize thermal stress and ensure the reliability of the solder joints.
  7. Inspection: Once cooled, the PCB undergoes inspection to verify the quality of the solder joints. This inspection may involve visual examination, automated optical inspection (AOI), or X-ray inspection to detect any defects such as insufficient solder, solder bridges, or misaligned components.
  8. Cleaning (Optional): Depending on the application and requirements, the PCB assembly may undergo cleaning to remove any flux residues left over from the soldering process. Cleanliness is essential for ensuring long-term reliability and functionality of the electronics.
  9. Testing: Finally, the assembled PCB may undergo functional testing to ensure that all components are functioning correctly according to specifications.
 

What Is the Temperature of the SMT Oven?

 
The temperature of a Surface Mount Technology (SMT) reflow oven varies depending on the specific stages of the reflow process. Here's a breakdown of typical temperature ranges:
 
1.Preheating Zone:
 
  • Temperature: Approximately 150-200°C (302-392°F)
  • Purpose: Preheats the PCB and components to remove moisture and prevent thermal shock during ramp-up.
 
2.Ramp-Up Zone:
 
  • Temperature: Rises from preheat temperature to peak reflow temperature.
  • Peak Temperature: Generally between 220-250°C (428-482°F), depending on the solder alloy used.
  • Purpose: Activates the solder paste, melting it to form solder joints between components and PCB pads.
 
3.Reflow Zone:
 
  • Temperature: Maintains peak temperature for a specific duration (typically around 20-60 seconds).
  • Purpose: Allows the solder to reflow completely, ensuring proper wetting and bonding of the solder joints.
 
4.Cooling Zone:
 
  • Temperature: Gradually decreases to solidify the solder joints.
  • Purpose: Prevents thermal stress and ensures the reliability of the solder connections.
 

Importance in Electronics Manufacturing

 
Surface mount reflow ovens are indispensable in electronics manufacturing for several reasons:
 
  • Precision and Consistency: They ensure precise control over soldering temperatures and profiles, leading to consistent quality and reliability of electronic assemblies.
  • Efficiency: Compared to manual soldering, reflow ovens automate the soldering process, increasing throughput and reducing labor costs.
  • Compatibility with Miniaturization: As electronic devices become smaller and more compact, surface mount technology facilitated by reflow ovens allows for the placement of tiny components with high accuracy.
 

Conclusion

 
In conclusion, surface mount reflow ovens represent a cornerstone of modern electronics manufacturing, enabling efficient and reliable soldering of components onto PCBs. Understanding their components and operational principles is crucial for maximizing production efficiency and maintaining high product quality in the ever-evolving electronics industry.
 
Whether you are new to electronics assembly or seeking to enhance your understanding of surface mount technology, mastering the fundamentals of surface mount reflow ovens is essential for success in this dynamic field.
 
Hvttec offer the largest selection of SMT Reflow Ovens for printed circuit board assembly. Shop from low- to high-volume reflow ovens to meet your needs.
Read more…
When joining two metals in a soldering process, such as in PCB assembly, flux is essential to achieve a true metallurgical bond. This ensures that the solder joint remains durable and resistant to cracking or coming loose, even with everyday wear and tear. This article discusses the types of fluxes available, their advantages and disadvantages, and options for flux removal.

Flux aids in the soldering and desoldering processes by removing oxide films that form on the surface of metals being soldered. It enhances the wetting ability of the solder, allowing it to flow uniformly over surfaces without balling up (dewetting).

In electronic soldering, flux plays a crucial role by facilitating the process and ensuring reliable connections between components. Soldering involves joining metal surfaces using a molten alloy known as solder. However, impurities, oxides, and contaminants present during soldering can impede the formation of a strong bond. Flux addresses these issues by cleaning the metal surfaces, enabling a strong and reliable metallurgical connection.
 

What Is Flux & How Does It Work?

 
Flux is a chemical compound that prepares metal surfaces for soldering by removing oxides, promoting wetting, and enhancing solder flow. It is available in various forms, including paste, liquid, or as a core within solder wire. The active ingredients in flux, such as rosin or organic acids, react with oxides on the metal surface.
 
When heated, flux activates and removes oxides, preventing them from interfering with the soldering process. It also promotes wetting, the ability of molten solder to spread and adhere to metal surfaces. By reducing the surface tension of the solder, flux ensures it flows smoothly and evenly, creating strong and reliable solder joints.
 
Moreover, flux prevents the reformation of oxides during soldering by creating a protective barrier on the metal surfaces. This barrier shields the freshly cleaned metal from the atmosphere, preventing rapid oxidation and ensuring a clean, reliable solder joint.
 

Types of Fluxes

 
Various types of flux are available for different soldering applications. Some fluxes are formulated for specific metals, like copper, while others are suitable for a broad range of uses. Additionally, fluxes come with different activity levels, ranging from mild to highly active, depending on the degree of oxidation or contaminants present on the metal surfaces.

IPC J Standard Flux Classification

The IPC J Standard (Joint Industry Standard) flux classification system has replaced the military's soldering standards previously defined under QQ-S-571 and MIL-F-14256. Fluxes are categorized as RO (rosin), OR (organic), IN (inorganic), and RE (resin/synthetic resin). The activity level of the flux solution is rated as L (low activity or <0.5% halide), M (medium activity or 0 to 2% halide), and H (high activity or 0 to >2% halide). Fluxes are classified based on halide (Cl- or Br-) content as either 0 (no halides) or 1 (some halides). For instance, an ROL0 flux would be a rosin flux with low activity and zero halides. An RMA flux could be classified as an ROM1 if it contained 0.5 to 2.0% halide content under this classification scheme.
 
Rosin (type R) Flux

The most fundamental soldering flux, employed for centuries, is natural rosin derived from pine tar resin. Pine tar resin undergoes dissolution in a solvent and subsequent distillation to produce clear, water-white rosin utilized in soldering flux. Rosin comprises naturally occurring acids, primarily abietic acid and its homologs. In soldering flux, clear rosin is dissolved in a solvent, typically isopropyl alcohol, without the addition of acid activators, classifying it as type R rosin flux.

To enhance the flux's ability to dissolve heavier oxide films, especially those formed at the elevated temperatures needed for lead-free solder alloys, activators are incorporated into soldering flux. Activated fluxes can be mildly activated, labeled as RMA (rosin - mildly activated), or fully activated, denoted as RA (rosin -activated). Commonly used activators include organic acids, halogenated compounds (containing chlorine or bromine), amides, and monobasic and dibasic organic salts. These activators are corrosive and must be removed from the circuit board to ensure long-term reliability.

Activated and mildly activated rosin fluxes may leave behind chloride ions and other corrosive residues, necessitating their removal from the printed circuit board post-soldering or desoldering to prevent long-term corrosion-related failures. Residues from these fluxes can also be tacky, attracting dust containing conductive elements that could lead to shorts and other electrical failures on the board. With the increasing prevalence of lead-free solder alloys in manufacturing, the use of highly activated fluxes to counteract oxidation film formation at higher soldering temperatures will likely rise. Consequently, thorough cleaning after soldering or desoldering with lead-free alloys will become imperative.
 
No-Clean Flux

No-clean fluxes can be formulated with either natural rosin or synthetic resins. Rosin-based no-clean flux solutions are similar to rosin (R Type) fluxes but typically contain natural gum rosin at a lower concentration than R Type (R, RMA, and RA) flux solutions. True synthetic no-clean fluxes utilize synthetic resins that offer the same desirable properties as natural rosin. Additionally, no-clean flux solutions may include extra activators, and the residues they leave behind can lead to corrosion.
 
Designed to enable circuit board manufacturers to avoid the time and cost of post-soldering cleaning, no-clean fluxes leave significantly less residue compared to conventional R type fluxes. This reduced residue amount usually does not interfere with board operation or cause long-term corrosion-related failures.
 
However, residues from no-clean fluxes may be adhesive and attract dust, affecting the appearance of the circuit board. Therefore, cleaning may be necessary to meet appearance or operational standards. If the circuit board is to be conformal coated for circuitry protection during operation, the board surface must be free of flux residues, even minimal residues left by no-clean flux, to ensure proper adhesion of the conformal coating.
 
Moreover, the increased need for activated (corrosive) flux when soldering with lead-free alloys may necessitate flux residue removal, potentially diminishing the advantages of using no-clean fluxes.
 
Water Soluble (Aqueous) Flux
 
Water-soluble fluxes typically utilize water-soluble resins, and their residues require removal through a water rinse. Some water-soluble fluxes are formulated as water-based solutions, eliminating the need for alcohol-based flux solutions. This presents an opportunity to reduce VOC emissions, particularly for board manufacturers operating under strict environmental regulations. Acid activators commonly found in water-soluble fluxes include organic acids, halogenated compounds (containing chlorine or bromine), amides, and monobasic and dibasic organic salts. All these activators are corrosive and should be eliminated from the circuit board to ensure long-term reliability.
 

Flux Formats & Packaging Options

 
Various soldering flux formats are available, including liquid flux, tacky flux, flux core, and flux in solder paste, each offering unique advantages suitable for different soldering applications. The choice of flux format depends on factors such as soldering type, joint accessibility, preferred application method, and specific process requirements.
 
Liquid flux, commonly thinned with isopropyl alcohol (IPA), is a prevalent form of soldering flux. Packaged in bottles, syringes, or pens for easy application, liquid flux is applied to solder joints or components before soldering. It cleans surfaces, enhances solder flow, and improves joint quality, making it essential for wave soldering in electronics manufacturing. Before wave soldering, liquid flux is selectively applied using spray, foam, or a flux applicator to ensure precise and controlled coverage.
 
Tacky flux, also known as sticky flux, possesses a thicker consistency than liquid flux, with a sticky or gel-like texture that prevents running or dripping. It adheres well to surfaces during soldering, making it suitable for vertical or overhead joints where flux retention is crucial.
 
Flux core solder features a hollow core filled with flux, combining solder and flux into a single product. As the solder wire melts during soldering, the flux cleans surfaces and aids soldering, offering convenience and efficiency.
 
Flux in solder paste consists of solder alloy particles and flux in a semi-solid or paste form. Widely used in surface mount technology (SMT) applications, solder paste cleans solder pads and components, promotes solder wetting, and holds solder in place before reflow soldering.
 
Flux plays a vital role in electronic soldering by removing oxides, promoting wetting, enhancing solder flow, and preventing re-oxidation. These functions collectively contribute to the creation of strong and reliable solder joints. Selecting the right flux for each soldering task ensures effective joining of electronic components, resulting in optimal electrical and mechanical connections.
 
Click here to read the original article.
Read more…

Open Surgery Vs Laparoscopic Surgery

Surgery plays a crucial role in modern medicine, being essential for treating acute and chronic diseases and improving quality of life. As medical technology advances, surgical methods continue to evolve and innovate. Among the various surgical techniques, open surgery and laparoscopic surgery are two primary methods widely used in clinical practice, each with its own unique advantages and limitations.

Open surgery, a traditional method, has been around for centuries. It involves making a large incision to directly expose the surgical area, allowing surgeons to clearly see and touch the affected tissues for precise operations. Although open surgery is well-established and suitable for many complex and emergency situations, its large incision and long recovery time often deter patients.

In contrast, laparoscopic surgery is a newer, minimally invasive method that has rapidly developed since the 1980s. By making several small incisions and using an endoscope and specialized instruments, laparoscopic surgery can perform complex operations with minimal trauma. Its benefits are clear: smaller surgical wounds, shorter recovery times, and less post-operative pain. However, laparoscopic surgery requires high technical skills and specialized equipment, making it unsuitable for all patients.

In this article, we will explore the differences between open surgery and laparoscopic surgery, analyzing their respective advantages, disadvantages, and suitability. By comparing these two surgical methods, we aim to provide readers with a comprehensive perspective to help them make more informed decisions when surgery is needed.
 

Surgical Methods Overview


Open Surgery

Open surgery, also known as traditional surgery, is a method where a large incision is made on the skin to directly expose the surgical area. This approach has a history spanning several centuries and has been a primary form of surgery since the advent of surgical procedures. Over its development, advancements in anesthesia, sterile techniques, and surgical instruments have significantly improved the safety and effectiveness of open surgery.

Common Applications

 
Open surgery is widely used across various surgical fields, including but not limited to:
 
  • Cardiac Surgery: Such as coronary artery bypass grafting.
  • Neurosurgery: Such as brain tumor removal.
  • Abdominal Surgery: Such as liver resection, pancreatic surgery.
  • Orthopedic Surgery: Such as joint replacement, fracture repair.
 

Laparoscopic Surgery

 
Laparoscopic surgery is a minimally invasive surgical technique where several small incisions are made to insert a laparoscope and specialized instruments. Surgeons perform operations while viewing magnified images on a screen. Introduced in the early 1980s, laparoscopic surgery quickly became a standard method for various surgical procedures. Its emergence marked the beginning of the minimally invasive era in surgery, profoundly transforming surgical treatment approaches.
 

Common Applications

 
  • Laparoscopic surgery is primarily used in the following areas:
  • General Surgery: Such as gallbladder removal, hernia repair.
  • Gynecological Surgery: Such as hysterectomy, ovarian cyst removal.
  • Urological Surgery: Such as prostatectomy, partial nephrectomy.
  • Gastrointestinal Surgery: Such as gastric bypass surgery, colon resection.
 

Surgical Techniques and Procedures


Techniques and Procedures of Open Surgery

Incision Size and Location

 
Open surgery typically requires a larger incision, which depends on the type of surgery and the area being operated on. For example, heart surgery may require a midline incision through the sternum, while abdominal surgery may need a midline or transverse incision.
 
Typical Steps During Surgery
 
  • Anesthesia: General anesthesia or regional anesthesia.
  • Incision: Using a surgical scalpel to cut through the skin and underlying tissues to expose the target area.
  • Operation: Directly accessing and manipulating the target organ or tissue for removal, repair, or reconstruction.
  • Closure: Closing the incision with sutures or staples and applying dressings.
 
Required Instruments and Equipment
 
Key instruments include surgical scalpels, scissors, forceps, hemostatic clamps, sutures, and surgical staples. Equipment typically includes surgical lights, operating tables, and anesthesia devices.
 

Techniques and Procedures of Laparoscopic Surgery

 
Number and Size of Incisions

Laparoscopic surgery usually requires several small incisions (typically 3-5), each about 0.5 to 1 centimeter in diameter. One incision is used for inserting the laparoscope, and the others for inserting surgical instruments.
 
Use of Laparoscope and Other Auxiliary Devices
  • Laparoscope: Inserted through one port, it transmits internal images to a monitor, providing a view of the surgical area.
  • Insufflation: Typically, carbon dioxide is inserted to expand the abdominal cavity, providing more space for operation and better visibility.
  • Surgical Instruments: Include graspers, scissors, staplers, and electrocautery devices, inserted through other ports for manipulation.
 
Key Steps in the Surgical Procedure
 
  • Anesthesia: Generally, general anesthesia is used.
  • Creation of Insufflation: Inserting a needle and injecting carbon dioxide gas to expand the abdominal cavity.
  • Insertion of Laparoscope and Instruments: Inserting laparoscope and surgical instruments through the incisions.
  • Operation: Observing on the monitor and manipulating surgical instruments.
  • Closure: After completing the surgery, releasing the insufflation gas, removing instruments, and closing the small incisions with stitches.
 

 Advantages and Disadvantages Comparison

 
Advantages of Open Surgery

Direct Visual and Tactile Feedback

Surgeons can directly see and touch the surgical area, providing more precise surgical operations and diagnostic capabilities.
 
Suitable for Complex or Emergency Situations
Open surgery is suitable for complex procedures that require extensive operation, or emergency situations such as severe bleeding or organ rupture that need immediate attention.
 
Disadvantages of Open Surgery

Large Incision, Long Recovery Time

The larger incision leads to increased post-operative pain, higher risk of infection, prolonged hospital stay, and longer recovery time for patients.
 
Higher Risk of Infection and Complications
The large incision increases the risk of post-operative infections and may also lead to more complications such as hernias or wound breakdown.
 

Advantages of Laparoscopic Surgery


Small Incision, Shorter Recovery Time

Due to smaller incisions, patients experience less post-operative pain, can often leave the hospital sooner, and have significantly reduced recovery times.
 
Less Pain, Shorter Hospital Stay

Smaller incisions not only reduce post-operative pain but also lower the risk of infection, allowing patients to resume normal activities sooner.
 
Disadvantages of Laparoscopic Surgery

Higher Technical Difficulty, Requires Specialized Training

Laparoscopic surgery requires surgeons to have advanced technical skills and specialized training. It involves greater complexity in operation and relies heavily on equipment.
 
Not Suitable for All Patients and Conditions

Not all patients are suitable candidates for laparoscopic surgery. Conditions such as severe abdominal adhesions, large tumors, or acute abdominal diseases may require open surgery for treatment.
 

Surgical Outcomes and Recovery


Post-Operative Outcomes and Recovery of Open Surgery

Recovery Time

Recovery from open surgery typically takes longer, often requiring weeks to months for patients to fully resume normal activities. This extended recovery is due to the larger incision, which takes more time to heal, and may involve prolonged post-operative pain.
 
Scarring and Appearance

Because of the larger incision in open surgery, scars after the procedure can be noticeable and may affect appearance. In some cases, scars may develop hypertrophy or keloids.
 
Complications and Readmission Rate

Open surgery carries a higher risk of complications such as infection, bleeding, or wound dehiscence. Due to these potential complications, patients may have a higher likelihood of readmission.
 
Post-Operative Outcomes and Recovery of Laparoscopic Surgery

Recovery Time

Recovery time after laparoscopic surgery is relatively short. Patients often can leave the hospital within a few days and resume normal activities within a few weeks. This is primarily because of the smaller incisions and reduced tissue trauma.
 
Scarring and Appearance

Due to the smaller incisions used in laparoscopic surgery, scars are typically smaller and less noticeable, often minimal or barely visible.
 
Complications and Readmission Rate

While laparoscopic surgery generally has fewer complications overall, there are specific risks such as gas-related complications or organ injury. Overall, the readmission rate after laparoscopic surgery tends to be lower, and patients generally experience smoother post-operative recovery.
 

Economic Costs

 
Costs of Open Surgery

Surgical Costs

Direct surgical costs for open surgery are generally lower because it doesn't require expensive laparoscopic equipment and specialized instruments. However, due to longer and more complex procedures, the costs associated with the surgical team may be higher.
 
Hospitalization and Recovery Period Costs

Due to the longer hospital stay required for open surgery, hospitalization costs significantly increase. Additionally, longer recovery times mean patients may need extended rehabilitation and more follow-up visits, further adding to overall medical costs.
 
Long-term Care and Complication Management Costs

Because of the higher risk of complications with open surgery, patients may require additional treatments and care, which further increases medical costs.
 
Costs of Laparoscopic Surgery

Surgical Costs

Direct surgical costs for laparoscopic surgery are usually higher primarily because of the need for expensive laparoscopic equipment and specialized instruments. Additionally, surgical teams need specialized training and skills, adding to the surgical costs.
 
Hospitalization and Recovery Period Costs

Due to the shorter hospital stay associated with laparoscopic surgery, hospitalization costs are typically lower. Faster recovery times also enable patients to return to work and normal activities sooner, reducing economic burdens during recovery.
 
Long-term Care and Complication Management Costs

Although laparoscopic surgery generally has fewer complications overall, there are still costs associated with managing specific complications. Overall, long-term care costs for patients undergoing laparoscopic surgery tend to be lower.
 

Conclusion

 
Open surgery and laparoscopic surgery are two primary methods in modern surgical practice, each with its own distinct advantages and limitations. Open surgery provides direct visual and tactile feedback, making it the preferred choice for handling complex and emergency situations. However, the larger incision and longer recovery time mean patients often face more pain and a higher risk of infection after the procedure. On the other hand, laparoscopic surgery uses small incisions and endoscopic technology to achieve minimal trauma and faster recovery, significantly reducing hospital stay and post-operative pain. Yet, it requires higher technical skills and equipment costs.

In terms of post-operative outcomes and recovery, open surgery typically requires a longer recovery period and hospital stay, with noticeable scars and a higher risk of infection and complications. Laparoscopic surgery, by contrast, offers a shorter recovery time and smaller scars, leading to a smoother recovery process for patients, though it still carries specific complication risks. Economically, open surgery has lower direct costs but higher overall costs due to extended hospital stays and recovery periods. Laparoscopic surgery, while having higher initial costs, might present a lower overall economic burden.

The choice of surgical method should be based on the specific condition, the patient's health status, and the complexity of the surgery. Open surgery is suitable for complex, emergency situations or procedures requiring extensive operations, while laparoscopic surgery is ideal for patients needing reduced trauma and faster recovery. With ongoing advancements in medical technology, especially in robotic surgery and new minimally invasive techniques, surgical options are becoming more diverse and personalized.

In summary, understanding the differences and appropriate applications of open and laparoscopic surgery is crucial for both patients and surgeons when making surgical decisions. By thoroughly evaluating the advantages, post-operative outcomes, and economic costs of each method, we can provide more personalized treatment plans, improving surgery success rates and patient quality of life.
 
Click here to read the original article.
Read more…
At the inspection stage of most production processes, various tools are used for quality assessment. The choice of tools depends largely on the type of inspection and the product being manufactured. Both borescopes and endoscopes are used to inspect areas that are difficult to visually access. They are particularly useful for examining regions that would otherwise require destructive methods, dismounting, or dismantling to reach.

While borescopes and endoscopes are often considered similar, they do have differences. This guide provides all the information you need to compare borescopes and endoscopes effectively and answers any questions you might have about their distinctions. If you’re ready, let’s dive in together.
 

What Is a Borescope?

 
A borescope is an optical device designed to facilitate the visual inspection of narrow, confined, or small spaces within equipment. It comprises a flexible or rigid tube with an eyepiece on one end for viewing and a camera on the other end for capturing images. These components are connected by an electrical system running through the tube.

In many borescopes, fiber optic illumination is used to enhance contrast and brightness, providing a clearer view of the inspection area. The objective lens captures an internal image of the illuminated object, which is then enlarged by the eyepiece for the viewer to see.
 

Features of Borescope

 
A borescope can be either flexible or rigid and comes in various forms. Despite the differences in design, all borescopes consist of a hollow tube, a light source to illuminate the object being inspected, and an eyepiece that magnifies the object. The eyepiece, which can be a camera or an optical lens, transmits the image from the scope's end to the viewer.

As mentioned earlier, borescopes are highly effective for inspecting areas with limited accessibility in equipment. Common applications include detecting coating defects, corrosion, cracks, burrs, voids, and other critical flaws.
 

Application of Borescope

 
Borescopes are widely used in various industries for inspecting hollows, bores, and confined spaces. Here are some key applications:
 
  • Boilers and Tanks: Regular inspections of boiler tubes and tanks are crucial. Borescopes are ideal for detecting cracks, corrosion, and scale deposits.
  • Building Cores: Borescopes are used to assess the structural integrity of buildings.
  • Valves and Pumps: Industries that utilize machine tools such as pumps and valves need to inspect these components regularly to ensure continuous productivity and avoid unnecessary costs.
  • Turbines: The maintenance and safety of gas and steam turbines require thorough and attentive inspection.
 
When choosing the right borescope, consider factors beyond the application to ensure you select the most suitable tool.
 

Price of Borescope 

 
When it comes to the cost and pricing of borescopes, there is no one-size-fits-all price for this type of inspection equipment. Different variations of borescopes are designed for different types of testing, so the cost is determined by the specific type of borescope you need for your inspection.

Instead of asking how much a borescope costs, the more critical question should be: what type of inspection is needed and where will it be deployed?

Other factors that influence pricing include the features of the borescope, the frequency of its use, and whether it is the right tool for the specific inspection task. Confirming these prerequisites helps determine the appropriate price for the borescope.
 

Pros and Cons of Borescope

 
Let's first examine the advantages of the borescope.

One of its significant benefits is its capability to access areas with restricted accessibility and its ease of maneuverability through tight spaces, particularly when using a flexible borescope. Additionally, video borescopes offer high-quality performance at a cost-effective rate, featuring recordable screens for continuous inspection monitoring.

Now, let's consider the disadvantages.

A common drawback is the rigidity of the rigid borescope, which consists of a straight hollow tube that can be challenging to maneuver. However, rigid borescopes typically provide very clear resolution compared to flexible fiber optic borescopes.
 

What is an Endoscope?

 
An endoscope shares many similarities with a borescope, but the key difference lies in flexibility: an endoscope is flexible, whereas a borescope can be either flexible or rigid.
Specifically, an endoscope is a small, flexible tube equipped with a camera or optical lens at its end. This allows inspection personnel to conduct non-destructive testing on objects without the need to dismantle or dismount any part of the object being inspected.
 

Features of Endoscope

 
As mentioned earlier, an endoscope is a long, slender, illuminated flexible tube with a camera attached at one end. Let's delve into its key characteristics.

Typically, an endoscope includes a thin, elongated, flexible tube, a lens system or optical lens, a light-transmitting system that guides light through flexible fibers (also known as optic fibers), an eyepiece for visualization, and a control system. These components collectively form the endoscope and enable its functionalities.
 

Application of Endoscope

 
Endoscopes are used similarly to borescopes for inspecting the interiors of complex technical systems. They have diverse applications, such as pre-visualizing architectural layouts for planned buildings and cities during spatial planning.

Moreover, endoscopes are crucial equipment used by bomb disposal personnel to inspect and disarm Improvised Explosive Devices (IEDs) safely, preventing accidental detonation.

Law enforcement also utilizes endoscopes for surveillance in confined spaces, leveraging their flexibility and portability for effective monitoring.
 

Price of Endoscope

 
Endoscopes, much like borescopes, do not follow a uniform pricing structure. They come in various types designed for different classes of testing. Therefore, the cost of an endoscope depends on the specific model suitable for the type of inspection needed.

Additionally, some endoscopes share similar but distinct features, similar to borescopes. This underscores the importance of specifying the exact functions required from the endoscope.

Moreover, using different types of endoscopes may require ongoing training and skill development for inspection personnel to effectively utilize the tool.
 

Pros and Cons of Endoscope

 
One of the primary advantages of an endoscope is its effectiveness in accessing narrow and complex spaces due to its inherent flexibility.

Endoscopes are available in both reusable and single-use varieties. However, this advantage is balanced by certain drawbacks associated with reusable endoscopes, which require extensive maintenance, have higher acquisition costs, and necessitate ongoing training for inspection personnel.

In contrast, single-use endoscopes offer advantages opposite to those of reusable ones. They require no continuous training, have lower acquisition costs, and require no maintenance.
 

Difference Between Borescope and Endoscope

 
Both tools exhibit distinct advantages in various aspects such as diameter, maneuverability, pricing, and field of view.
 
In terms of diameter, endoscopes are notably thinner than borescopes, enabling them to access tighter spaces more effectively due to their flexibility. This characteristic enhances their maneuverability around the test object.
 
When comparing field of view, borescopes typically offer a wider perspective of around 120 degrees, whereas endoscopes typically provide a narrower field of view of about 90 degrees.
 
Regarding pricing, borescopes are generally more affordable than endoscopes, making them a cost-effective choice for many applications.
 

Conclusion

 
In summary, borescopes and endoscopes are highly similar equipment with overlapping functions. However, their specific use cases can differ significantly, highlighting notable distinctions between them.

While the differences mentioned are subtle, they contribute to making both tools excellent choices for various applications and purposes.

Selecting the appropriate equipment for specific inspections is crucial, and understanding the unique features and functionalities of each tool can guide you in choosing the most suitable one for your inspection needs.
Read more…
In the intricate realm of surgical procedures, precision is paramount. Surgeons rely on an array of specialized tools to perform intricate tasks with finesse and accuracy. Understanding the categories of surgical instruments is fundamental not only for medical professionals but also for those curious about the intricacies of surgical practice. In this comprehensive guide, we unveil the three primary categories of surgical instruments, shedding light on their unique purposes and significance in the operating room.
 

1.Cutting Surgical Instruments

 
At the forefront of surgical precision are cutting instruments, designed to dissect and incise tissues with utmost precision. These instruments are crucial for creating clean, precise surgical incisions, minimizing trauma to surrounding tissues. Within this category, a diverse array of tools exists, each tailored for specific tasks. Scalpels, the quintessential cutting instrument, come in various sizes and shapes, allowing surgeons to adapt to the intricacies of different procedures. Scissors, another essential cutting tool, enable precise tissue dissection and suturing. Additionally, surgical knives, such as the versatile and precise lancet, find applications in specialized procedures, including dermatological surgeries. Cutting instruments play a foundational role in surgical procedures, facilitating the meticulous manipulation of tissues with minimal disruption.
 

Types of Surgical Instruments For Cutting

 
Below are some of the commonly used surgical instruments for cutting:
 
Scalpels
 
Scalpels are versatile cutting instruments indispensable in surgical procedures. They are categorized based on their size and shape, each tailored for specific applications. For instance, the number 10 blade is preferred by surgeons for making smaller incisions in skin and tissue, while the number 15 blade, featuring a slight curve, excels in creating short and precise incisions, ideal for tasks like removing skin lesions or accessing coronary arteries.
 
Surgical Scissors
 
Surgical scissors encompass a wide range of sizes and functionalities to cater to diverse surgical needs. Heavy-duty surgical scissors, positioned at the higher end of the spectrum, are adept at cutting through thick tissue, muscle, and even bone. Mid-size surgical scissors employ a combination of sharp and serrated blades to achieve precise cuts with minimal tissue trauma. Those with curved blades offer surgeons the ability to execute clean cuts without risking damage to underlying tissues.
 
Specialized Scissors
 
In addition to conventional surgical scissors, specialized variants serve specific surgical disciplines. Vannas scissors and Castroviejo scissors, both smaller in size, excel in delicate procedures such as ophthalmic and neurosurgical interventions. Furthermore, small sapphire blades emerge as invaluable tools in microsurgery, facilitating precise cuts with minimal pressure application, thus minimizing tissue disruption.
 

2.Grasping and Holding Instruments

 
In the realm of surgical precision, control is key. Grasping and holding instruments empower surgeons to manipulate tissues and organs with dexterity and finesse, facilitating complex surgical maneuvers. These instruments come in a myriad of forms, each serving a specific purpose in the operating theater. Forceps, characterized by their fine tips and sturdy grip, enable surgeons to grasp and manipulate delicate tissues with precision. Within this category, variations such as tissue forceps, hemostatic forceps, and toothed forceps cater to diverse surgical needs. Additionally, retractors play a pivotal role in surgical exposure, holding tissues aside to provide optimal visibility and access to the operative field. Whether used for gentle tissue manipulation or firm retraction, grasping and holding instruments are indispensable allies in the hands of skilled surgeons.
 

Types of Surgical Instruments For Grasping

 
Similar to scissors and scalpels, surgical forceps exhibit a diverse array of styles and sizes, each tailored to specific surgical tasks. Forceps may feature either straight or curved tips, with each design offering distinct advantages depending on the application. Straight-tip forceps prioritize enhanced grip and precision, whereas curved-tip variants optimize visibility during intricate procedures.
 
Thumb Forceps
 
Thumb forceps, operated by squeezing to open, find utility in various surgical procedures. Their design makes them well-suited for tasks such as dressing wounds, removing dressings, and tying sutures, offering surgeons a high level of control and maneuverability.
 
Reverse Forceps
 
Conversely, reverse forceps operate by squeezing to close, providing uniform tension for precise handling, particularly beneficial when working with gloved hands. This design ensures consistent grip strength, enhancing the surgeon's ability to execute intricate maneuvers with accuracy.
 
Locking Forceps (Haemostats)
 
Locking forceps, also known as haemostats, bear resemblance to scissors in appearance. Surgeons utilize these specialized forceps to securely grasp tissues during delicate surgical procedures. Moreover, haemostats play a crucial role in hemostasis by compressing blood vessels to halt blood flow, facilitating precise surgical interventions on organs and tissues.
 

3.Retracting Surgical Instruments

 
Retracting surgical instruments play a pivotal role in surgical procedures by providing optimal exposure and access to the surgical site, thereby enabling surgeons to perform intricate maneuvers with precision and efficiency. These instruments are designed to gently hold tissues, organs, or structures aside, allowing the surgeon clear visibility and unobstructed access to the area of interest. 
 

Types of Surgical Instruments For Retracting

 
In surgical procedures, retractors serve the dual purpose of holding incisions open or keeping organs and tissues away from the operative field, facilitating unhindered access and maneuverability.
 
Handheld Retractors
 
Handheld retractors necessitate external assistance to maintain their position throughout the procedure. Typically, surgical assistants fulfill this role by holding the retractor in place, ensuring consistent retraction and visibility of the surgical site.
 
Self-Retaining Retractors
 
Self-retaining retractors, as the name implies, eliminate the need for constant manual support during procedures. These retractors employ various mechanisms such as screws, ratchets, or clamps to secure tissues in place. Alternatively, wire retractors utilize a spring-based system to maintain tension and uphold tissue retraction throughout the surgery.
 

Choosing The Right Surgical Instrument For Your Application

 
Certain surgical instruments exhibit versatility, capable of serving in a variety of applications. However, specific surgical procedures may necessitate the use of more specialized tools, such as smaller, sharper, or more precise instruments.
 
When selecting the appropriate surgical instruments for your needs, consider the following factors:
 
Nature of the Procedure

Determine the specific procedure you will be performing. Research papers and published literature often detail the surgical equipment utilized in various procedures, providing valuable insights and recommendations for optimal instrument selection to achieve the best outcomes.
 
Frequency of Use

Evaluate how frequently you will utilize the surgical equipment. While proper cleaning and maintenance are essential for instrument longevity, it's crucial to recognize that surgical tools undergo wear and may lose sharpness over time. For heavy usage scenarios, prioritize instruments crafted from durable materials, as they tend to retain sharpness for extended periods.
 
For tailored guidance on selecting the most suitable surgical equipment for your applications, our comprehensive range of surgical instruments in China offers a diverse selection. Our team of experts is readily available to provide personalized assistance, ensuring you acquire the equipment best suited to your needs. Learn more about our extensive collection of surgical instruments to streamline your surgical practice.
Read more…
LED lighting offers extensive customization options due to its versatility. However, since LEDs operate on direct current (DC), achieving dimming functionality necessitates the utilization of LED dimmer drivers, which can operate in two distinct modes.
 

What is a LED Dimmer Driver?

 
Because LEDs operate on low voltage and direct current, it's crucial to regulate the electricity flowing into them using an LED driver.

An LED driver is an electronic device that adjusts the voltage and current from the electrical source to make it safe and usable for LEDs. Typically, household electricity runs on mains alternating current (AC), which the LED driver converts into direct current (DC).

The LED driver controls the flow of electricity to the LED, making dimming possible. This specialized form of LED driver, known as an LED dimmer driver, enables adjustment of the LED's brightness.

When selecting an LED dimmer driver, ease of use is key. Look for models with dual in-line package (DIP) switches on the front for easy adjustment of the output current, allowing precise control over the LED brightness.

Additionally, consider compatibility with Triode for Alternating Current (TRIAC) wall plates and power supplies. This compatibility ensures high-speed control of electric current to the LED, making the dimmer suitable for various projects and applications.
 

How Do LED Dimmers Work?

 
LED dimmers work by adjusting the amount of electrical current flowing to an LED light source, thereby controlling its brightness. Here's how they operate:
 
  • PWM Dimming (Pulse Width Modulation): Many LED dimmers use PWM dimming, where the LED receives full voltage in rapid pulses. The width of each pulse determines how much power reaches the LED. A longer pulse means more power and thus brighter light, while a shorter pulse results in dimmer light. This method is efficient and maintains color consistency.
  • Analog Dimming: Some LED dimmers vary the voltage supplied to the LED. By reducing the voltage, they lower the current flowing through the LED, dimming its output. Analog dimming tends to be simpler but may affect color temperature slightly.
  • Digital Dimming: Digital dimmers control LEDs by sending digital signals, adjusting the current or pulse width digitally. This method offers precise control over dimming levels and can integrate with smart home systems.
  • Compatibility: LED dimmers need to be compatible with the specific type of LED driver in use. For instance, constant current LED drivers require dimmers designed for such drivers to function correctly.
  • Types of LED Dimmers: There are various types of LED dimmers available, including wall-mounted dimmer switches, remote-controlled dimmers, and programmable dimmers used in advanced lighting systems.
 

Two LED Dimming Techniques

 
There are two primary techniques used for dimming LEDs: Pulse Width Modulation (PWM) and Analog dimming. Here's how each technique works:
 
1.Pulse Width Modulation (PWM)
 
  • Description: PWM is a digital technique that rapidly switches the LED on and off at a controlled rate. The percentage of time the LED is on (duty cycle) versus off determines its brightness.
  • Operation: A higher duty cycle (more time on) results in a brighter light output, while a lower duty cycle (more time off) dims the light. PWM operates at a frequency usually above human perception, ensuring smooth dimming without visible flickering.
  • Advantages: Precise control over brightness levels, efficient operation, and maintains color consistency.
 
2.Analog Dimming
 
  • Description: Analog dimming adjusts the voltage or current supplied to the LED, thereby directly controlling its brightness.
  • Operation: By reducing the voltage or current, analog dimming lowers the light output of the LED. This method is straightforward but may slightly alter the color temperature of the light at lower brightness levels.
  • Advantages: Simple to implement, no high-frequency switching noise, and can be compatible with existing dimmer technologies.
 
Comparison
 
  • Control Precision: PWM offers more precise control over brightness levels compared to analog dimming.
  • Efficiency: PWM dimming is generally more efficient because it switches LEDs fully on and off, reducing power consumption.
  • Compatibility: Analog dimming may be more compatible with older dimmer technologies and does not introduce high-frequency switching noise.
 
Both techniques have their strengths depending on the application and specific requirements. PWM is favored for applications needing precise control and efficiency, while analog dimming is suitable for simpler setups and compatibility with existing infrastructure.
 

Do I Need a Dimmable LED Driver?

 
Whether you need a dimmable LED driver depends on your specific lighting requirements and preferences. Here are some factors to consider:
 
  1. Dimming Capability: If you desire the flexibility to adjust the brightness levels of your LED lights, especially for creating different moods or saving energy, then a dimmable LED driver is essential. Dimming allows you to customize the lighting ambiance according to different activities or times of day.
  2. Compatibility: Check if your LED fixtures or bulbs are dimmable. Not all LEDs are dimmable, and using non-dimmable LEDs with a dimmable driver may cause flickering or other performance issues. Ensure compatibility between your LEDs and the dimmable driver to achieve smooth dimming operation.
  3. Functionality: Dimmable LED drivers provide precise control over light output, allowing you to set the desired brightness level accurately. This feature is beneficial in residential, commercial, or hospitality settings where lighting needs vary.
  4. Energy Efficiency: Dimming LEDs can contribute to energy savings by reducing light output when full brightness is unnecessary. This can extend the lifespan of your LED lights and lower electricity costs over time.
  5. Application: Consider the application and environment where the LED lights will be installed. Dimmable drivers are commonly used in homes, offices, restaurants, hotels, and other spaces where adjustable lighting is desired.
 

Purchase An LED Dimmer Driver


Looking to enhance your LED lighting experience? Invest in LED dimmable drivers to unlock the full potential of your LED lights. With adjustable brightness levels, you can create the perfect ambiance while conserving energy.
 
Discover the extensive range of LED dimmable drivers at Suncom! Our drivers are engineered for high voltage dimming compatibility, ensuring reliable performance with compatible dimmer switches. Trust Suncom for superior dimming solutions that guarantee optimal performance and reliability.
 
Don't compromise on your lighting project—choose Suncom's dimmable drivers for sophisticated controls and seamless dimming solutions tailored to your needs.
 
Contact us today at +86 760 28168132 to learn more about our lighting and dimming solutions at Suncom!
Read more…
"What type of LED driver should I choose? Navigating through the multitude of options available for LED drivers can be quite challenging. There are numerous factors to consider when selecting the right one for your needs, which we comprehensively cover in our LED drivers guide here. One crucial decision is whether to opt for a constant current LED driver or a constant voltage LED driver. While LED drivers are commonly associated with constant current operation, manufacturers also provide constant voltage drivers for LEDs. Why is this the case? And how can we distinguish between these two types?"
 

Constant Current LED Drivers Vs. Constant Voltage LED Drivers

 
Both constant current and constant voltage drivers are suitable choices for powering LED light sources, but they differ in how they deliver power. LED drivers play a crucial role in supplying and controlling the power needed to ensure LEDs operate safely and reliably. Differentiating between these two types is essential for:
 
  • Properly powering LEDs
  • Preventing potential damage to your LED investment
 

What is a Constant Current LED Driver?

 
Constant current LED drivers are specifically designed to provide a fixed output current (measured in mA or A) within a designated range of output voltages. LEDs that operate with constant current drivers require a consistent supply of current to ensure optimal performance. These drivers regulate voltage across the electronic circuit to keep the current stable throughout the LED system.

For instance, Suncom’s Constant Current Driver exemplifies this approach:

Using higher current ratings can increase LED brightness, but without proper regulation, LEDs may draw more current than they are rated for. This condition, known as Thermal Runaway, leads to reduced LED lifespan and premature burnouts due to elevated temperatures. Constant current drivers are therefore essential for driving high-power LEDs, as they maintain uniform brightness and prevent issues across all LEDs connected in series.
 

What is a Constant Voltage LED Driver?

 
Constant voltage drivers are designed to provide a steady direct current (DC) output voltage, typically at 12VDC or 24VDC. LED lights that operate with constant voltage require a specific input voltage to function correctly, as indicated by their rating.

These drivers convert standard line voltage (120-277VAC), which is commonly found in household wall outlets, into a lower direct current voltage (VDC). Regardless of the current load applied, constant voltage drivers maintain a consistent voltage output.
 
For example, the LPV-60-12 driver ensures a stable 12VDC output, as long as the current remains below the maximum of 5 amps indicated in the specifications. Constant voltage drivers are commonly used in applications such as under-cabinet lighting and LED flex strip installations, although their versatility extends beyond these categories.
 

What Type of LED Driver Do I Need?

 
The case for constant current drivers:
 
When dealing with high-powered LEDs, a notable characteristic is the exponential relationship between the applied forward voltage and the resulting current flow. This phenomenon is clearly illustrated by the electrical characteristics of the Cree XP-G2 LED shown in Figure 1. Even a slight 5% increase in voltage (from 2.74V to 2.87V) can lead to a significant 100% rise in current through the XP-G2, as indicated by the red marks where current jumps from 350mA to 700mA.
 
Figure 1
 
While higher current can indeed enhance LED brightness, it also risks over-driving the LED. Referencing Figure 2, which displays Cree’s specifications for maximum forward current and de-rating curves under various ambient temperatures, driving the XP-G2 LED at 700mA as seen in the example is within acceptable limits. However, without a current limiting device, changes in the LED’s electrical characteristics due to temperature fluctuations could cause it to draw excessive current. This scenario, particularly in warmer environments, could lead to thermal runaway—a condition where increased forward current generates excess heat, shortening the LED's lifespan and potentially causing failure.

To mitigate these risks, constant current LED drivers are preferred for powering high-powered LEDs. By maintaining a steady current output despite fluctuations in voltage caused by temperature changes, these drivers prevent over-driving of the LED and effectively mitigate thermal runaway.
 

When Should You Opt for a Constant Voltage LED Driver?

 
In real-world lighting applications, using individual high-powered LEDs as discussed earlier is often impractical and costly. Instead, manufacturers offer pre-assembled LED products such as LED rope lights, LED strips, and LED bars, which contain multiple LEDs arranged in series and/or parallel configurations.

Common LED strips, for instance, are typically designed with LEDs connected in series along with current-limiting resistors. These resistors are strategically placed to ensure stable operation regardless of minor fluctuations in the voltage supply, similar to what was described with the XP-G2 LED. Since the current is already regulated by these onboard resistors, these LED strips require only a constant voltage to power them.

When LEDs or LED arrays are configured in this manner, they are usually rated to operate at a specific voltage. For example, if your LED strip operates at 12VDC, you do not need to use a constant current driver; a 12VDC constant voltage source is sufficient. The built-in circuitry provided by the manufacturer ensures that the LEDs receive the correct current under varying operating conditions.
 

Benefits of Utilizing a Constant Current LED Driver

 
Therefore, when constructing your own fixture or working with high-powered LEDs, it is highly advantageous to use constant current drivers because:
 
  1. They prevent exceeding the maximum current specified for the LEDs, thereby preventing burnout or thermal runaway.
  2. They offer easier control for designers, ensuring more consistent brightness in the lighting application.
 

Benefits of Utilizing a Constant Voltage LED Driver

 
Constant voltage LED drivers are suitable when powering LEDs or arrays that require a specific voltage. This approach is advantageous because:
 
  1. Constant voltage technology is well-known and widely understood by design and installation engineers.
  2. These systems can be more cost-effective, especially in larger-scale applications.
 
Discover a dependable led driver today. Extensive inventory of led drivers. Class 1, 5-year warranties, and affordable power supplies ready to ship today!
Read more…
Suncom LED drivers provide dimming capabilities to meet the requirements of modern lighting control. Offering a wide range of LED drivers with advanced dimming features, Suncom has developed a comprehensive line tailored for LED lighting. Many models feature Suncom's innovative 3-in-1 dimming capability. With '3-in-1 dimming,' users can dim LEDs using three distinct signal forms: Passive Resistance, 1-10VDC (0-10V), and Pulse Width Modulation (PWM). This dimming functionality enhances flexibility, simplifying end-application design.
 

Potentiometer: Simple Resistance Dimming with Some Shortcomings

 
A straightforward and cost-effective solution for dimming LED drivers involves using a basic 100k Ohm potentiometer. This variable resistor can be easily connected to the dimming wires, offering a budget-friendly option.

However, there are two main drawbacks associated with this dimming method that should be considered in end-application design. Firstly, the dimming response tends to be unstable, particularly when multiple drivers are connected to a single potentiometer. Secondly, there are limited options for integrating the potentiometer seamlessly into the aesthetic design of the application or household.

These limitations may prompt users to explore alternatives such as electronic potentiometers or 0-10V dimmers. While 100k Potentiometers are suitable for smaller projects requiring simple knob control or for testing LED light dimming range and output, they may not be ideal for larger installations or applications requiring smoother dimming performance and aesthetic integration.
 

1-10V or 0-10V Dimming

 
0-10V dimming involves adjusting the control signal of the dimming wires from 1-10VDC to regulate LED brightness. In 0-10V or 1-10V dimmable drivers, a 10V signal flows from the Dim (+) line to the Dim (-) line. When the wires are left untouched (without a dimmer), the signal remains at 10V, resulting in 100% light output. Similarly, with a dimmer connected and turned up fully, the signal remains at 10V, maintaining maximum light output. As the dimming signal is reduced, light output decreases until reaching the minimum output level.

However, there is a distinction between 0-10V and 1-10V dimming drivers. With 1-10V dimming, the dimming signal can go down to 1V or 10% light output, meaning there is still some visible light and power flowing through the system at its lowest setting. Therefore, a switch at the AC main lines is required to cut off power when the light is not needed. On the other hand, 0-10V dimmers can go down to .57V or 5.7% light output before cutting off power.

For Suncom drivers, the output status is not guaranteed when the signal is less than 1V. Using a switch setup as described above can assist the circuit and ensure it is turned off when not in use. The typical dimming response for a 1-10V dimming signal is illustrated below:
 
1-10V dimming signal
 
It's important to note that Sunom drivers require a current sinking dimmer, rather than one that already provides the 0-10V signal. We offer an excellent current sinking 0-10V dimmer specifically designed to work seamlessly with Sunom drivers. This simple yet effective design only requires wiring to the dimming wires and smoothly dims LED lights. Additionally, the dimmer includes a faceplate for wall mount installations and is available in rotary knob or slider options. To install, connect the gray wire on the dimmer to Dim (+) and the purple wire to Dim (-).

If you have a controller with a 0-10V output signal, consider using the ELN, which is compatible with that type of circuit.
 

PWM Dimming Controls

 
Another dimming option involves using a PWM (Pulse Width Modulation) signal generated by a dimming switch or control. It's important to understand that this method does not give the driver a PWM output similar to the PWM power supply from Suncom. Instead, it regulates the light output through the dimming wires.

In this type of dimming, the control will have wires or terminals that connect to the driver's dimming wires. As the duty cycle is reduced, the LED controller decreases the output of the LED driver. For example, you could use an Arduino to output a PWM signal to the dimming wires.
 

Why Are the LEDS Dimming at an Uneven or Rapid Rate?

 
The typical response to this issue is that the LED driver being tested is underloaded. Most dimmable Suncom drivers function by reducing the amplitude of the current supplied to the LED lights.

For smooth dimming that synchronizes with the motion of the dimming switch, the LED driver should be loaded as close to its rated maximum power output as possible. I'd suggest aiming for around 90-95% load capacity. If the load is less than this, dimming performance may degrade, and there may be some dead space.

The graphs below provide a visual representation of how dimming will behave with LED drivers operating at various load capacities:
 
dimming graphs
 
(a) LED driver loaded to 100% - Provides smooth and uniform dimming.
 
(b) LED driver loaded to 70% - No dimming occurs until the dimmer switch is lowered below 70%.
 
(c) LED driver loaded to 30% - No dimming occurs until the dimmer switch is lowered below 30%.
 
If your LED driver is appropriately loaded as recommended above and dimming issues persist, there may be a problem with the dimming switch.
 
In conclusion, Suncom LED drivers offer an array of dimming solutions tailored to meet the diverse needs of modern lighting control. From 0-10V dimming systems to PWM dimming controls, users have access to versatile and reliable dimming options to enhance their LED lighting experience.
Read more…

Types and Uses of Steel Sheet Metal

Choosing the correct sheet metal for your manufactured product can be complex. Here’s a guide to help you navigate the options when considering Carbon Steel, commonly known as “Mild Steel”.

When selecting Carbon Steel sheet metal for your parts, it's crucial to answer a few key questions to ensure you choose the right material:

1.Cutting Method: Will your parts be cut using a laser, plasma, or punched?

Each cutting method affects the type of Carbon Steel you should choose. For instance, laser cutting may require a different grade than punching due to varying material thicknesses and heat sensitivity.

2.Surface Finish: Will your parts be painted?

The paintability of Carbon Steel varies based on its surface finish and chemical composition. Some grades may require special pre-treatments or coatings to achieve optimal paint adhesion and durability.

3.Environmental Exposure: Will your finished parts be used indoors or outdoors?

Exposure to outdoor environments can cause certain grades of Carbon Steel to corrode or degrade faster. Understanding the intended use helps in selecting a grade with appropriate corrosion resistance or protective coatings.

Considering these factors will guide you towards the most suitable type of Carbon Steel for your project. Each type offers unique properties and advantages, making it essential to align your material choice with your specific manufacturing and performance requirements.
 

4 Common Types of Sheet Metal


Galvannealed Steel Sheet Metal

 
Galvannealed sheet metal is a type of steel sheet coated with a zinc-iron alloy that enhances its corrosion resistance and paint adhesion properties. The process of galvannealing involves heating the steel sheet to a high temperature in a controlled atmosphere to promote alloying between the zinc coating and the steel substrate. This results in a uniform, matte grey finish that provides excellent surface for painting and other finishing processes.
 
Key characteristics of galvannealed sheet metal include:
 
  • Corrosion Resistance: The zinc-iron alloy coating provides better corrosion resistance compared to regular galvanized steel. This makes galvannealed sheet metal suitable for outdoor applications and environments where exposure to moisture and weathering is a concern.
  • Paint Adhesion: The matte finish and alloy structure of galvannealed steel promote excellent paint adhesion. Paint adheres tightly to the surface, reducing the risk of peeling or flaking over time. This makes it ideal for applications where painted surfaces need to maintain their appearance and durability.
  • Weldability: Galvannealed steel retains good weldability, similar to uncoated steel sheets. This allows for ease of fabrication and welding during manufacturing processes.
  • Formability: It exhibits good formability characteristics, allowing it to be shaped and formed into various complex shapes without cracking or flaking of the coating.
  • Surface Appearance: The surface of galvannealed sheet metal has a uniform, matte grey appearance due to the zinc-iron alloy coating. This finish is often preferred for applications where aesthetics are important and a uniform appearance is desired.
 
When to Use Galvannealed Sheet?
 
Galvannealed sheet metal is ideal for applications where the part will undergo painting and requires enhanced corrosion resistance. This type of sheet can be efficiently laser cut, punched, and formed, yielding excellent results in manufacturing processes.

Its surface finish facilitates superior adhesion and paint quality, making galvannealed material a preferred choice. Specifically designed for use in painted conditions, galvannealed sheets, when coated with appropriately selected primers and paints, offer exceptional resistance against peeling and blistering. Moreover, compared to conventional galvanized sheet metal, galvannealed sheets enhance the corrosion resistance of the applied paint. This combination makes galvannealed sheet metal highly suitable for industries requiring durable, aesthetically pleasing finishes that withstand environmental exposure and operational demands.
 

Hot Rolled Sheet Metal

 
Hot rolled sheets refer to steel sheets that are processed through a hot rolling method. This manufacturing process involves heating slabs of steel above their recrystallization temperature and then passing them through rollers to achieve the desired thickness and shape. Here are key characteristics and considerations regarding hot rolled sheets:
 
  • Production Process: Hot rolling begins with large steel slabs or billets that are heated above their recrystallization temperature, typically around 1100 to 1300 degrees Celsius (2000 to 2400 degrees Fahrenheit). The heated steel is then passed through a series of rollers to reduce its thickness and shape it into a sheet or coil.
  • Surface Finish: Hot rolled sheets have a rough, scaled surface texture due to the residual oxide layers formed during the rolling process. This surface texture is characteristic of hot rolled steel and may require further processing (such as pickling or cold rolling) for smoother finishes if needed.
  • Grain Structure: The hot rolling process alters the grain structure of the steel, aligning the grains in the direction of rolling. This can enhance the mechanical properties of the steel, including its strength and toughness.
  • Dimensional Tolerances: Hot rolled sheets are generally less precise in terms of thickness and dimension tolerances compared to cold rolled sheets. However, they are suitable for applications where exact dimensions are not critical or where subsequent processing can refine dimensions.
  • Applications: Hot rolled sheets are used in a wide range of applications across industries, including construction, automotive, shipbuilding, pipelines, and structural components. They are particularly favored in applications where strength and durability are important, and where surface finish requirements are less stringent.
  • Cost and Availability: Hot rolled sheets are typically more cost-effective than cold rolled sheets due to the simpler manufacturing process and lower production costs. They are widely available in various grades and thicknesses to meet diverse industrial needs.
 
When to Utilize Hot Rolled Steel?
 
Opt for hot rolled steel (HRS) when prioritizing cost over surface finish. It's advisable to punch hot rolled sheet metal instead of using a laser cutter, as the presence of mill scale can impact the cut quality. Hot rolled sheets are easily formable; however, when painted, any remaining mill scale or pits may be visible through the paint, leading to a textured finish.
 

Hot Rolled Pickled and Oiled (Hrpo) Sheet Metal

 
The Difference Between Hrpo and Hot Rolled Sheets
 
Hot Rolled Pickled and Oiled (HRPO) Sheet is made from the same material as regular Hot Rolled Sheet, but it undergoes an additional process before being uncoiled, flattened, and cut to specific lengths. In the HRPO manufacturing process, the Hot Rolled material is uncoiled and passed through a pickling chemical bath, which removes all surface oxides. After pickling, the sheet is oiled to prevent rusting before being recoiled and further processed.
 
When is HRPO Used?
 
HRPO (Hot Rolled Pickled and Oiled) sheet metal is suitable for applications where the product will be painted and primarily used indoors. It also serves as a cost-effective alternative to Galvannealed sheet metal. HRPO sheets can be laser cut, punched, and formed effectively, producing excellent results. The painted surface finish achieved with HRPO is typically very smooth and of high quality.
 
Cold Rolled Sheet Metal
 
Cold Rolled Sheet Metal (CRS) is preferred when seeking enhanced material strength combined with a smooth surface finish. Parts made from cold rolled sheet metal should be painted or protected promptly to prevent surface rust. Similar to HRPO sheets, cold rolled sheet metal can be laser cut, punched, and formed with excellent results. The surface finish of painted parts is usually very refined and consistent with CRS.
Read more…

Applications of Perforated Sheets

Sheet metal is known for its exceptional versatility and widespread use across various industries. Among its many variations, perforated sheets play a niche yet crucial role in specific applications.

In this guide, we aim to provide you with comprehensive insights into perforated sheets—exploring their common uses, unique characteristics, and the manufacturing process behind them.
 

What Is Perforated Sheet and How Does It Work?

 
Sheet metal is a thin, flat material widely used in various industries, from automotive to electronics. Perforated sheet metal, on the other hand, is distinguished by its numerous punched holes arranged in regular patterns.

These perforated sheets can feature different hole shapes such as squares, rectangles, and oblongs, but circular holes in a staggered pattern are the most common. This design choice enhances manufacturing efficiency, improves aesthetics, and strengthens the sheet.

The process of creating perforated sheets involves using automated punching machines, either CNC-controlled or mechanically operated, to precisely punch holes into regular sheet metal.
 

The Process of Making Perforated Sheet Metal

 
Perforated sheet metal typically begins as a coil of sheet metal with a specific gauge thickness. Gauge sizes vary by country, where a higher gauge number indicates thinner sheet metal. Once the gauge is selected, various manufacturing methods can be used to fabricate perforated sheet metal.

The top three modern manufacturing processes for perforated sheet metal include rotary-pinned perforation, punch press, and laser perforation.

Rotary-Pinned Perforation

Rotary-pinned perforation is the most common and efficient method for producing high-quality perforated sheet metal. This process utilizes large cylinders equipped with sharp needles on their surface. The cylinders rotate at high speeds, sometimes heated to temperatures above 400 degrees Celsius, to punch holes into the passing sheet metal. This heat treatment strengthens the perforations, improving their load resistance and overall strength. Due to their high speed, rotary-pinned perforation is cost-effective and capable of producing large quantities of identical holes rapidly.

Punch Press

A punch press uses a ram to compress sheet metal against a fixed die, shaping and cutting holes in the metal. Punch presses can be manually operated or computer numerically controlled (CNC). CNC-controlled punch presses automate production, improving efficiency and precision.
 
  • Wide Punch Press: Features multiple rams aligned in rows that descend simultaneously to punch rows of holes in the sheet metal.
  • XY-Axis Machine: Utilizes a single die or a group of punching rams to create holes in intricate patterns and non-repetitive designs. The sheet metal is typically held in place as the machine moves to punch holes, leaving non-perforated areas that enhance the finished appearance.
 
Laser Perforation

Laser perforation employs precision beams to burn through the sheet metal, creating precise and intricate patterns of holes. This method offers high accuracy and flexibility but can be time-consuming and expensive for large-scale production.
 

What Type of Sheet Material Can Be Perforated?

 
Perforated sheets can be made from nearly any sheet metal material, although steel and aluminum are the most frequently used. These sheets are available in a variety of thicknesses, ranging from 0.019 inches to 0.250 inches thick.

Standard sheet sizes are commonly used for perforated sheets, but at Huijin Metal, we offer the flexibility to cut sheets to any size you need, ensuring they meet your specific requirements.
 
applications of perforated sheets
 

Applications of Perforated Sheets

 
Perforated sheets serve numerous applications across various industries, and the following list provides just a glimpse of their diverse uses!
 
Acoustic Applications
 
  • Acoustic Panels: Used in sound-critical environments like recording studios to dampen, reflect, or dissipate sound waves.
  • Acoustic Equipment Framework: Enhances sound system performance while providing structural support and encasement for electronic components.
 
Automotive Uses
 
  • Exhaust Baffling: Installed inside mufflers to dissipate sound waves and contain wadding without obstructing gas flow.
  • Speaker Grilles: Typically made from thin aluminum sheets.
 
Construction and Architectural Uses
 
  • Building Facades: Aluminum or painted steel perforated sheets used as design features and for acoustic damping on modern building exteriors.
  • Aggregate Filters: Heavy perforated sheets utilized in construction site landscaping for filtering and grading bulk materials.
 
Water & Waste Management Filtration
 
  • Filters and Screens: Ideal for creating filters that allow water and small particles to pass through while blocking larger debris.
  • Staged Filtration: Customizable hole sizes enable the creation of multi-stage filtration systems that progressively filter smaller particles.
 
Bespoke Fabrications
 
  • Cooling and Ventilation Panels: Used on electrical equipment to provide airflow for cooling while ensuring safety from contact.
  • Store Displays: Creative designers use perforated sheets in shop displays to add visual interest and break up the design.
 

Benefits of Utilizing Perforated Sheets

 
Cost Efficiency

While mesh screens can be customized with laser cutting, this process tends to be expensive. Perforated sheets, on the other hand, offer a cost-effective solution for filtration, airflow, and various other applications mentioned earlier, available in ready-to-use configurations.

Versatility in Fabrication

Perforated sheets can be easily tailored to bespoke shapes and sizes using tools like laser cutters, guillotines, and press brakes, just like regular sheet metal. For more details on these fabrication methods, refer to our comprehensive guide here.

Wide Range of Sizes for Every Need

Available in various thicknesses and materials, perforated sheets cater to both light-duty and heavy-duty applications. Whether used as painted architectural features or corrosion-resistant filtration systems, perforated sheets offer versatility. Hole sizes range from 0.063 inches to 2.0 inches, ensuring there's a suitable type for your specific requirements.

At Huijin Metal, we stock perforated sheets in mild steel and aluminum, offering a wide selection of thicknesses. Explore our full range of products to find the perfect solution for your project needs.
 

What Can I Do to Customize My Project?

 
Modern perforated sheet metal offers incredible versatility to meet diverse design requirements. If you're considering perforated sheet metal for your upcoming project, here are the customization options we provide:
 
  1. Raw Materials: Perforated sheet metal can be crafted from various materials such as aluminum, zinc alloys, steel (including galvanized and stainless steel), and copper. For outdoor applications requiring corrosion resistance, materials like zinc, galvanized steel, or aluminum are ideal. Copper and stainless steel are often chosen for their aesthetic appeal in indoor settings.
  2. Designs and Patterns: Our computer-controlled laser cutting system ensures precise cutting of intricate shapes and patterns, meeting the most demanding design specifications.
  3. Sheet Shapes: Sheet metal's flexibility allows for creating custom shapes like waves, curves, or scallops. We employ cutting-edge techniques such as cutting, welding, and bending to achieve your desired design.
  4. Finishing: The finishing process enhances the appearance and durability of perforated sheet metal. Options include powder coating, galvanizing, and anodizing, which not only add brightness, color, and texture but also improve resistance to wear and corrosion.
Read more…

Top 5 Expanded Metal Mesh Suppliers

Expanded metal mesh stands as a versatile solution, finding applications across industries ranging from architecture to industrial manufacturing. However, sourcing quality expanded metal mesh from reliable suppliers is paramount for ensuring durability, precision, and cost-effectiveness. In this article, we unveil the top five expanded metal mesh suppliers, providing a comprehensive guide to aid your procurement decisions.
 

What Is Expanded Metal Mesh?

 
Expanded metal mesh is a type of metal product that is produced by cutting and stretching a sheet of metal to form a regular pattern (often diamond-shaped) of mesh-like openings. The process does not involve any welding or joining, which makes the mesh stronger and more durable than other types of metal meshes.
 

Types of Expanded Metal Mesh

 
1.Standard (Raised) Expanded Metal

Has a raised surface and offers greater strength and rigidity.

2.Flattened Expanded Metal

Passed through a cold rolling mill to flatten the raised surface, resulting in a smoother, more even finish.

3.Micro Expanded Metal

Features smaller openings and is used in applications requiring fine filtration or aesthetic details.
 

What Is Expanded Metal Mesh Used For?

 
Expanded metal mesh is a versatile material that finds use in a wide range of applications across various industries due to its unique properties. Here are some of the common uses:
 
1. Construction and Architecture
  • Facade and Cladding: Provides aesthetic appeal and protection for buildings.
  • Walkways and Stair Treads: Offers durability and slip resistance.
  • Ceilings and Partitions: Used for both decorative and functional purposes.

2. Industrial Applications
  • Safety Guards: Protects machinery and equipment from debris while allowing visibility.
  • Fencing and Security: Creates barriers that are difficult to breach but still allow for visibility and airflow.
  • Ventilation Grilles: Allows airflow while keeping large particles out.

3. Transportation
  • Grills and Grates: Used in vehicles for ventilation and protection of components.
  • Railway Platforms: Provides a durable, slip-resistant surface.

4. Filtration
  • Air and Fluid Filters: Acts as a durable and permeable medium in various filtration systems.

5. Energy Sector
  • Oil and Gas: Used in platforms, walkways, and safety guards due to its durability and corrosion resistance.
  • Wind and Solar Energy: Protects and supports equipment and infrastructure.

6. Agriculture
  • Animal Cages and Enclosures: Provides strong, ventilated, and secure housing.
  • Grain Storage: Utilized in sieving and sorting applications.

7. Home and Garden
  • Shelving and Storage: Durable and allows for air circulation.
  • Outdoor Furniture: Used for its strength and aesthetic qualities.
  • Garden Fencing: Provides security and supports climbing plants.

8. Decorative Applications
  • Art and Sculpture: Utilized by artists for its unique texture and structural properties.
  • Interior Design: Employed in fixtures, screens, and other decorative elements.

9. Infrastructure
  • Road and Bridge Construction: Reinforces concrete and provides non-slip surfaces.
  • Drain Covers: Used in urban infrastructure to cover drains while allowing water flow.
 

List of 5 Expanded Metal Mesh Manufacturers


1.Huijinmaterials

 
Huijin Company is a trusted provider of high-quality expanded metal products. With extensive expertise and a commitment to excellence, they have become a leading supplier across various industries. Whether for architectural, industrial, filtration, or security applications, Huijin Company offers the perfect solution for your needs. They understand the diverse applications of expanded metal and manufacture a wide range of products, including flat expanded metals, standard expanded metals, expanded gratings, 3/4#9 expanded metal, galvanized expanded metals, steel expanded metals, and aluminum expanded metals. No matter your project specifications, size, pattern, or material, their comprehensive range of expanded metal products has you covered.
 

2.Expanded Metal Company

 
The Expanded Metal Company is a renowned specialist in expanded metal mesh solutions and was previously part of the Expamet group of companies. Operating from a 25,000+ sqm site in Hartlepool, North East England, the company is a leader and innovator in the development and manufacture of expanded metal mesh products. Their offerings range from construction materials to filters, grilles, walkways, and visually striking architectural meshes.

The company has also developed ExMesh™, a range of innovative fencing systems and security solutions designed to protect people, property, and infrastructure from a wide array of threats. More information about ExMesh™ products is available on their website.

With a high degree of technical expertise, The Expanded Metal Company’s highly skilled team supports contractors and end users at all stages of their projects. The company serves a wide range of industrial sectors, including construction, filtration, automotive, aerospace, architecture, agriculture, acoustics, manufacturing, engineering, and security. They pride themselves on building close, long-term relationships with their customers.
 

3.Niles Expanded Metals

 
Founded in 1959, Niles Expanded Metals specializes in the manufacturing of industrial expanded metals, walkway gratings, stair treads, and accessories. The company tailors its product lines and customer service to meet the specific needs of the steel service center and distribution industry.
Niles Expanded Metals stocks a comprehensive range of Aluminum, Carbon Steel, and Stainless Steel T-304 and T-316 products. They also manufacture expanded materials in plastics, brass, bronze, copper, nickel alloys, most stainless steels, titanium, and virtually any ductile material. Their products are available in both sheet and coil forms, ensuring versatility and availability for a wide range of applications.
 

4.AMICO Expanded Metal 

 
AMICO Expanded Metal services OEM accounts through its nationwide distribution network. Mill buyers are encouraged to contact AMICO directly for a customized stocking program.

AMICO stocks expanded metal sheets in various sizes and shapes, including catwalk grating, heavy-duty grating, and standard options, all available for immediate shipment. When specific finishes, welds, and sizes are required, AMICO's team provides the expertise and tools necessary to create customized solutions such as wall cladding, fences, and infill panels. Customers can rely on AMICO for quality manufacturing and tailored solutions to meet their unique needs.
 

5.Direct Metals

 
Direct Metals® Company, LLC is a leader in the industrial metal and fiberglass products industry, boasting one of the nation's largest inventories. They ensure the quick and reliable shipment of high-quality industrial metal and fiberglass products. As an architectural metal supplier, Direct Metals® maintains extensive inventories in warehouses located in Atlanta, GA, and Pleasant Prairie, WI, to serve customers throughout the United States. They also cater to international manufacturing plants with global shipping options.

Owned and operated by a select group of metal experts with over 100 years of combined experience in specialty metals and fiberglass products, Direct Metals® offers a wide selection of products, including:
 
  • Perforated Metal
  • Wire Mesh
  • Bar Grating
  • Expanded Metal
  • Safety Grating
  • Fiberglass Grating
  • Fabrication Services
 
In addition to their specialty metal inventory, Direct Metals® provides comprehensive processing capabilities, including shearing, sawing, punching, rolling, stamping, drilling, welding, slitting, and blanking, ensuring customized solutions for their clients' specific needs.
Read more…
When you bring a board to a PCB factory, Surface Mount Device (SMD) parts are typically assembled onto the board using reflow soldering. This efficient method is standard in electronics manufacturing, yet some companies have developed soldering products that downsize reflow soldering into small desktop-sized oven units.

Why should you consider investing in a desktop reflow oven? Sometimes, if you choose to prototype in-house, it's practical to conduct a basic reflow process on a batch of boards instead of outsourcing assembly to a vendor. This approach is preferable to manual soldering or air soldering by a technician, and ideally, you can obtain a small batch of ready-to-use PCBs after just a day's work.

Before embarking on the hunt for a desktop reflow oven, take note of these tips. And always bear in mind, similar to most electronic equipment, the quality often corresponds with the price you pay.
 
 
desktop reflow oven
 

Factors to Consider When Selecting a Desktop Reflow Oven

 
1. Size and Capacity

The first consideration when choosing a desktop reflow oven is its size and capacity. Determine the dimensions of your PCBs and the volume of production you anticipate. Look for an oven that can accommodate your largest PCBs while still fitting comfortably on your workbench or desk. Additionally, consider the number of boards you'll need to process at once to ensure the oven meets your production requirements.
 
2. Temperature Control and Uniformity

Temperature control and uniformity are critical factors that can affect soldering quality. Look for a desktop reflow oven with precise temperature control capabilities and uniform heat distribution across the entire heating chamber. This ensures consistent soldering results and minimizes the risk of overheating or underheating components.
 
3. Heating Technology

Desktop reflow ovens typically utilize one of two heating technologies: convection or infrared (IR). Convection ovens use hot air to heat the PCB evenly, while IR ovens use infrared radiation for rapid and efficient heating. Consider your specific soldering requirements and preferences when choosing between convection and IR heating technologies.
 
4. Ease of Use and Programming

Choose a desktop reflow oven that is user-friendly and easy to program. Look for intuitive controls, a clear display interface, and pre-programmed soldering profiles for common solder paste formulations. Additionally, consider whether the oven offers customizable programming options to accommodate unique soldering parameters and profiles.
 
5. Safety Features

Safety should always be a top priority when working with soldering equipment. Look for desktop reflow ovens with built-in safety features such as overheating protection, automatic shutdown, and thermal insulation to prevent accidents and ensure operator safety.
 
6. Reliability and Durability

Invest in a desktop reflow oven from a reputable manufacturer known for producing high-quality, reliable equipment. Choose a model with durable construction and components that can withstand frequent use and provide consistent performance over time.
 
7. Price and Value

Finally, consider the price and overall value of the desktop reflow oven. While it's essential to stay within your budget, remember that quality and performance are also important factors to consider. Compare prices, features, and customer reviews to find the best value for your money.
 

How Desktop Reflow Ovens Work?

 
All desktop reflow ovens share a common objective: to execute a reflow temperature profile for a small batch of boards. These units typically involve placing PCBs with assembled parts and solder paste into a drawer and initiating the reflow temperature profile using controls located on the unit's front panel. Once the reflow profile concludes, a batch of finished boards is ready for testing. However, it's important to note that these completed boards may require cleaning before use.

The features and capabilities of these systems can vary significantly, and naturally, this influences their cost. Considerations may include:
 
  • Memory for Multiple Reflow Profiles: Some units offer the ability to store multiple reflow profiles in memory.
  • Compatibility with Pb-Free Solder: Ensure compatibility with lead-free solder if required for your application.
  • Customization of Reflow Profile Steps: Look for the ability to customize the number and size of steps in the reflow profile.
  • Heating Method: Choose between forced air convection or static heating element.
  • Access to Configuration Software: Some units may come with software applications for configuration.
  • Integration with Custom Applications: Consider whether the device can be integrated into a custom application.
  • Manufacturer's Service and Warranties: Evaluate the availability of service or warranties from the manufacturer.
 
The quality of these systems also varies widely. Quality encompasses not only the construction of the oven itself but also the accuracy of the temperature profile and the consistency of temperature throughout the oven chamber. Ideally, temperature variation within the chamber should be minimal, and it should closely follow the reflow profile. This can be assessed through simple thermocouple probe measurements.
 

Vacuum Reflow Oven Supplier

 
While there are many options available for desktop reflow ovens, one brand that stands out for its advanced features and quality is Chengliankaida Technology Co., LTD. Established in 2007 and headquartered in Tongzhou district, Beijing, Chengliankaida specializes in vacuum reflow ovens, offering innovative solutions for PCB assembly.
 
Company Advantages:
 
Independent Research Software Control System: Their reflow ovens feature an independent research software control system, allowing for precise temperature control and optimization of the soldering process. Additionally, they can arrange the internet of things system to factory power module packages, helping establish customer MES systems for enhanced efficiency.

Expertise in Vacuum Chambers and Valves: Chengliankaida boasts expertise in designing and machining vacuum chambers and valves, ensuring optimal performance and reliability. With years of experience in material selection, production processes, and testing, they deliver superior quality products tailored to customer needs.

Technical Team with Rich Experience: Their technical team brings a wealth of experience in SMT to semiconductor microchip package processes. From product welding and material selection to temperature and vacuum settings, their team ensures precise control and consistent results.
 
By considering Chengliankaida brand for your desktop reflow oven needs, you can benefit from advanced features, reliable performance, and expert support for your PCB assembly projects.
To explore Chengliankaida 's full range of products and learn more about how they can elevate your electronics manufacturing process, visit their website today!
 
Click here to read the original article.
Read more…

Ultimate Guide to Cryogenic Storage Tanks

Cryogenic storage tanks play a crucial role in various industries, from healthcare to food preservation. This ultimate guide will help you understand what cryogenic storage tanks are, their benefits, and how to maintain them effectively.
 

What Is a Cryogenic Storage Tank?

 
cryogenic storage tank
 
A cryogenic storage tank is a specialized container designed to store extremely cold liquids and gases at very low temperatures, typically below -150°C (-238°F). These tanks are essential for preserving and transporting substances that need to be kept at cryogenic temperatures to remain in a liquid state, such as liquid nitrogen, oxygen, argon, and other industrial gases.
 
Key Features of Cryogenic Storage Tanks
 
1.Insulation

Cryogenic tanks are highly insulated to minimize heat transfer from the external environment. This insulation is crucial for maintaining the low temperatures required to keep the stored substances in their liquid form.

2.Materials

The materials used to construct cryogenic storage tanks must withstand extreme temperatures. Common materials include stainless steel and other alloys that can maintain structural integrity and prevent corrosion at cryogenic temperatures.

3.Pressure Control

Cryogenic tanks are equipped with pressure relief devices and control systems to manage the pressure build-up caused by the vaporization of the stored liquid. This ensures safety and prevents accidents.

4.Vacuum Jacket

Many cryogenic tanks feature a vacuum jacket, a space between two walls of the tank that is evacuated of air. This vacuum layer significantly reduces heat transfer and enhances insulation.
 

How Do Cryogenic Storage Tanks Work?

 
Cryogenic storage tanks are specialized containers designed to hold extremely cold substances, typically liquefied gases such as nitrogen, oxygen, helium, and argon. These tanks operate under principles that ensure the efficient storage and handling of these materials while maintaining their low temperatures. Here’s an in-depth look at how cryogenic storage tanks work:
 
1. Basic Principles of Cryogenic Storage

Cryogenic storage tanks are built to maintain temperatures below -150°C (-238°F). At these low temperatures, gases turn into liquids, significantly reducing their volume and making them easier to store and transport. The key principle behind cryogenic storage is minimizing heat transfer from the environment to keep the stored liquid at its boiling point or below.
 
2. Design and Materials

Cryogenic tanks are typically constructed with inner and outer layers. The inner tank, which directly holds the cryogenic liquid, is made from materials with excellent low-temperature properties, such as stainless steel or aluminum. The outer layer, often made from carbon steel, provides structural support and protection.
 
3. Insulation Systems

To prevent heat transfer, cryogenic tanks employ advanced insulation techniques. The most common method is using a vacuum jacket, where the space between the inner and outer tanks is evacuated to create a vacuum. This vacuum significantly reduces heat conduction and convection. Additionally, multilayer insulation (MLI), composed of reflective foils and spacers, is often added to further minimize radiative heat transfer.
 
4. Pressure Management

Cryogenic liquids naturally tend to evaporate as they absorb heat from their surroundings, leading to a buildup of pressure inside the tank. Cryogenic storage tanks are equipped with pressure relief valves to safely vent excess gas and maintain pressure within safe limits. Additionally, many tanks have pressure-building systems that vaporize a small amount of liquid to maintain desired pressure levels for consistent dispensing.
 
5. Temperature Control

Maintaining the correct temperature is crucial for cryogenic storage. Tanks are equipped with temperature sensors and monitoring systems to continuously track the internal temperature. Automated controls can adjust insulation or pressure relief mechanisms to maintain the desired low temperatures.
 
6. Loading and Unloading

Cryogenic tanks are designed with specialized fill and withdrawal systems to handle the transfer of liquefied gases. These systems often include vacuum-insulated transfer lines and valves that prevent excessive heat ingress during the loading and unloading processes. Safety protocols are crucial during these operations to prevent rapid vaporization and pressure spikes.
 
7. Safety Features

Due to the extreme cold and the potential hazards associated with cryogenic liquids, these storage tanks incorporate various safety features. These include rupture disks, emergency shutdown systems, and safety interlocks that prevent the accidental opening of valves. Regular maintenance and inspections are also essential to ensure the integrity and safety of the tanks.
 

What Are the Benefits of Cryogenic Storage Tank?

 
Cryogenic storage tanks offer numerous advantages in various industrial, medical, and scientific applications. Their ability to store and manage liquefied gases at extremely low temperatures brings several benefits, including efficiency, safety, and reliability. Here are the primary benefits of cryogenic storage tanks:
 
1. High Storage Efficiency

Cryogenic storage tanks enable the storage of gases in a liquefied state, which significantly reduces their volume. This high-density storage allows for the containment of large quantities of gas in relatively compact tanks, making them ideal for industries where space and storage capacity are critical.
 
2. Extended Shelf Life

Liquefied gases stored in cryogenic tanks can remain in their liquid state for extended periods without significant loss due to evaporation. The advanced insulation and temperature control systems of cryogenic tanks minimize heat transfer, ensuring that the stored substances remain at their required low temperatures.
 
3. Safety and Reliability

Cryogenic storage tanks are designed with numerous safety features to handle the extreme conditions associated with liquefied gases. These features include pressure relief valves, emergency shutdown systems, and robust structural materials that prevent leaks and ruptures. This ensures the safe storage and handling of potentially hazardous materials.
 
4. Versatility in Applications

Cryogenic storage tanks are used across a wide range of industries. In the medical field, they store liquid oxygen and nitrogen for various treatments and cryopreservation. In the industrial sector, they store and transport gases like argon, helium, and nitrogen for welding, electronics manufacturing, and other processes. Their versatility makes them indispensable in many fields.
 
5. Improved Transportability

The compact and robust design of cryogenic storage tanks allows for the easy transportation of liquefied gases over long distances. Specialized transport tanks, often equipped with similar insulation and pressure control systems, enable the safe and efficient delivery of these gases to remote locations.
 
6. Energy Efficiency

Storing gases in a liquefied state is more energy-efficient compared to compressing them into high-pressure gas cylinders. The energy required to liquefy gases is often lower than the energy needed to compress and maintain them in a gaseous state. This efficiency translates into cost savings and reduced environmental impact.
 
7. Consistency and Purity

Cryogenic storage tanks maintain the purity and consistency of the stored gases. The controlled environment within the tanks prevents contamination, ensuring that the gases meet the required quality standards for various applications. This is particularly important in industries like pharmaceuticals and electronics, where purity is crucial.
 
8. Enhanced Research and Development

In scientific research and development, cryogenic storage tanks provide the necessary conditions for experiments requiring ultra-low temperatures. They enable the study of materials and biological samples at cryogenic temperatures, advancing research in fields like physics, chemistry, and biology.
 
9. Cost-Effective Storage Solution

Although the initial investment in cryogenic storage tanks and infrastructure can be significant, the long-term cost savings are substantial. Reduced gas losses, lower energy consumption, and minimized maintenance costs contribute to the overall cost-effectiveness of cryogenic storage solutions.
 

Types of Cryogenic Tanks

 
There's a vast array of cryogenic tanks available, each meticulously tailored to the specific cryogenic liquid it's intended to contain and the environment in which it will be situated: considerations such as size, location, terrain, and more all come into play.
Consequently, the shape and design of cryogenic tanks will vary significantly based on the type of cryogenic liquid they're designed to store:
 
  • LIN (Liquid Nitrogen)
  • LOX (Liquid Oxygen)
  • LAR (Liquid Argon)
  • CO2 (Carbon Dioxide)
  • LNG (Liquefied Natural Gas)
  • LHe (Liquid Helium)
  • LH2 (Liquid Hydrogen)
  • LPG (Liquefied Petroleum Gas)
  • Liquid Ethylene
 
Each type of tank will exhibit distinct characteristics tailored to the unique properties and storage requirements of the corresponding cryogenic liquid.
 

Customization for Cryogenic Storage Tanks

 
Should you require customization, we're fully equipped to accommodate your needs. Get in touch with us to explore the incorporation of any of the following options into a standard CH tank, tailored to suit your requirements for the perfect:
  
Furthermore, we offer manufacturing services for both large- and small-scale production runs. Contact us to discuss your specific needs and customization options.
 
Click hereto read the original article.
 
 
Read more…
When it's time to brighten up your office environment, prioritize top-notch LED panel lights for optimal and efficient illumination. These versatile fixtures come with a plethora of advantages, including energy efficiency, extended lifespan, and superior lighting quality.

In this extensive guide, we'll delve into the essential factors and considerations you should bear in mind while searching for the finest LED panel lights. From evaluating your unique lighting needs and familiarizing yourself with various sizes and types of LED panel lights to assessing factors like brightness, color temperature, and installation alternatives, this article aims to assist you in choosing the ideal LED panel lights tailored to your requirements.
 
led flat panel lighting
 

Which Panel Light Is Best?

 
Choosing the best panel light depends on your specific needs and preferences. There are several factors to consider:
 
  • Brightness: Look for a panel light with sufficient brightness for your intended use. Consider the lumens output, which indicates how bright the light is.
  • Color Temperature: Decide whether you need a warm (yellowish) or cool (bluish) light. Some panel lights offer adjustable color temperature to suit different environments.
  • CRI (Color Rendering Index): A high CRI ensures that colors appear accurately under the light. Look for a CRI of 80 or above for good color rendition.
  • Energy Efficiency: Choose LED panel lights, as they are more energy-efficient compared to traditional lighting options.
  • Durability: Consider the build quality and materials used. Opt for panel lights with sturdy construction for longevity.
  • Dimming Options: If you need versatility in lighting intensity, choose a panel light with dimming capabilities.
  • Size and Design: Consider the size of the space where you'll install the panel light and choose a size and design that fits well aesthetically.
  • Brand Reputation and Reviews: Research reputable brands and read customer reviews to gauge the performance and reliability of the panel light.
 
When selecting a top-tier LED panel light, explore choices from reputable suppliers such as Allway Lighting. They provide a variety of designs equipped with adjustable color temperature, dimming capabilities, and integrated emergency backup systems.
 

What to Look for When Choosing LED Panel Lights

 
When it comes to illuminating your home or workspace, you're presented with a myriad of choices. However, to optimize your environment, it's essential to pinpoint the finest LED panel lights that suit your unique needs. Here are some essential factors to contemplate when evaluating your lighting necessities:
 
Room Functionality

The function of the room plays a pivotal role in selecting the optimal LED panel lights. For instance, a classroom demands bright, clear lighting conducive to study, while a teacher's lounge might benefit from softer, dimmable options to foster a relaxed atmosphere for faculty relaxation between classes.

Desired Illumination Levels

The brightness of an LED panel light is quantified in lumens. To gauge the required brightness, reference the recommended lumens per square foot for various spaces. For instance, an open office layout necessitates higher lumens per square foot compared to a conference room.

Room Size and Layout

The size of your room significantly impacts the lighting requirements. Larger spaces may necessitate multiple LED panels, whereas smaller areas could suffice with one or two strategically positioned lights. Consider ceiling height as well, as taller ceilings may require more potent lighting solutions.

Installation Approach

Contemplate the preferred installation method for your LED panel lights. The three primary installation methods include mounting into a drop ceiling, affixing onto a solid surface, or suspending via steel cables. Ensure you comprehend the installation prerequisites and any associated costs prior to procurement.
 

Types of LED Panel Lights

 
LED panel lights come in various types, each suited to different applications and preferences:
 
  1. Recessed LED Panel Lights: These lights are designed to be installed into ceilings, offering a sleek and modern look. They are commonly used in offices, commercial spaces, and residential settings.
  2. Surface Mounted LED Panel Lights: Surface mounted panels are attached directly to the surface of the ceiling. They are ideal for spaces with shallow ceiling voids or where recessed installation is not possible.
  3. Edge-lit LED Panel Lights: In edge-lit panels, the LEDs are positioned around the edges of the panel, and light is directed towards the center. This design provides even illumination and a slim profile.
  4. Back-lit LED Panel Lights: Back-lit panels have LEDs positioned at the back of the panel, illuminating a diffuser or light guide plate. They offer uniform lighting with reduced glare and are suitable for various environments.
  5. Adjustable Color Temperature LED Panel Lights: These panels allow users to adjust the color temperature of the light output, providing flexibility to create different atmospheres. They are popular in settings such as offices, retail spaces, and homes.
  6. RGB LED Panel Lights: RGB panels can produce a wide range of colors by combining red, green, and blue LEDs. They are often used for decorative lighting in entertainment venues, restaurants, and residential settings.
  7. Emergency LED Panel Lights: Some LED panels come with integrated emergency backup systems, providing illumination during power outages or emergencies. They are commonly used in commercial and institutional buildings.
  8. Slim LED Panel Lights: Slim panels have a low-profile design, making them suitable for installations where space is limited. They are often used in residential settings, hallways, and corridors.
 

Benefits and Features of LED Panel Lights

 
LED panel lights have risen to prominence as the premier lighting choice for offices, retail shops, and other commercial spaces due to several compelling reasons. Here are some key benefits you can expect from LED panel lights:
 
  1. Energy Efficiency: One of the most notable advantages of LED panel lights is their energy efficiency. Compared to traditional fluorescent or incandescent options, LEDs consume significantly less electricity, making them both environmentally friendly and cost-effective.
  2. Longevity: LED panel lights are renowned for their long lifespan, often lasting up to 50,000 hours or more. This extended durability reduces the frequency of lamp replacements, saving both time and money in the long term.
  3. Uniform Light Distribution: The design of LED panel lights enables uniform light distribution across the entire panel. This ensures there are no dark spots or uneven lighting, particularly beneficial in professional environments such as offices and classrooms.
  4. Versatility in Design: The slim and sleek design of LED panel lights offers remarkable versatility. They can be mounted in various ways — recessed, surface-mounted, or even suspended — providing a range of aesthetic options to suit diverse spaces.
  5. Eco-Friendly: LED panel lights are free of toxic materials like mercury, making them more environmentally friendly than traditional lighting options. Additionally, they are fully recyclable, further reducing their environmental impact.
  6. Low Heat Emission: Unlike older lighting technologies that emit substantial heat, LED panel lights remain cool to the touch. This reduces the need for additional air conditioning, contributing to overall energy savings.
 

The Best LED Panel Lights Are Available at Allway Lighting

 
LED panel lights deliver unparalleled energy efficiency, cutting-edge features, and outstanding durability, fulfilling all your lighting requirements. With a range of versatile design options and special features including integrated emergency backup systems, we offer comprehensive solutions that seamlessly integrate functionality with aesthetics. Embark on transforming your lighting experience today by reaching out to us.

Allway Lighting specializes in solid state lighting solutions customized for residential and commercial environments, serving individual homeowners, contractors, businesses, municipal clients, and wholesale distributors alike.
 
Click here to read the original article.
Read more…