Lower back pain has become one of the most common occupational health complaints in modern office environments. With remote work, long screen hours, and increasingly sedentary routines, more people are actively searching for top-rated office chairs for lower back pain relief rather than simply “comfortable chairs.” What users truly want is not marketing language, but evidence-based guidance—how chairs actually affect spinal health, what ergonomic features matter, and how to choose seating that supports long-term wellbeing across different workspace scenarios.
Section 1: Why Lower Back Pain Is So Common in Office Work
The Biomechanics Behind Office Related Lower Back Pain
Lower back pain in office settings is rarely caused by a single factor. Instead, it results from a combination of static sitting, inadequate lumbar support, and poor pelvic positioning over extended periods. When sitting, the lumbar spine is subjected to higher disc pressure than when standing or walking. If a chair fails to support the spine's natural inward curve, the pelvis rotates backward, flattening lumbar lordosis and increasing stress on spinal discs and surrounding muscles.
Over time, this leads to muscle fatigue, reduced blood circulation, and micro-strain that accumulates into chronic discomfort or pain. This explains why many users report that back pain worsens not immediately, but after several hours of seated work.
What Users Actually Search for When Researching Back-Pain Chairs?
Analysis of top search results and user discussions reveals that people researching modern conference room chairs for lower back pain focus on functional performance, not aesthetics. The most common user concerns include:
Whether lumbar support is adjustable rather than fixed
If the chair supports long hours without forcing a rigid posture
Breathability and heat control during extended sitting
Durability and adaptability for different body types
Suitability for both individual desks and shared office environments
This explains why ergonomic task chairs dominate “top-rated” lists, while purely padded or design-focused chairs often receive mixed reviews when evaluated for pain relief.
Section 2: Core Ergonomic Features That Reduce Lower Back Strain
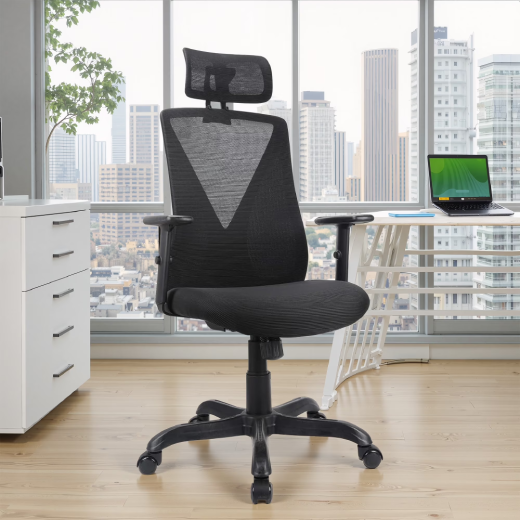
Adjustable Lumbar Support: The Non-Negotiable Element
Lumbar support is not simply a cushion placed behind the back. Its real function is to maintain neutral spinal alignment by supporting the lumbar curve at the correct height and depth. Chairs with adjustable lumbar mechanisms allow users to fine-tune this support based on torso length and sitting posture.
Fixed lumbar pads may feel comfortable initially, but often fail to accommodate different users or posture changes throughout the day. This is why adjustable lumbar systems are consistently associated with better long-term comfort and reduced back fatigue.
Dynamic Sitting and Micro Movement
Another key insight from ergonomic research is that movement matters more than stillness. Chairs that allow controlled reclining, seat tilt, and responsive backrests encourage micro-movements that reduce static muscle loading. This concept—often referred to as dynamic sitting—helps prevent stiffness and supports spinal health over long durations.
High quality ergonomic chairs integrate these features subtly, allowing posture variation without compromising lumbar support.
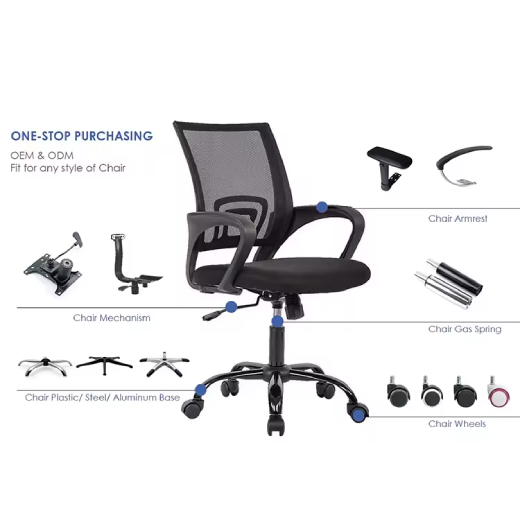
Mesh Backrests vs. Traditional Upholstery
Mesh back office chairs have gained popularity for legitimate ergonomic reasons. A well-designed mesh back adapts to the user's shape, distributes pressure evenly, and improves airflow—reducing heat buildup that often leads to posture shifting and discomfort.
However, mesh alone does not guarantee back pain relief. Without proper lumbar structure and adjustability, even mesh chairs can fall short. This is why full-mesh ergonomic designs, when combined with adjustable lumbar support and seat mechanics, tend to perform best for long workdays.
The ergonomic full mesh back office chair category, represented by manufacturers like FSGROWING, reflects this integrated approach: material choice supports ergonomics, but does not replace it.
Section 3: Choosing the Right Office Chair Based on Real Use Scenarios
Individual Fit Matters More Than Brand or Price
One of the strongest patterns across user reviews is dissatisfaction with chairs that are “highly rated” but poorly matched to the individual. Ergonomics is inherently personal. Factors such as height, weight, desk setup, and daily sitting duration all influence whether a chair will actually relieve lower back pain.
For this reason, adjustability range is often more important than brand recognition. Chairs that accommodate a wide spectrum of users tend to perform better in both home offices and shared corporate environments.
“Office Chairs Near Me”: Why Physical Testing Still Matters
Despite the convenience of online research, many users still search for office chairs near me—and for good reason. Sitting in a chair reveals details that specifications cannot: lumbar pressure feel, seat edge comfort, recline resistance, and armrest interaction with desk height.
For organizations purchasing chairs in volume, pilot testing a small batch before committing to bulk orders helps avoid mismatches that can lead to discomfort, complaints, or replacements.
Bulk Office Chairs vs. Individual Task Chairs
When sourcing bulk office chairs, decision-makers face a different challenge than individual buyers. The goal is not perfect fit for one person, but acceptable ergonomic support for many. In these cases, chairs with:
Broad adjustment ranges
Intuitive controls
Durable materials
Neutral, modern aesthetics
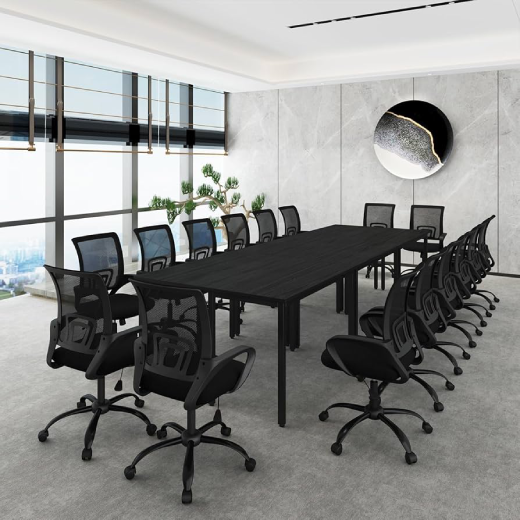
Manufacturers like FSGROWING design chairs with this balance in mind—supporting ergonomic performance while maintaining visual consistency for professional workspaces.
Conference Room Chairs and Back Support Expectations
Unlike task chairs, conference room chairs are usually designed for shorter sitting durations. However, as meetings become longer and more frequent, expectations around comfort have increased. Modern conference room chairs increasingly incorporate ergonomic cues such as contoured backrests, flexible frames, and breathable materials.
That said, they are not replacements for full ergonomic task chairs. Understanding this distinction helps businesses allocate seating budgets more effectively.
Section 4: Common Pitfalls, Practical Advice, and FAQ
Why Some “Ergonomic” Chairs Fail to Relieve Pain
A frequent user complaint is that a chair labeled “ergonomic” does not actually improve back comfort. The most common reasons include:
Lumbar support that is fixed or poorly positioned
Limited adjustability despite ergonomic claims
Incorrect chair setup after purchase
Over reliance on cushioning instead of structural support
Even a well designed chair can underperform if not properly adjusted to the user's body and workstation.
Practical Tips for Maximizing Chair Effectiveness
Adjust lumbar support first before changing seat height or recline
Ensure feet rest flat on the floor to stabilize pelvic position
Combine chair ergonomics with proper desk and monitor height
Take regular posture breaks—no chair replaces movement
Frequently Asked Questions (FAQ)
Q1: What defines a top-rated office chair for lower back pain relief?
A top-rated chair combines adjustable lumbar support, proper seat depth, dynamic movement features, and durable construction. User satisfaction is closely tied to how well the chair adapts to individual anatomy rather than how it looks.
Q2: Are mesh office chairs better for lower back pain?
Mesh chairs can be highly effective when designed with proper lumbar structure and adjustability. Breathability and adaptive support are advantages, but ergonomics—not material alone—determine pain relief.
Q3: Should I search for office chairs near me instead of buying online?
If possible, yes. Physical testing helps confirm whether lumbar positioning and seat comfort align with your body. Online research narrows options, but real-world sitting validates the choice.
Q4: Are expensive office chairs always better for back pain?
Not necessarily. Many mid-range ergonomic chairs provide the core features required for lower back support. Fit, adjustability, and setup quality matter more than price.
Q5: Can an ergonomic chair completely eliminate lower back pain?
No chair can eliminate pain on its own. Ergonomic seating reduces strain, but posture changes, movement, and proper workstation setup remain essential.